Category: Travel Tips

  • What’s The Fastest Way To Learn A Language? 7 Day Plan

    What’s The Fastest Way To Learn A Language? 7 Day Plan

    Hey. 你好. Qué pasa? Nzuri? Bon.

    Over the past few years I’ve seen the dividends of all my language study from my twenties. Often on the road I get the chance to chatter in a foreign language, which often leads to people asking me, “Bren you speak Spanish too? How many languages do you speak?”

    The truth is I speak far fewer than I would like, and nowhere near as well as I would like. But even my scruffy résumé has served me really well on my travels. Just a few words in another language has opened doors to some incredible experiences.

    Language has fascinated me ever since I started travelling – that we all say the same things in such different ways. This led to me spending much time and money during my travels to learn language and reduce my dependency on English. Funnily I always thought language was fun for everyone – like video games and eating ice cream. It didn’t occur to me that many people actually don’t like learning language. Which explains why so many never do.

    What’s the fastest way to learn a language? It’s not complicated. Their a certain things that are better to learn before others, certain words you should learn and certain ones you shouldn’t bother learning at all. If you focus on the right areas, you can find yourself speaking rather quickly.

    Language doesn’t need to be a mammoth task, and it doesn’t require months and months of studying to be able to say a few basic things. In this guide I’ll take you through a few tips and hacks that will have you holding your own in just a few days. Once you experience that and have your first conversation in another language, however broken it might be, I promise, travelling will never be the same again.

    Why learn the local language

    For me it’s mostly about respect. The world is a big place and England is only one country in the top left corner. Not everyone in the world speaks English or even cares to try. Yet every day I see travellers confused and frustrated that locals in other countries don’t understand English.

    Would it not be weird if someone walked into your coffee shop and said “一杯咖啡和一碗沙拉“, and then got angry when you couldn’t understand them? Yet we English speakers seem to do that all the time.

    It goes both ways. If you respect the locals by trying to communicate in their own language, they will respect you back for the gesture. You will make more friends, have more interesting conversations, be welcomed into more communities, and be given more opportunities to experience local life.

    Even if you only learn to say “nice to meet you” and “thank you”, you will be surprised how far that will take you.

    What’s the fastest way to learn a language?

    Here is my basic breakdown, divided into difficulty:

    Level 1:

    • Greetings
    • Numbers (1-100)
    • Basic nouns
    • Basic verbs

    Level 2:

    • Numbers (100+)
    • Basic adjectives
    • Basic adverbs
    • Verbs in the present tense
    • Basic sentence structure (Noun + verb. e.g. “eat apples”)

    Level 3:

    • Verbs in past and future
    • Fuller sentence structure (.e.g. “John likes to eat red apples”)

    Level 4:

    • Everything else

    If you are trying to learn the bare minimum before a trip, I recommend sticking with Level 1.

    This will give you the best chance of communicating without learning anything complex, and sticking to those subjects is definitely the fastest way to learn a language if you just need very basic communication.

    Level 1 only requires memory and no real understanding of the language structure, but will still give you the tools to say many everyday things. That’s perfect! And you can do it in a couple of days.

    Level 2 will take you longer but is not difficult. Level 3 and above is where a little more “study time” is required.

    A 7 day plan:

    Let’s say it’s a week before your trip. Obviously I’m not going to teach you to become fluent in a new language in 7 days. That’s impossible. There are people who’ve spoken English their entire life and are still horrible at it.

    But if we learn smart we can definitely learn to say a lot in a new language in that short time.

    Here are a few interesting things to consider:

    • Even if you speak a new language broken, almost everyone will still understand you. For example, in a restaurant, you don’t need to say “May I please have a bowl of fruit?” You could just say, “Please, bowl, fruit” with a big smile, and you’ll get exactly what you want. I’m not saying you should aspire to speak broken, I’m saying you don’t need to be perfect to start.
    • If you like chicken, you’ll probably say that word quite often. And if you don’t like shrimp, you probably won’t say that word at all. So you need to personalise your learning, rather than just learning generic lists. This cuts your learning time exponentially.
    • Most words you learn in a typical language course are useless. For example you might learn the word “elephant”. How often do you say the word elephant? Maybe once or twice a month. Whereas you say the words “eat” and “toilet” probably every day, and the words “why” and “because” every second sentence. So in reality you only need to learn a few words, much less than you would expect. Just 100 words will get you much farther than you would imagine!

    What I’m getting at is learning a language should be highly personalised, like going to the gym. A grandfather who is 100kg overweight and a 14 year old girl will have totally different training plans. It is the same with language. You can improve your progress exponentially this way.

    Consider this as an example; my Swahili is slightly better than my Chinese. Why is this strange? Because I spent an entire year studying Chinese full time at a university in Shanghai, with professional teachers, exams, textbooks, countless hours of study, homework, class every day. With Swahili, I’ve only done around 50 hours of self-study while in Tanzania. How does 50 hours of self-study get better results than an entire year in a top university?

    The answer; learn smarter. In my Chinese course we had to learn long lists of completely useless words, like mainframe and parliament. Not only that, I had to learn to write and read them in Chinese characters. That led to hundreds, maybe thousands, of hours spent learning words I might use once or twice a year. Imagine how silly it was that I could write the Chinese character for embassy, yet couldn’t order a simple cocktail at the bar.

    When I started learning Swahili I wanted to be smarter. Because I didn’t have exams or teachers, I got to decide all my own material. I used my experience of studying Spanish and Chinese to help me strip the language down to the bare essentials, and create the most efficient language course, designed specifically for me. Not only did I learn faster and better, it was a lot more fun as well. Once I was able to converse about basic things, my vocabulary and understanding rocketed quickly just from everyday conversation.

    The plan below will introduce you to this approach; how to get to a basic conversational level in a new language in just 7 days. I’m going to go through the steps using two languages; first, Spanish, as it’s a language familiar to many. But I’m also going to do this demonstration in Italian.

    Why Italian? Because I’ve never learned a word of Italian in my life, I have no Italian friends and I’ve never even been to Italy. By laying out the steps to learn Italian in 7 days, this will be a perfect simulation of starting a language from absolute zero.

    Note: This also that means some of my Italian below might (definitely) be wrong, so any Italians reading please chill. You can feel free to correct me in the comments too 🙂


    Day 1: Numbers

    Numbers are important because you use them for almost every activity (room numbers, bus fare, shopping, table for four, etc). Also it’s a nice, easy thing to start with when learning a new language.

    We learn 1-10 to begin with. Anybody can do that in any language.

    For most languages, 1-10 takes you a long way. For example, in Chinese if you can count to ten you can count to 99. And if you learn three more words (“hundred”, “thousand”, and “ten thousand”) you can count to a million.

    If you’re learning French however, counting to 100 is like an epic academic quest for enlightenment.

    So it all depends on the language. But we’re just worried about 1-10 for now.

    So the first thing you will learn is:

    English Spanish Italian
    One Uno Uno
    Two Dos Due
    Three Tres Tre
    Four Cuatro Quattro
    Five Cinco Cinque
    Six Seis Sei
    Seven Siete Sette
    Eight Ocho Otto
    Nine Nueve Nove
    Ten Diez Dieci

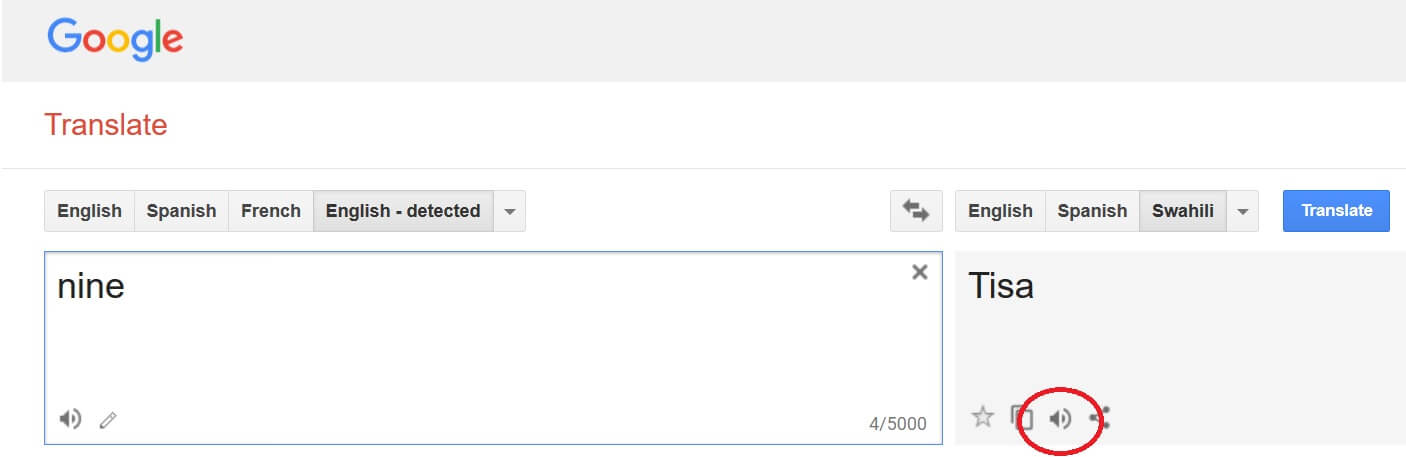
    If you don’t know how to pronounce a word, Google Translate has an audio option, too:
    Counting to ten is a cool first thing to learn because you can kind of sing it to yourself over and over, in the shower, in the car, wherever you want. It’s like your new ABC’s. It sticks with you too – I can do it in maybe ten to fifteen different languages now, just from memory.

    In reality you should be able to learn to count to ten in any language within 15-20 minutes. A nice surprise for me here was that Italian numbers are so similar to Spanish, which I did not know before! That made it an easy start.

    Leave it there for Day 1.


    Day 2: Greetings and basic words

    Greetings are probably the thing you will use the most so it’s good to learn the most common ones.

    Whenever you walk into a restaurant, greeting your waiters at breakfast, the receptionist, even taxi drivers and strangers on the street. Also for Day 2 it’s a good idea to throw in some basic words that you will use all the time (please, thank you etc).

    Here is a list of starting suggestions. I’d also encourage you to add your own!

    English Spanish Italian
    Hello Hola Ciao
    How are you? Como estas? Come va?
    I’m fine Bien Bene
    Good morning Buenos dias Buon giorno
    Good night Buenas noches Buonanotte
         
    Please Por favor Per Favore
    Thank you Gracias Grazie
         
    Yes Si
    No No No
    Excuse me Disculpe Scusami
    Sorry Lo siento Scusa
    Why? Por que? Perché
    What? Que? Che cosa?
    Who? Quien? Chi?
    Which? Cual? Quale?
    Where? Donde? Dove?

    You may also be wondering where and how you find out all the translations for these lists. I’m just using Google Translate, but Google will give you all kinds of free online dictionaries etc. The resources online are endless – it shouldn’t be difficult.

    I made a similar wordlist for Swahili recently and just asked a Tanzanian friend to sit down with me and translate everything – took maybe half an hour, so that’s another way to do it.


    Day 3: Basic verbs

    To populate this list, think of the verbs that you do every day. Don’t include verbs like “paint” and “sail” because you probably don’t do those things every day (unless you’re a painter or sailor).

    Remember, we’re trying to narrow things down to the most usable words. Limit your list to 20. Here’s a good starting list:

    English Spanish Italian
    To eat comer mangiare
    To drink beber bere
    To sleep dormir dormire
    To wake despertarse svegliarsi
    To walk caminar camminare
    To run correr correre
    To wait esperar aspettare
    To cook cocinar cucinare
    To buy comprar comprare
    To go ir andare
    To come venir venire
    To see ver vedere
    To want querer volere

    Bonus points: After you learn this list of verbs, you would get a lot more mileage out of them by learning how to conjugate. That just means instead of learning the verb in infinitive form (to eat) you could also learn how to say “I eat”, “You eat” etc.

    For example in Spanish, the verb to eat is like so:

    to eat comer
    I eat como
    you eat comes

    And a quick Google tells me that in Italian it is:

    to eat mangiare
    I eat mangio
    you eat mangi

    I just Googled this blog post to figure that out.

    If this all sounds like gibberish to you then don’t worry, just learn the verbs as they are and speak broken to begin with. People will understand you. Also many of you would have studied conjugated languages in high school and already know how this works, so go ahead and spend a bit of time learning the basic forms (I, you, they). Of course this doesn’t apply to all languages.


    Day 4: Basic nouns

    Now it’s time to learn the objects we use every day. Food we eat, items we use, that kind of stuff. Here’s a good list to start:

    English Spanish Italian
    Food la comida il cibo
    Drink la bebida la bevanda
    Room la habitación la stanza
    Car el coche l’auto
    Restaurant el restaurante il ristorante
    Bus el autobús il bus
    Coffee el café il caffè
    Tea el il tè
    Juice el jugo il succo
    Beer la cerveza la birra
    Supermarket el supermercado il supermercato
    Brother el hermano il fratello
    Sister la hermana la sorella
    Taxi el taxi il taxi

    This list is the most open to customising. It’s important to learn things common in your life that may come up in conversation. For example if your favourite sports are boxing and surfing, add those words in. Learn how to say the name of your home country. If your favourite food is chicken and chips, add those too. If you’re a lawyer or engineer, add those, and so on.

    Likewise you need to account for where you’re travelling to. If you’re going somewhere to surf, learn the words for ocean, beach, surfboard. If you’re going hiking, learn the words for boots, mountain etc.

    This is what effective language learning is about. Instead of memorising any old word list, create your own. If you’re not a pilot and none of your family or friends are pilots, don’t learn the word for pilot! Minimise your workload.

    For this list I’d set a word limit of about 25-30 words. At this point would be a good time to go back and start revising all your words from Day 1-3. You can forget them quite quickly.


    Day 5: Common words

    This list is all about words that come up in general day-to-day conversation. Did you know just 100 words in the English language make up 50% of all written material? There are maybe 250,000 words in the dictionary, but a small collection of 100 words make up 50% of your average book.

    Unfortunately that doesn’t help us with our cause much; most of them are words like “be” and “the” and “that”, and obviously going around saying “be that the” in another language won’t do much for us. But the concept is a good one to follow. What are the keywords we most commonly use in general conversation?

    English Spanish Italian
    Up arriba su
    Down abajo g
    Left izquierda sinistra
    Right derecha destra
    Near junto vicino
    Far lejos lontano
    Man hombre uomo
    Woman mujer donna
    Fast rápido veloce
    Slow despacio lento
    Here aquí qui
    There ahí
    This esto questo
    That eso quella
    Some alguno alcuni
    All todo tutti
    None ninguno nessuna
    Inside dentro dentro
    Outside fuera fuori
    Hungry hambre affamato
    Thirsty sed assetato
    Sometimes a veces a volte
    Always siempre sempre

    This list is super important because many of these words will come up in day to day interactions. Asking for directions, asking questions, explaining things to people, pointing to things on a menu. You’ll be surprised how often you use the word “sometimes” or “there”. No matter which level of language you get to these words will always be useful – learn this list well!


    Day 6: Basic phrases and replies

    The interesting thing about languages is they are routine in many ways. For example, if someone asks “How are you?”, 90% of the time the reply will be “I’m good” or “I’m fine” (except in Australia, where they’ll say Yeeah yeah bloody good mate just watching the footy yew!)

    Likewise in Swahili if you say “Mambo” to 100 people, 99 of them will reply “Poa”.

    One thing new language speakers do is learn a bunch of words and phrases like “What’s the time?” and “How much is it?” but never prepare themselves for the answer! If you are anticipating an answer you will have a much higher chance of understanding it, even if they say it fast or mumble it. You will also be able to put together an answer if the same phrase is said to you.

    Here are a few good examples to start with:

    English Spanish Italian
    How much is it? Cuanto cuesta? Quanto costa?
    It’s twenty pesos/shillings Veinte pesos Venti euro
    What is your name? Cual es tu nombre? Come ti chiami?
    My name is Batman Mi nombre es Batman Mi chiamo Batman
    How old are you? Cuantos anos tienes? Quanti anni hai?
    I am 20 years old Tengo veinte anos Ho vent’anni
    Where are you going? A dónde vas? Dove vai?
    I’m going to… Estoy llendo a…. Andrò a…
    What are you doing? Q haces? Cosa fai?
    I am…(eating) Estoy (comiendo) Sto (mangiando)
    Where is…(the dog)? Dónde esta…(el perro?) Dov’è… (il cane)?
    It is…(inside the house) Esta… (en casa) È (in casa)
    Do you like it? Te gusta? Ti piace?
    Yes, I like it Si, me gusta Sì, mi piace
    How is it? Cómo es? Come è?
    Good Bueno Buono
    What’s the time? Qué hora es? Che ora è?
    It’s 2 o clock Son las dos Sono le due
    Who is he/she? Quien es el? Chi è lui?
    She is (my sister) Ella es (mi hermana) Lei è (mia sorella)
    I would like… Quisiera…(por favor) Vorrei…(per favore)

    Day 7: Practice!

    And that’s it.

    If you learn everything above, you would have actually learned a few hundred words, will be able to say many basic day-to-day words and phrases, and will probably understand quite a few things said to you.

    Take notes, write down the parts that you struggle with, revise revise revise.

    Remember language is largely a practice and usage skill, meaning the more you use it the better you will get. Your knowledge also compounds, so while it may seem highly difficult at the start it will get much easier as you learn more words and phrases.

    We’re also skimming the fat on a lot of work that goes into language. Most language schools try to educate you on all four skills (reading, writing, listening, speaking), and we’re instead focusing 90% on speaking. That’s going to decrease your learning time a lot without much downside at all (unless you plan on reading the newspaper every day or writing an essay).

    Also remember, the above lists are just examples. Remove or add words/phrases to make the lists most usable for you, so they represent the things you most use/say in your everyday life. These lists are not complete – they are there for you to build on.

    How much time will you need? The above shouldn’t take you more than 1-2 hours per day. I translated all the lists above into Italian in less than 30 minutes. It helped that it was so similar to Spanish and French (I didn’t expect that) but most romanised languages you should be able to do in similar time. Non-romanised languages like Thai or Chinese will take longer but not painfully so.

    After that it’s just about putting in time. Keep it in a doc on your phone or if you’re old school like me write it on a notepad. Everything above will fit on one page. You can read it on the train or while you’re lying in bed at night. Remember there’s no super IQ needed here – it’s mostly just memorisation so anybody can do it.

    The last and most important tip of all is: Speak! As soon you touch down in the country, use it every opportunity you can. Learning everything is useless if you never use it. Don’t be afraid to make mistakes (nobody is expecting you to be perfect), make it fun and use a few more of your words each day. I’ll admit it’s intimidating at the start, but after a few days you won’t be able to shut up.

    Just a handful of hours and I promise you, your next trip will be a completely different experience.

    Good luck!

    Bren

  • Ten Cool Travel Websites You Probably Haven’t Heard About, Ed. 2

    Ten Cool Travel Websites You Probably Haven’t Heard About, Ed. 2

    One thing you’ll notice if you’re on the road a lot is the scene changes and develops very quickly. Sometimes you’re telling a fellow traveller how you “Wish there was a way to do so-and-so” and a month later there’s a site to do exactly that.

    Every year I try out as many of these sites as possible, sometimes for research, sometimes just out of simple curiosity. A lot of newcomers make it onto my bookmarks list and this past year has been no exception. Below I’ve listed ten of the more interesting ones. Enjoy!

    Missed the last roundup? Check it out here.


    1. Kiwi

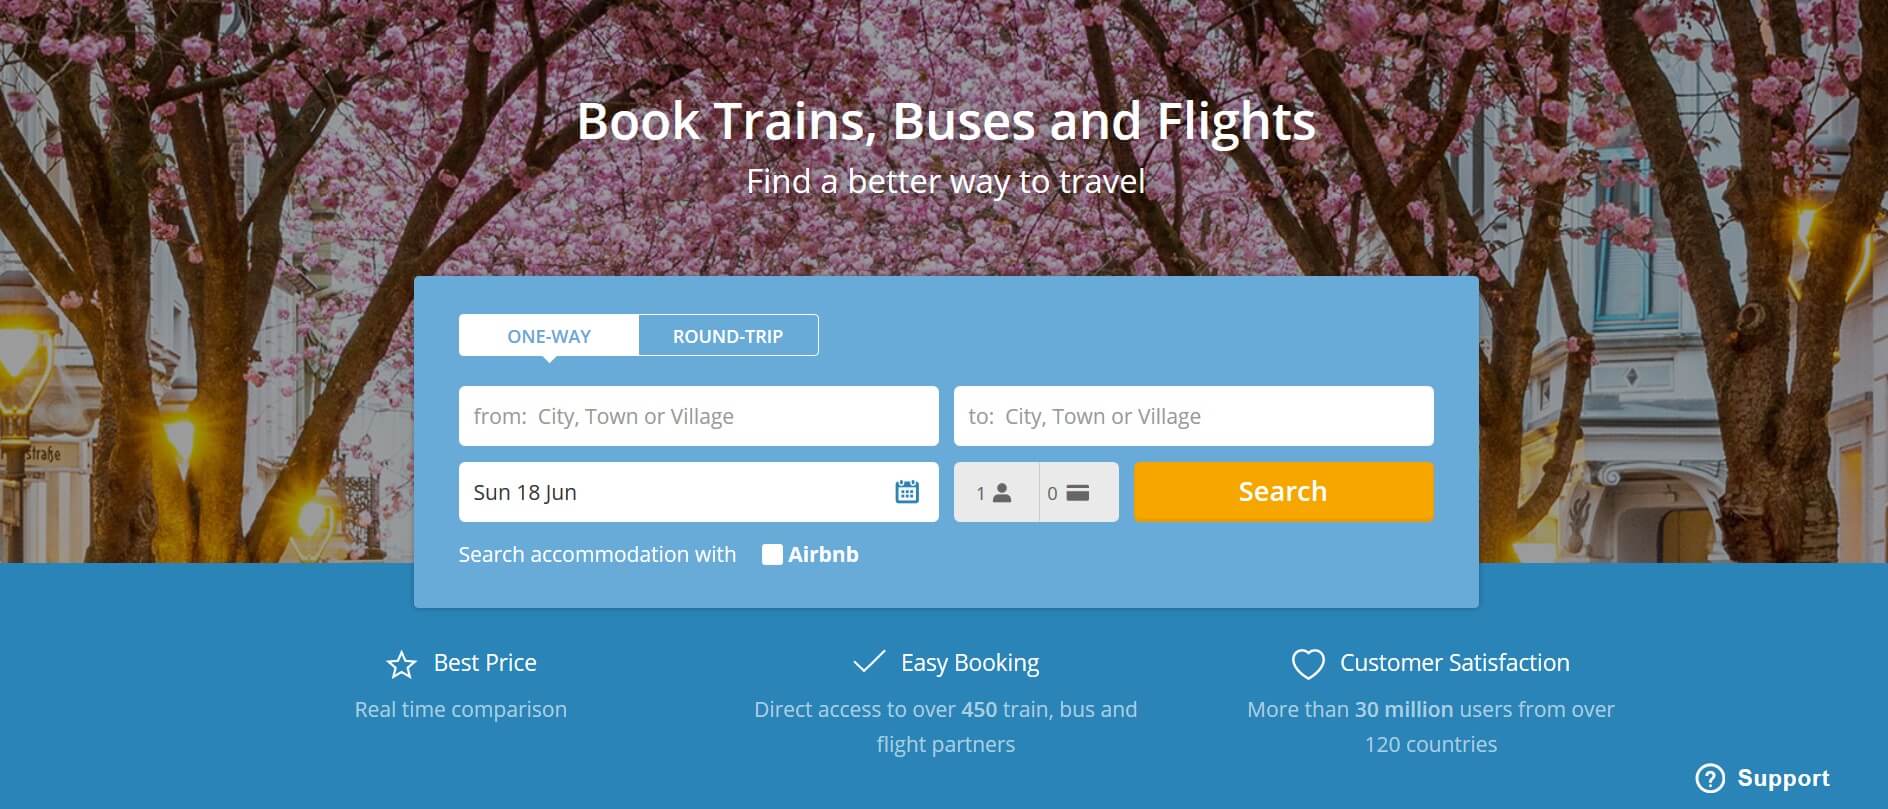
    This is the new flight search engine that everybody has been talking about. They have all the frills of the regular favourites like Skyscanner and Kayak, but their search algorithm is a little different to most. You might remember in my cheap flights guide I suggest breaking up long-haul flights into individual legs and searching them manually, as many sites only search connections within alliances or codeshares. The cool thing is, Kiwi does this for you. The result: CHEAP FLIGHTS.

    The risk is it’s much more likely to miss a connecting flight as you need to self transfer. What makes Kiwi even cooler is they have guarantees to cover you for this. Here are a few of them:

    • Overnight accommodation if your flight is missed/delayed more than 8 hours.
    • Food and drinks for any delays over 4 hours.
    • A refund if your connection is missed due to delay or cancellation.
    • A new ticket if your flight is missed due to delay or cancellation.

    While I’ve noticed some other sites are including self-transfer flights in their results, none that I know of offer the guarantees that Kiwi does. Definitely one to keep in your bookmarks.


    2. Travelers Box

    You know when you’re at the airport and you have a few dollars in change that you need to spend before you leave? Then you go around all the stores looking for packs of Skittles or breath mints before you need to board your flight. And even when you do find something, you’re still left with fifty cents in change that you can’t buy anything with.

    Travelers Box is here to solve that. I heard about them a few years back and had the chance to try them in Turkey. What they do is plant kiosks in airports where you can deposit your leftover change. Just drop your coins in and enter a Paypal address to send it to. I threw some old change in there last time I saw one and it showed up without any problems:

    You can also redeem Amazon or iTunes credit if you prefer. Pretty cool!


    3. Flyonward

    If you travel long term, you are probably familiar with the onward ticket rule: When you must have a return flight or proof of onward travel before you can board the plane.

    The problem is there’s a good chance you haven’t yet decided how long you will stay in the country (because how do you know until you actually get there?) but they will still make you guess and buy a ticket anyway. To get around it I would just buy a cheap Air Asia ticket and take the hit.

    Other loopholes some of us have used is to buy a first class refundable ticket (and wait months for your refund), or just forge a booking confirmation in Photoshop (and risk an eye-stabbingly long rendezvous with airport mall cops if you’re ever caught).

    FlyOnward has come up with a solution. For a ten dollar fee they will book a fully refundable ticket in your name – long enough for you to flash it at the check-in lady for 2 seconds – then they will cancel it once you land. All the hoo-ha that goes on with getting your ticket refunded will be dealt with by them. Because it’s actually a real ticket, with a real booking number in the airline’s system, you are not forging anything and it’s completely legal. Ten bucks and you’re done. Check-in lady gets to tick her box, FlyOnward makes some money, you get on the plane. Win win win.


    4. Omio

    If you’ve ever backpacked through Europe, you’ll know what it’s like having a bunch of tabs open searching through all the different buses, trains and flights to get between cities. Which one is fastest? Cheapest? Most reliable? Should I take a ten dollar bus or a fifty euro flight?

    Omio is a free app designed to make this side of Euro travel super fast and simple. They’re partnered with most of the major rail, bus and airline companies in Europe, meaning you can compare all of these with one simple click. It’s a huge time saver, the app is lightning quick and you can even book your tickets within the app as well! If you’re backpacking Europe any time soon keep this one handy on your phone, especially if you’re hopping countries.

    You can grab it here for both Android and iOS.


    5. Secret Flying

    There are quite a few flight deals websites out there, but I’ve never used any of them as most are geared towards the North American market. Secret Flying has changed that.

    You might be wondering exactly what a flight deals website does. It’s like this; airfares are changing all the time. Specials come and go in hours, airlines post error fares offering business class fares for just a few hundred bucks, things like that. Secret Flying collates all these and brings them to you, meaning you get crazy flight deals delivered right to your inbox. The cool thing about Secret Flying is it covers ports worldwide, meaning even down in New Zealand they have flight deals regularly (I’ve never seen that before). Best of all, the site is 100% free. Awesome.


    6. Hitchwiki

    For the aspiring hitch-hiker Hitchwiki is the best resource available on the web.

    Enter the name of a country and Hitchwiki will give you a background of hitch-hiking in that country (legality, social acceptance, frequency) and what to expect when trying to hitch-hike today. If there are certain customs or unwritten rules you should observe, you’ll find it there.

    Enter the name of the city you’re in and it will give you all the options for hitching out to the surrounding cities. If there are things you should know, such as visa issues or checkpoints, it will likely be written there too. It will also have directions (and sometimes GPS coordinates and photos) for the best places to hitch your ride.

    An awesome free resource, one I used religiously during my Baltic hitch last year.


    7. Too many adapters

    Too Many Adapters is a travel tech website run by fellow travel blogger and supergeek Dave Dean. Dave constantly keeps us at the forefront of travel tech and the blog is always filled with interesting updates, whether it’s about using data overseas, new travel gadgets, co-working spaces or whatever else people are nerding out on. He’s also my go-to guy for getting advice on a new purchase – whether it’s a new laptop or just a software I’m looking for, I don’t even bother reading reviews anymore. I just tweet Dave and ask what’s on his hot list. If you’re interested in grass-roots tech advice, rather than big company press releases and product placements, Too Many Adapters is your spot.


    8. Prey

    Prey is awesome. If you’re heading overseas with your phone or laptop, download Prey and install it on both. It’s a tracking software that will protect your devices in the event of loss or theft.

    Just recently I hit the road again and turned off my laptop as I packed it away. Prey emailed me while I was at the airport and told me my laptop had gone “off the radar”. When I arrived and booted up again, it emailed me and told me my laptop had reappeared in Tanzania (my destination). Pretty nifty!

    The basic account is free, and you can geo-locate, lock your phone, use the camera to take screenshots and more. A premium upgrade with even more features is available too. Essential for any long term traveller.


    9. Transferwise

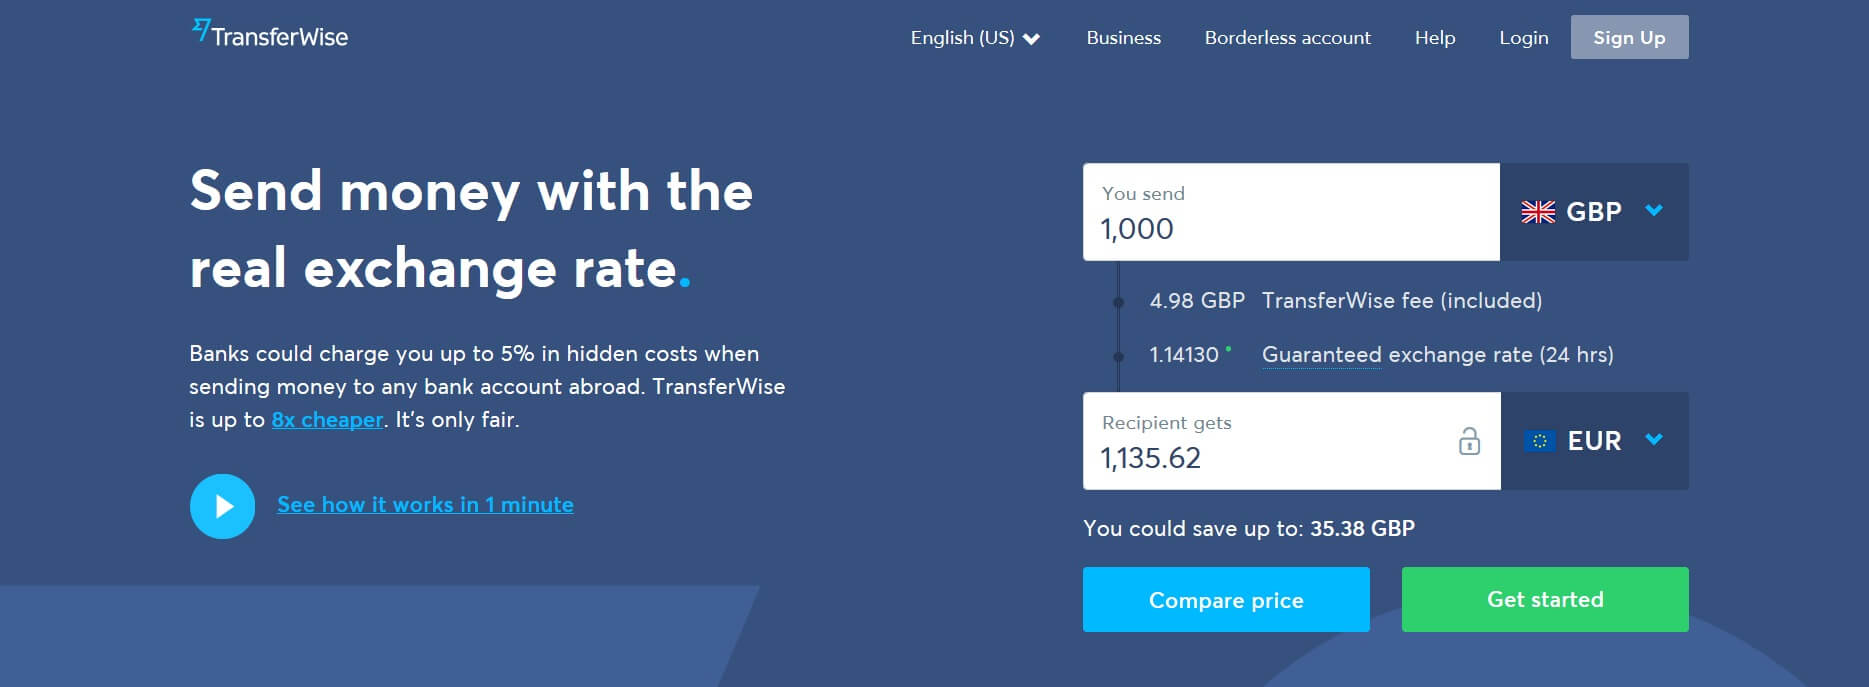
    I love sites that allow me to circumvent big corps like banks and telcos, and Transferwise is one of them. What they offer is a super fast and simple way to transfer funds between countries, using a fair exchange rate and super low fees. If you’re an expat or have bank accounts in different countries, Transferwise is going to save you a fortune.

    Not sure about you, but New Zealand banks charge me around $15 to both send and receive an international payment. Plus the exchange rate is loaded with a spread of around 3 points. Transferwise gives you a neutral rate, and a fee of 0.7%. Plus since you’re not making an international payment (it’s all done through Transferwise’s domestic accounts) you don’t get charged any international payment fees by your bank.

    I recently used it to transfer about $2,000 NZD to AUD, and saved about $16 NZD on fees and $21 NZD on the exchange rate (that’s about $27 USD in total). Do that a few times and you’ll be able to buy yourself a new pair of shoes. You can get your first transfer free using this link!

    On a side note, I recently upgraded to N26, which is amazing. Check out my review here.


    10. Couchsurfing Hangouts

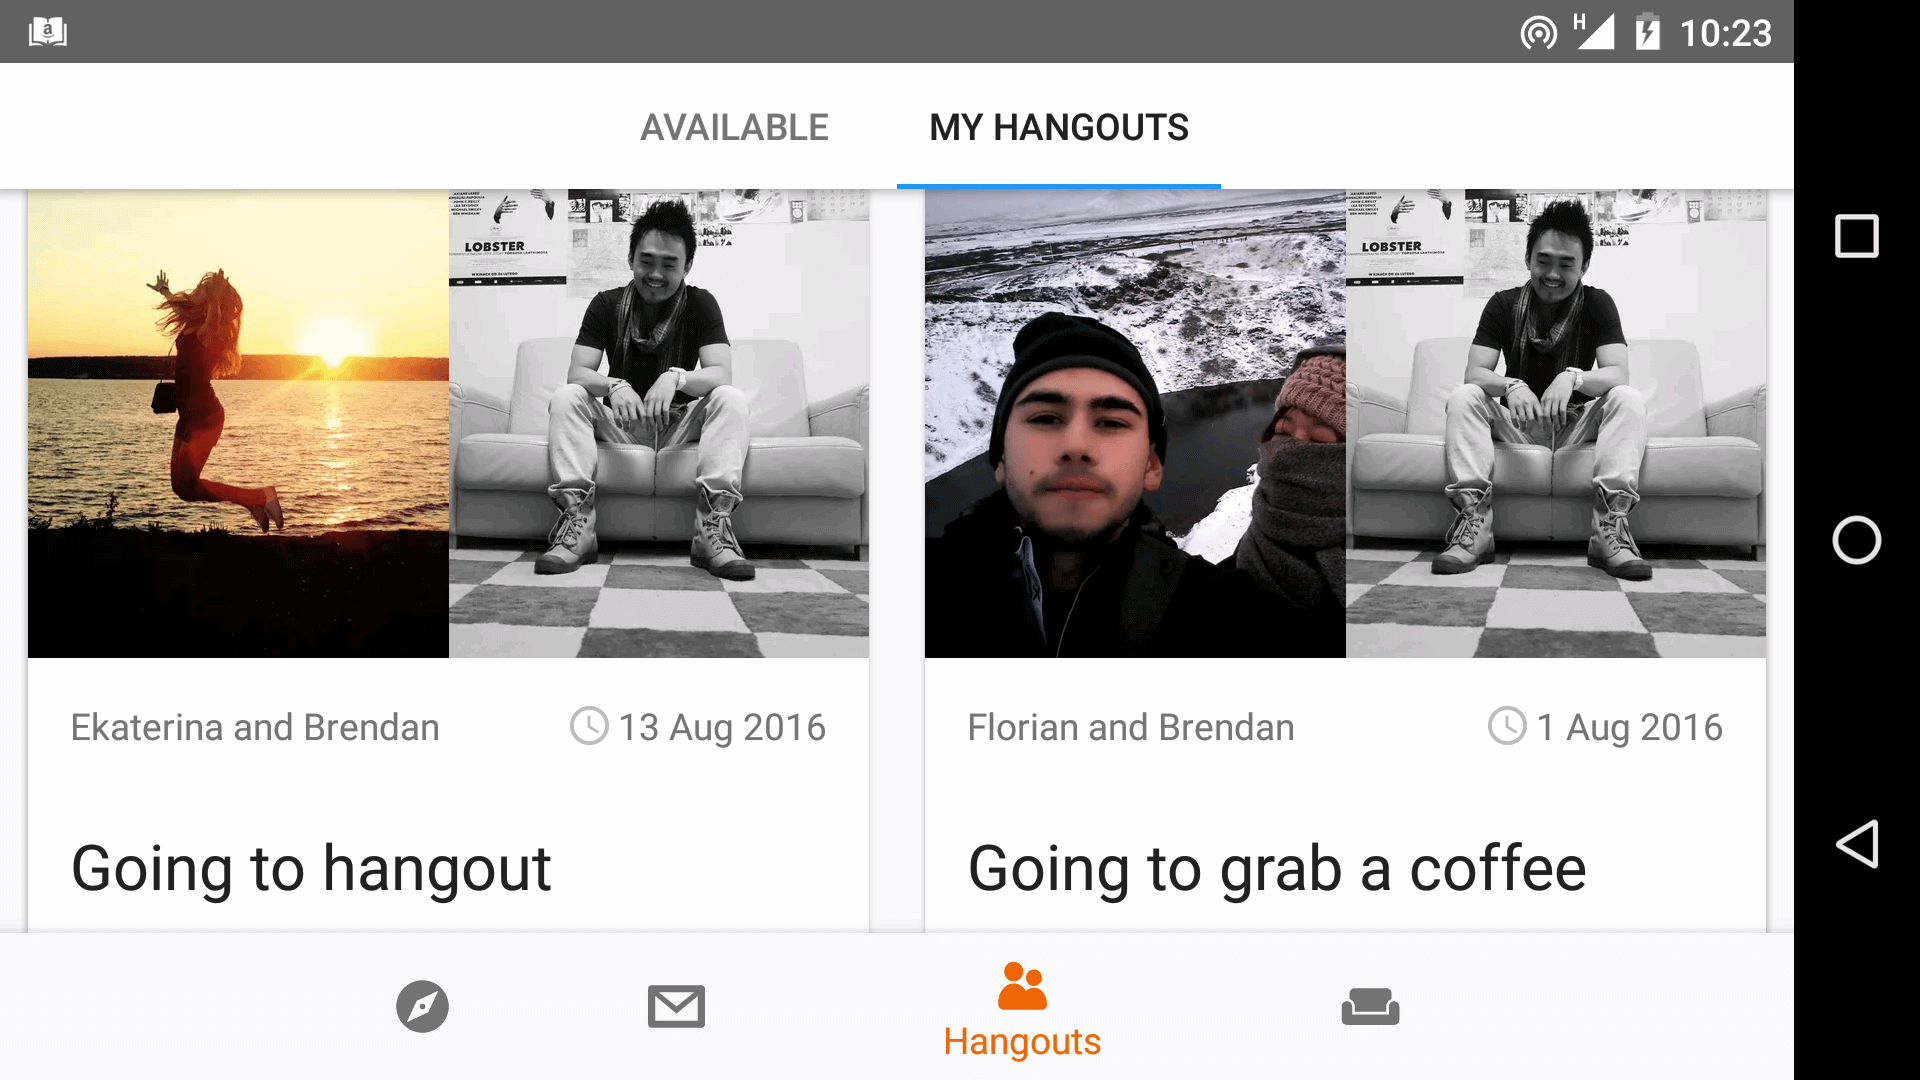
    “Hangouts” is a new addition to the Couchsurfing app that helps you meet locals and travellers in whichever city you’re visiting. Simply mark yourself as “Available to hangout” and you’ll get shown all the other Couchsurfers in the area looking for people to meet. It’s a good way to get involved in the community if you’re not yet ready to stay with a stranger or host travellers in your home. I tried it out a few times on my last trips through Europe and Thailand and while you get your regular mix of weird and crazy I met some pretty cool people. Just use the same precautions I go through in my beginners Couchsurfing guide and you should be fine.

    If you want to try it out, just log in to the Couchsurfing app and you’re good to go. If you don’t have an account yet, sign up! You can register for a free account here.

    That’s ten! Any other cool travel websites you’ve been using recently? Let me know in the comments.

    Cheaper flights? A place for your leftover coins? Goodbye banks? Hacking Europe? After another year on the road I bring you the sites that have helped me travel better, safer, cheaper and longer. Check out these hot new travel websites to stash in your bookmarks this year.

    Note: This post contains affiliate links. Omio compensated me for their review. I have used their service and recommend it honestly. For more information, please check out my Disclosure Policy.

  • 5 Ways To Stay Healthy While Travelling (In Less Than 15 Minutes A Day)

    5 Ways To Stay Healthy While Travelling (In Less Than 15 Minutes A Day)

    If you’ve ever travelled for any longish period of time, you’ll know it goes something like this:

    You spend months prior to your trip at the gym (because you’re going to meet your soulmate and fall in love out there, of course).

    You spend the first week of your trip eating shitty food like pizza and kebabs and loaded fries – basically whatever is on the corner by your hostel.

    You meet some mates and start getting friendly with the booze, because you’re on holiday, duh.

    After one month you’ve put on 5kg but it’s cool, you’ll start running every morning now.

    You go for one run.

    After two months you’ve put on 10kg but it’s cool because you’re seriously going to start running now.

    You don’t start running.

    You get a cold.

    Now you’re feeling better and you could start running, but you decide to just start eating salad for dinner, because you uh, don’t have good running shorts or something.

    You eat one salad.

    Now you decide it’s too late, you’re just going to binge eat and drink beer because you should just enjoy the rest of your holiday.

    Six months later, welcome home. You’re officially a fat ****.

    IT DOESN’T HAVE TO BE THIS WAY.

    After many jaunts on the road, I’ve finally learned how to kick this “traveller’s disease” of beer bellies, pimply skin, runny noses and sore throats.

    In fact on my last couple of trips, both six months long with a lot of sleeping on floors, long buses and trains, sleepless nights and a super tight budget, I didn’t get sick at all. Maybe a few sniffles for a day. Compared to my first few years on the road where I spent entire weeks in bed coughing up gunk, I felt invincible.

    The best part is, it doesn’t require anything fancy and expensive. Fifteen minutes every morning and you’ll be returning home in better shape than when you left. Promise. Detailed below is my (patent-pending) Bren On The Road Don’t Be A Sick Fatty Wasting-Your-Trip-In-Bed Traveller Five-Step Plan:

    1. Get your Daily Greens

    It’s not a secret (or maybe it still is for some) that vegetables are what keep us sexy. Unfortunately on the road it’s not always possible to be eating healthy home-cooked meals every night. Honestly – what do you do when you’ve just gotten off a 12 hour bus ride and it’s after midnight? You go to the 7 Eleven for a hot dog and a Milo.

    Luckily in the 21st century it’s possible to get a serving of daily greens without a vegetable garden and a kitchen. I’ve been using green powders (even while not travelling) for the last year and they’ve been awesome. Dried and powdered veges are certainly not as good as fresh greens pulled from the ground, but they’re definitely better than a few shreds of lettuce in a Family Mart sandwich.

    stay healthy while travelling

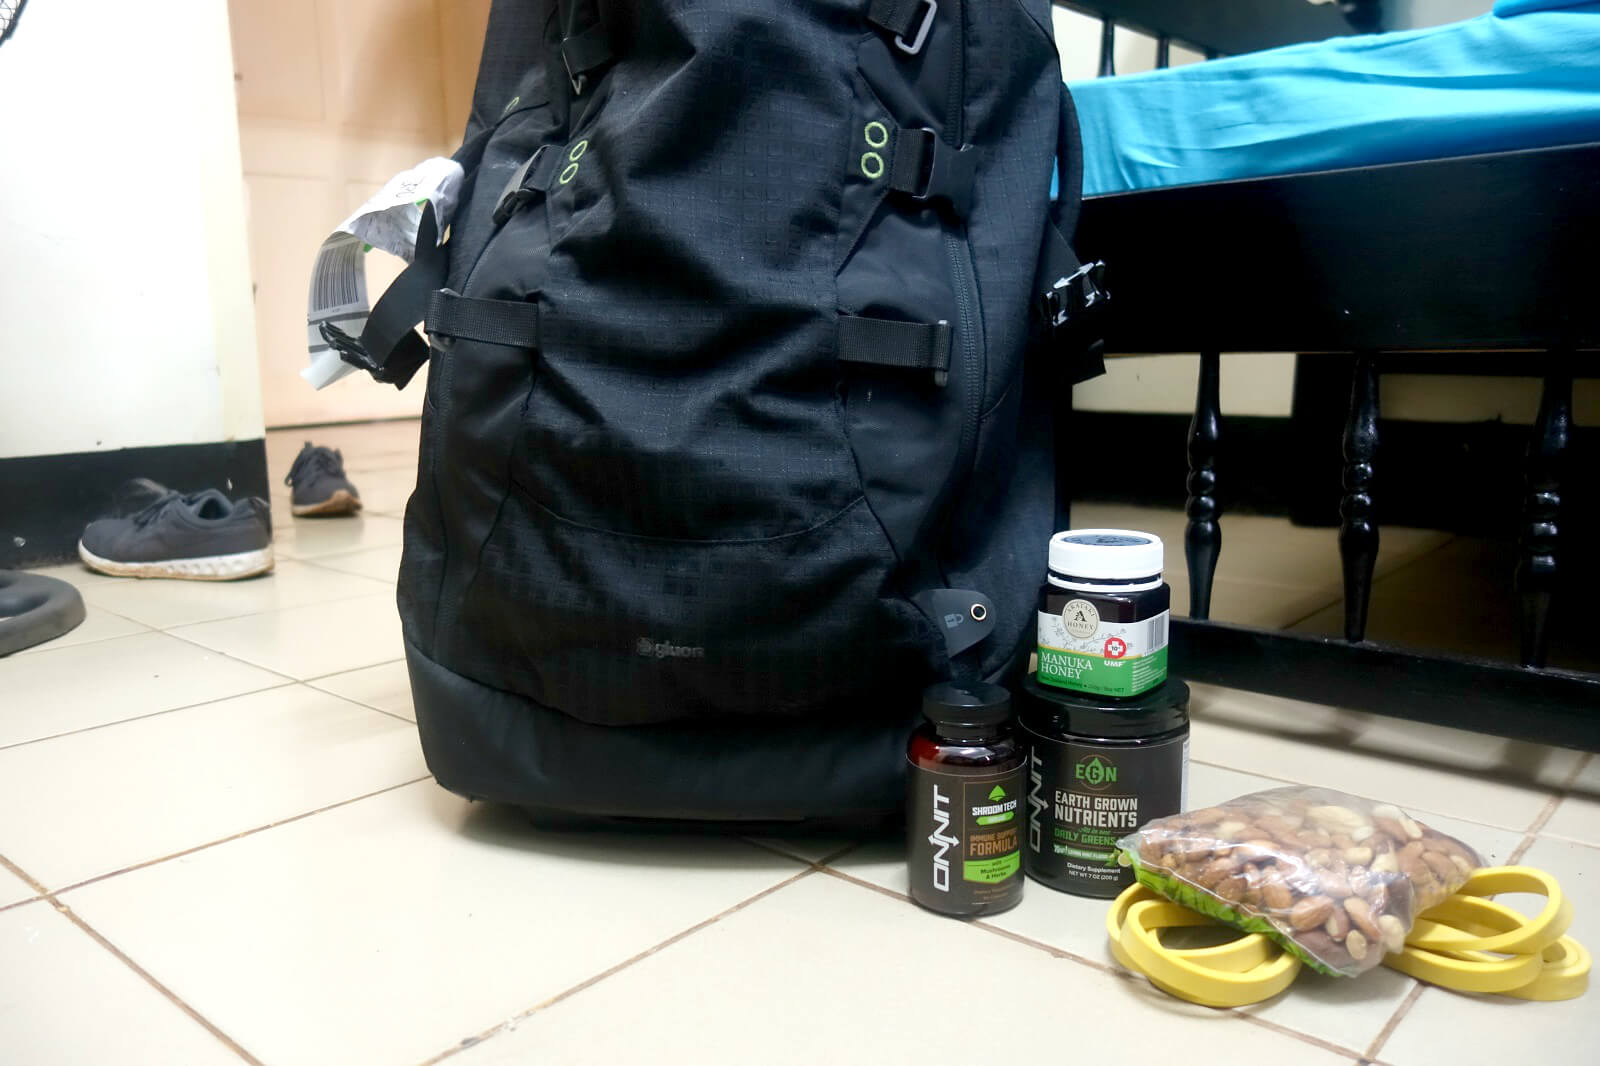
    There are many brands out there so do your homework and find a reputable brand available in your country. The powder I always travel with is Earth Grown Nutrients by Onnit – one of my favourite brands. I drink it daily on short trips, every other day on longer ones. It comes in small, easy-to-pack containers and the ingredients mix is just awesome. Mix it up in a glass and knock it down in five. Got your greens for the day and so, so easy.

    2. Snack smart and healthy

    Most of us are not used to spending the whole day wandering around cities and taking photos for hours, so we tend to get hungrier and thirstier than usual. That means on the road, we tend to snack hard.

    One bit of cookie dough won’t hurt, right?

    It’s even worse in the hostel when people are passing around M&M’s and bottles of wine.

    Try and flip the script and eat snacks that actually give your health a boost rather than a drag.

    stay healthy while travelling

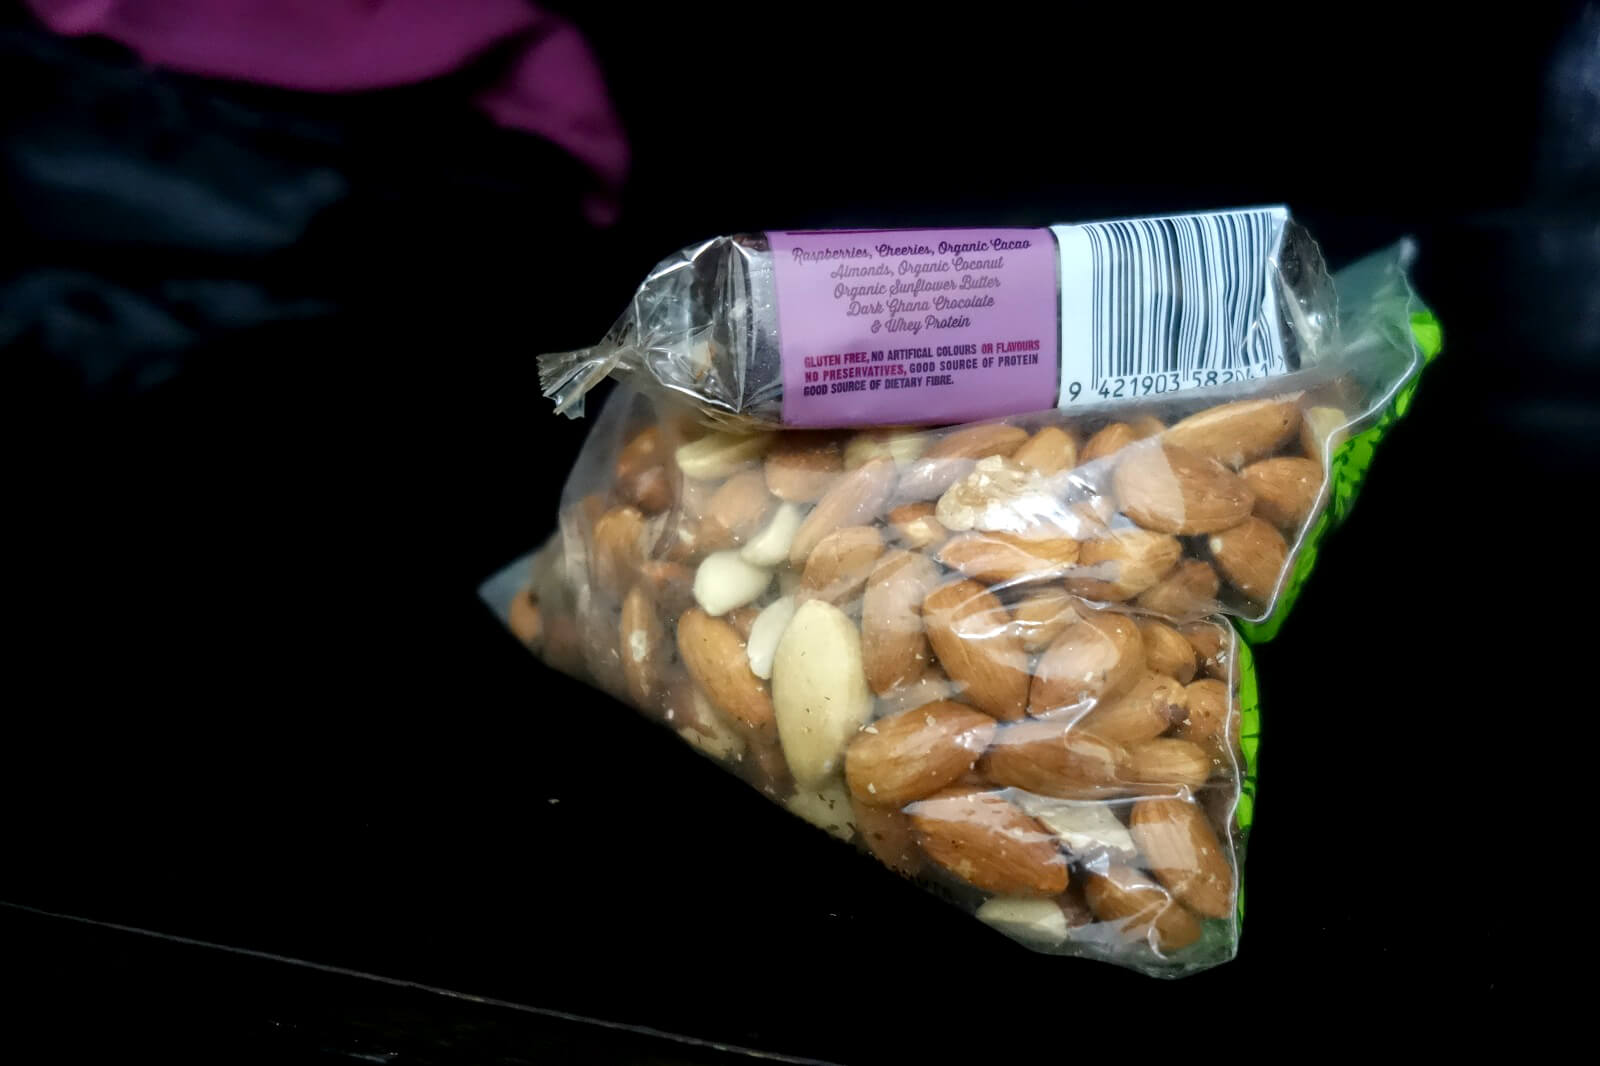
    My favourite snacks – nuts, carrots and protein bars. I used to eat Burger King at the airport as a treat for the long flight ahead (isn’t it weird how there’s always a Burger King by your gate?). Now I always have a few bars and a bag of nuts on any flight. If I pass a supermarket, I buy a few carrots and apples and eat those if I’m hungry at night or looking for breakfast. I still eat all the good stuff I find on the street, but I balance it out with something good. And I always drink a lot of water.

    You may think this is needle-in-a-haystack type stuff, but if you’re snacking every day that’s going to add up to maybe fifty or a hundred carrots on your trip. Ask your doc – it makes a difference!

    3. Get Spiced

    stay healthy while travelling

    Spices are huge right now. Turmeric, ginger, cinnamon – we’re finally learning what many ethnic communities have known forever – spices are one of nature’s best medicines.

    When I first revamped my diet I spent months travelling with actual spices – little bottles of turmeric and slabs of ginger, trying to cook and make tea with them whenever I could. Inconvenient obviously, but it worked.

    Then the guys at Onnit came out with their spices-based supplement which was the answer to all my backpacking prayers.

    What’s in it?

    A blend of immune-boosting mushrooms, turmeric, ginger root, oregano leaf, lemon peel and a bunch of other good stuff. I take a few supplements on trips but this is by far my favourite; completely food-based, all-natural, packed with goodness and locked in an easy to take capsule. I simply throw a couple of bottles in my backpack before a trip and I take it daily. I love it. You can grab a bottle for yourself here, or if you prefer just get your spices the old fashioned way. Both work!

    4. A scoop of honey

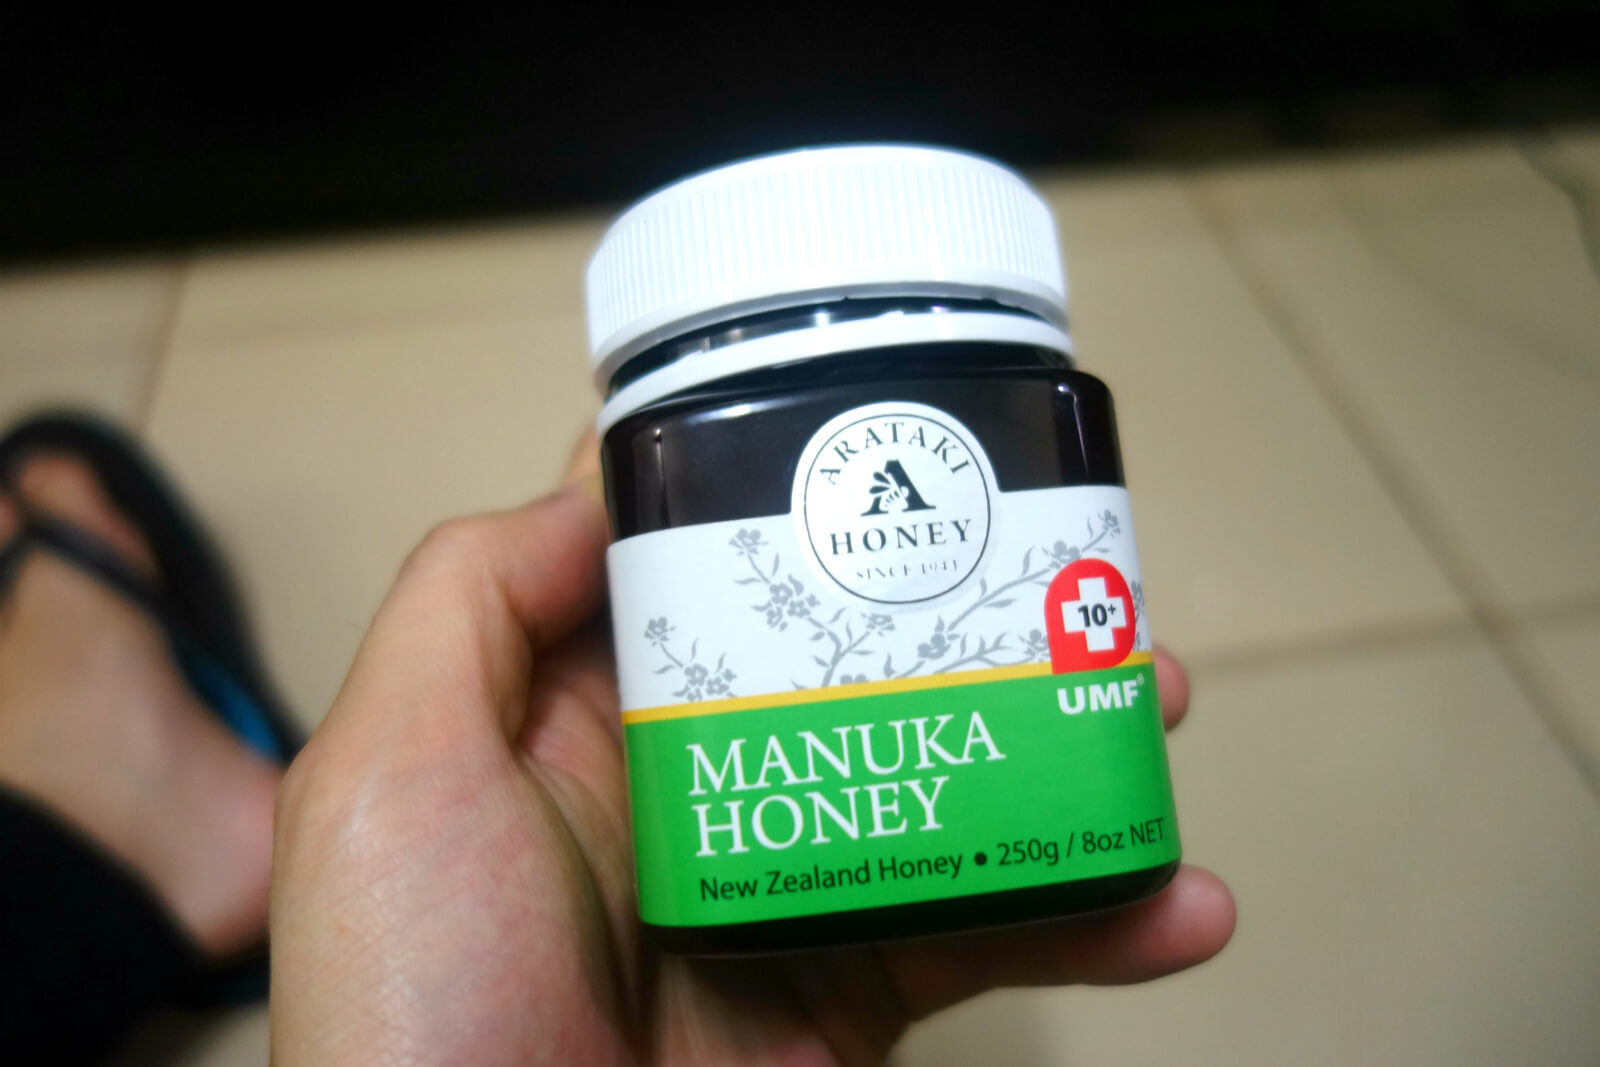
    Down in New Zealand and Australia, we grow up with Manuka honey. It’s not until we hear people raving about it across the world that we realise how awesome it actually is.

    stay healthy while travelling

    The health benefits of honey are not a secret, but Manuka is honey on steroids. Across the interwebs you’ll hear people raving about using Manuka honey to kick colds, cure the most stubborn staph infections, heal up wounds (all of which I’ve done myself too, by the way) and you wonder why more people don’t know about it. Well today I’m telling you about it. I won’t list all the studies – you can browse them for yourself.

    So what do you do with it? While a lot of people use it for dressing wounds and so on, I mostly just eat it. I travel with a jar of it wherever I go and take a teaspoon most days, or a few teaspoons if I’m feeling a little weak.

    It can be expensive if purchased overseas, but you can grab some decent brands on Amazon like this one. If you’re travelling through Australia or New Zealand, just pick up a jar at the supermarket. I don’t have any preferred brand; just grab anything with a UMF rating of 10 or more. Ooh honey.

    5. Fifteen minutes of sweat

    The one you were dreading.

    How do you exercise on the road? Sometimes you’re sharing a dorm with 10 other people, and unless you’re flush and splurging on a nice hotel, there won’t be a gym you can get swole at either. Here’s a secret: To exercise on the road you just need your arms and legs and fifteen minutes. And I know sometimes you just can’t be arsed, but I’m sorry I cannot hear all your excuses over all these great ideas I’m about to give you. These are things you can do that are fast, free and as good as any gym workout:

    • Plank for as long as you can. Then do it again. Then again one last time. You’ll go home with rock hard abs. I plank in the airport all the time.
    • Do a set number of push ups every day. My number is 100 but start at whatever you want. Even if it’s just 20 – you can do 10 in the morning and 10 at night. Over a month that’s 600 push ups. Takes less than five minutes.
    • Do squat jumps. Aim for a set number each day. All you need is two legs and a chair.
    • If there’s a washing line or soccer goal or children’s playground, do some pull ups.
    • Do a HIIT workout. Takes less than five minutes and burns massive calories. This one is my favourite.
    • Yoga. Learn some basic poses, then get your yoga on for 5-10 minutes. Easy.
    • Shadow box.
    • Skipping. If you don’t have a rope, shadow skip.
    • Lift. You can do it anywhere with resistance bands. I travel with these bands and use them all the time for both working out and rehab. You can get a full lift with them (for example), and you can do it anywhere, even when sitting in a train station (yeah I’m that guy). They literally weigh as much as a sock and will fit in your pocket. You can grab them on Amazon for 30 bucks. Be warned though, everyone in your dorm is going to want to use em!

    There it is friends. Drink your greens. A spoonful of honey. Pop a spiced up pill. Pack a bag of nuts. Sweat for fifteen minutes.

    HOW EASY IS IT. And it all fits in your backpack like a pair of shoes:

    stay healthy while travelling

    Catch you on the road with your six pack.

    Bren

  • 7 Tips For Staying Safe On Free Wifi While Travelling

    7 Tips For Staying Safe On Free Wifi While Travelling

    Take a moment to think about your phone. 

    Think about how much stuff is on there.

    How much personal stuff.

    How much stuff you would never want anyone else to see.

    The angry email you sent your ex boyfriend ten years ago. All the flirty text messages from Jessica at reception. Your artistic naked selfies. The dirty jokes you send to your work colleagues, photos of your grandparents, probably even your credit card and passport and tax information.

    When it comes to your phone, it’s all just a swipe or two away. 

    If you gave your phone to a stranger for an hour, imagine how much they would know about you. They would know more about you than your mother and your best friend combined.

    And your laptop?

    Shiver. Don’t even think about it.

    But here’s the scariest part:

    Every time you connect to free wifi, you may be giving somebody an invitation to all of it.

    Yes, really.

    As travellers, we’re suckers for free wifi. At a cafe, a hostel, an airport, sometimes, we don’t even know who the wifi belongs to. If it’s free and has no password, we’re on it like rats. I mean, we gotta post those hilarious snaps from the beach yesterday, right?

    But wifi is a network. That means computers, phones, providers – they all become connected. If the security isn’t up to date, or someone shady set up the network, you may have a few uninvited guests looking through your devices. And it can turn out a lot worse than you think.

    The truth is, you can only do so much to protect yourself online. There is always going to be a chance of you getting targeted, but there are still many things you can do to minimise the risk.

    Follow the tips below, and hopefully the only person browsing your naked selfies on your next trip will be you.

    1. Stick to secure websites

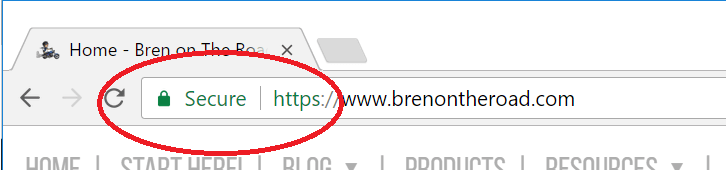
    It’s always important to check that the website you’re using is secure. You can do this simply by checking the security information in a trusted browser like Chrome of Firefox. If a website’s connection is safe, it will be indicated by a green lock to the left of the URL, like so:

    stay safe on free wifi while travelling, private internet access review, best vpn for travelers

    If you’re on a public network (or any network!) try to avoid entering any sensitive information on a non-secured website. This includes things like passwords, credit card numbers, and other personal details.

    2. Avoid using apps

    App security is less stringent than browser security. If you are using apps from well known brands, such as Paypal, you’ll probably be okay. But try to avoid entering any sensitive information into apps from lesser known companies. This is particularly important if you use the same password for various websites – even if you’re willing to risk a casual forum or game account, hackers can start trying those login details for every other website, including emails and social media. Stick to using your browser rather than apps, and only on secure websites.

    3. Turn off file sharing

    Make sure your files are secure. Often when using our laptops on a home network we share folders with our friends and sisters and parents. This is fine, as long as you remember to turn it off when you connect to public wifi. If you forget to turn off file sharing, that means every other person connected to the same wifi network (yes, everyone) has an open pass to see what’s on your computer.

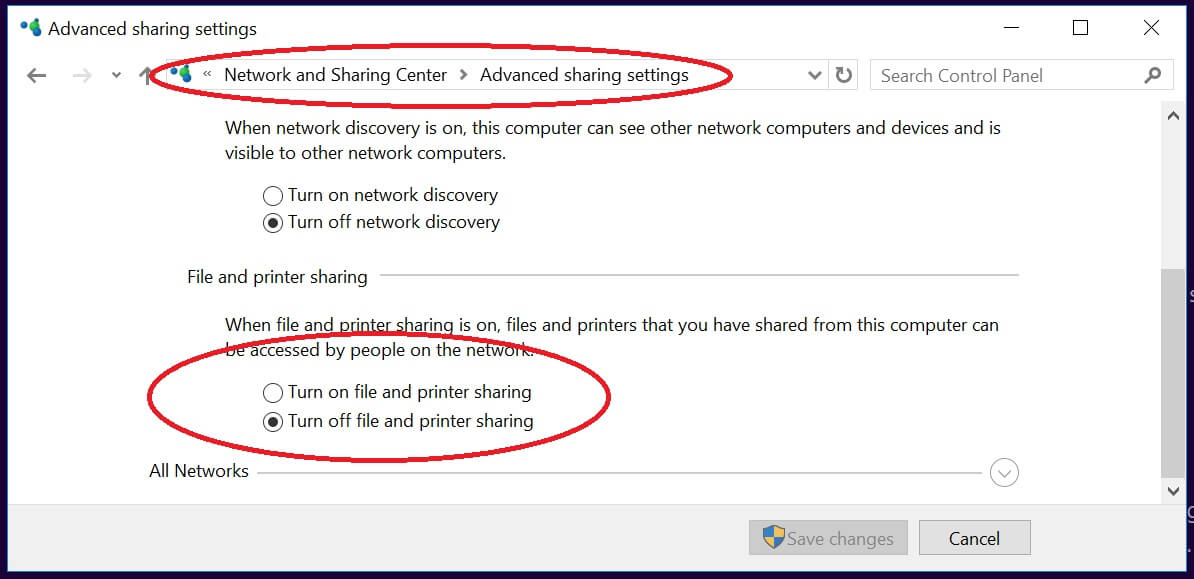
    Some newer computers are smart and will automatically turn this off for you when you connect to a public wifi, but you should double check anyway. To turn off file sharing, simply search for “Advanced Sharing Settings” in the Windows search bar, and you’ll come to a window like this:

    stay safe on free wifi while travelling, private internet access review, best vpn for travelers

    Simply turn off discovery and file sharing and you’re good. For you Mac users, you can find the same options under “Sharing” in your System Preferences.

    4. Choose your wifi wisely

    Let’s say you’re in a shopping mall. The shopping mall advertises free wifi throughout the mall, just connect and accept the terms and conditions. Sounds great, right? And it might be great for your social media addiction, but not so good for security. The easier it is to connect to a wifi network, the easier it is for bad stuff to be happening on it.

    A better option is to look for a coffee shop or restaurant inside the mall, and use their private wifi network instead. If the network is hidden and/or you need to ask the staff for the password – even better.

    5. Update your antivirus

    Never connect your devices to any free wifi network without an up to date antivirus. Most laptops these days come with a built in software, like Windows Defender, which should be sufficient for most people. Of course, you can step up and download a software like Avast, which is free and gives you an extra layer of protection.

    6. Use a VPN

    If you’re like me and just want a set-and-forget option, I’d recommend using a VPN. A VPN is a “Virtual Private Network”, which acts as your own private internet bodyguard.

    The way a VPN works is it hides your IP address and encrypts your connection, so that everything you send over the internet is hidden. Think of it like a ninja connection – whenever you send information, nobody knows what it was or where it came from. You may be familiar with using a VPN for work; often a requirement if you work for government or handle sensitive information. However, your personal details are just as, if not more, important than your work stuff, so you should be using a VPN on your personal devices too.

    Luckily VPNs are cheap and accessible these days, so there really is no excuse to not be using one. The VPN I use is called Private Internet Access and I have been using them for many years. They’re affordable, allow multiple devices, and are super fast and user friendly. You can click here to look at their plans.

    If you’d like to learn more about VPNs, why they’re important and how to use them, you can check out my beginner’s guide here.

    7. Don’t use it at all

    While I generally don’t have a problem using wifi in restaurants and cafes with secure passwords, I try to avoid connecting to large open wifi networks in airports and malls. Instead, I purchase a local sim card with data, and will use that on my phone and/or tether to my laptop any time I need to get connected. Even with a VPN, I tend to take the ‘better safe than sorry’ route, especially as I’m constantly checking bank accounts and other important information. Data is usually cheap these days, and for around $20 a month you can get more gigabytes than a normal human being should need. Alternatively, you can invest in a pocket wifi to keep you connected 24/7. The best way to stay safe on public wifi is to not use it at all.

    Like I said these steps will not make you bulletproof, but will definitely reduce your chance of being a target.

    Safe travels!!


    Using free wifi? Whenever you connect to a network unsecured, everything on your phone and laptop is open season. Emails, text messages, photos, tax information, bank accounts. Use these 7 simple tips to protect yourself and your infomation next time you connect to that free wifi network.

  • Couchsurfing 101: Everything You Need To Know

    Couchsurfing 101: Everything You Need To Know

    Update: Due to new developments at Couchsurfing, I no longer recommend using the site. You can read full details here.

    I spent about a week in Norway recently. On my first night, I stayed in a small cabin in the town of Neiden. I don’t actually know if you could call it a town. It probably only had eleven people living there.

    We arrived in the late afternoon, stashed some beers in the fridge, ate some crab with the neighbour, and then headed over to the sauna for the night. After sweating out twelve gallons of sins and demons, I stumbled back to the cabin and passed out on one of the couches.

    The cabin was actually pretty flash – in the summer months it was rented out to tourists who come to catch fish and king crab from the nearby fiords. About a thousand bucks a night. But in the winter it was mostly empty. That’s how I ended up there. The owner needed a chef for his nearby hotel, so he hired some Finnish guy for the job, and put him up in the empty cabin for the winter.

    That Finnish guy just happened to be my Couchsurfing host.

    Sleeping at the wheel

    People often ask me how I always manage to have such “authentic” experiences while I’m travelling. I think what they mean by this is, how do I manage to get connected to locals so quickly and easily? While there are many ways, Couchsurfing is up there with the best of them. When you get involved in Couchsurfing, experiences like the one I’ve described above are not rare. You’ll find yourself staying in all sorts of interesting places, with interesting people, and having experiences you would never hope to find in a hostel or hotel. But to get the most of the community, you need to understand how it works.

    What is Couchsurfing?


    A post shared by Bren (@brenontheroad) on

    Couchsurfing is a travel community. The concept goes like this:

    When travellers go overseas they need places to stay. And there are many locals who have spare beds, floors and couches. Couchsurfing matches these two together.
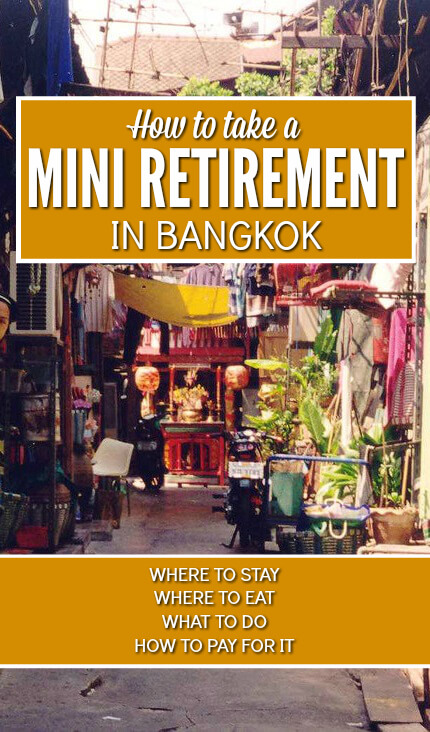
    “Hosts” will list their available spaces on the site. Travellers will then search through them and request to “surf” with hosts they think they’ll get along with. Alternatively, travellers can publish their travel plans, and hosts can offer to accommodate them.

    No money ever changes hands. The exchange is done in the spirit of travellers helping other travellers. Some of you might find it odd that anyone would do this. Why would you offer a bed for free? Why go to so much trouble to accommodate someone and get nothing in return? Why not list it on Airbnb and make some money instead?

    It’s pretty simple. Travellers know travellers. And we know how important it is to help each other out. Plus you get to meet some pretty cool people along the way.


    How to find a Couchsurfing host


    A post shared by Bren (@brenontheroad) on


    Quite a few people struggle to find a Couchsurfing host, and usually it’s because they misunderstand how the community works. This leads to most people trying to get hosted once or twice, not hearing back, and giving up on Couchsurfing altogether.

    To avoid this happening to you, try and follow my guidelines below. This will give you the best chance of finding a host, and help you get the most out of the community on your travels.

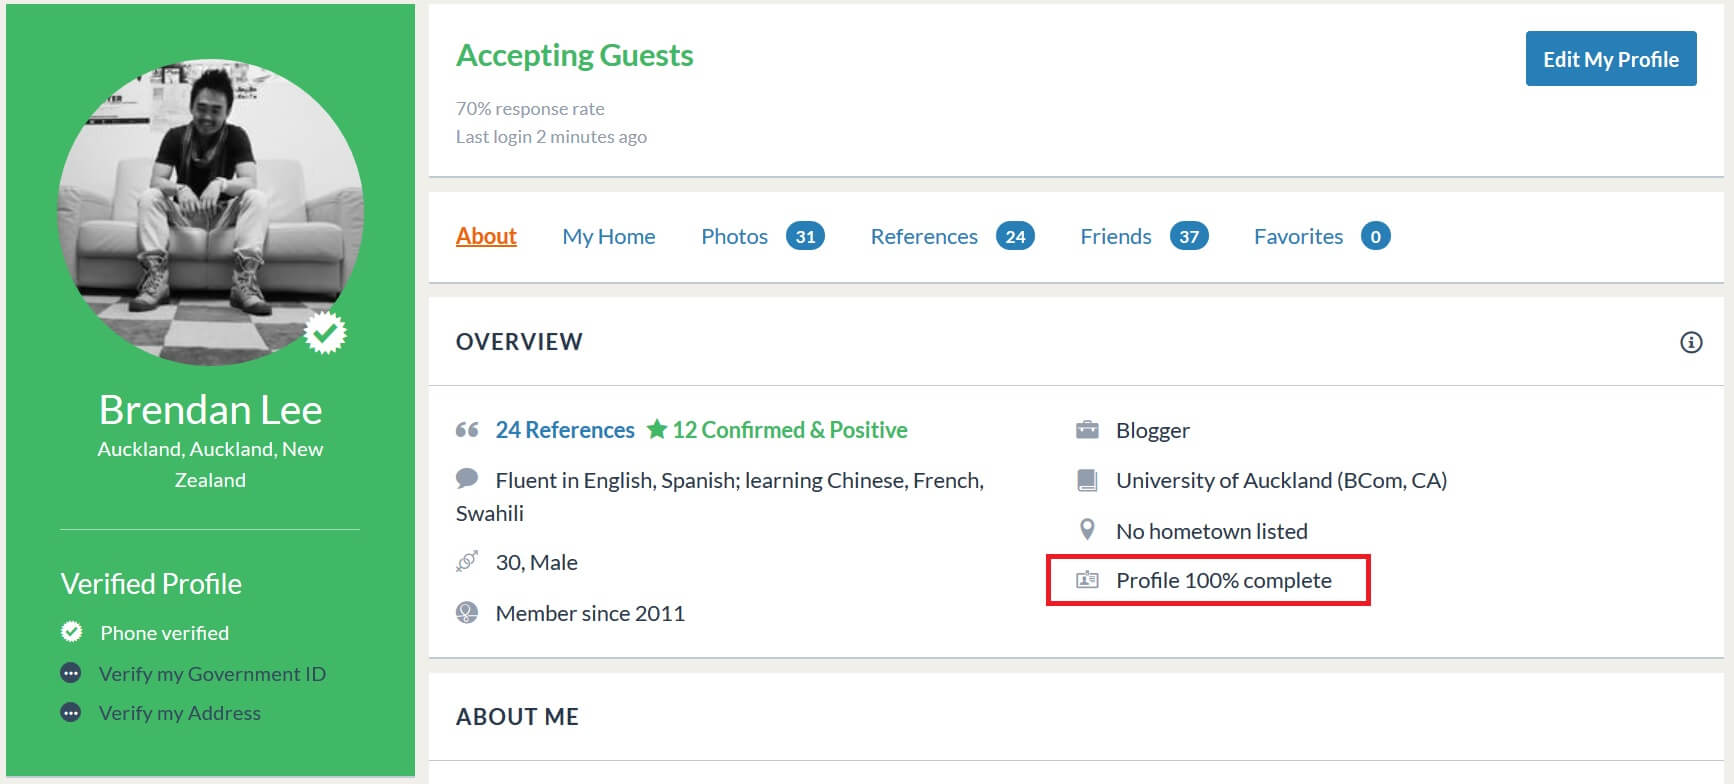
    1. Complete your profile!

    This is super important. Most people only spend about five minutes on their profile and think that will work. Try to remember – you’re asking to be invited into somebody’s home. And it’s also quite competitive – there are far more surfers than hosts active at any one time.

    Your profile is the only thing hosts have to get an idea of who you are. It’s what they’re going to use to judge whether you’re fun to hang out with, whether you’re a serial linen thief, whether you’re going to start cooking up heroin in their bathroom. If you want to get hosted, spend time crafting your profile to show the best sides of yourself. Here are a few tips:

    1. Fill out all the sections fully. In the “About me” section actually write a few paragraphs about who you are and what you’re about. What are your hobbies? What do you do in your free time? These are things that hosts will look at to see if you have anything in common. In the “Amazing things I’ve done” section, put something interesting. It doesn’t have to be mind-blowing, maybe something as simple as graduating from high school was amazing for you. This isn’t a douchey job interview where you need to impress everyone. If you can’t think of anything, write something sarcastic. Something funny. In the “Music and Movies section”, write something! Things like this matter. If you’re a Tupac fan, the chance of me hosting you goes up 1,000%.
    2. Add lots of photos. Not two or three. More like nine or ten. And make them clear – so your face can actually be seen and we can be sure that you’re a real person. Sometimes people send me couch requests and they only have two photos – one of a sunset that was probably stolen off Google, and then another of them 10,000km in the distance where I can almost make out the colour of their jacket but not really. Needless to say those people are never getting hosted.
    3. Try and get some references. While the best references are from hosting and surfing, there is also a third reference group from “friends”. If you connect your Facebook to your Couchsurfing account, you’ll probably see you already have friends on the platform. Ask them if they would take a few minutes to write you a reference – this can be quite helpful to get you started.

    2. Look for hosts

    When looking at Couchsurfing hosts, it’s important that you find a host that is trustworthy. While hosts are concerned about their own safety, you should take the necessary precautions for yourself too.

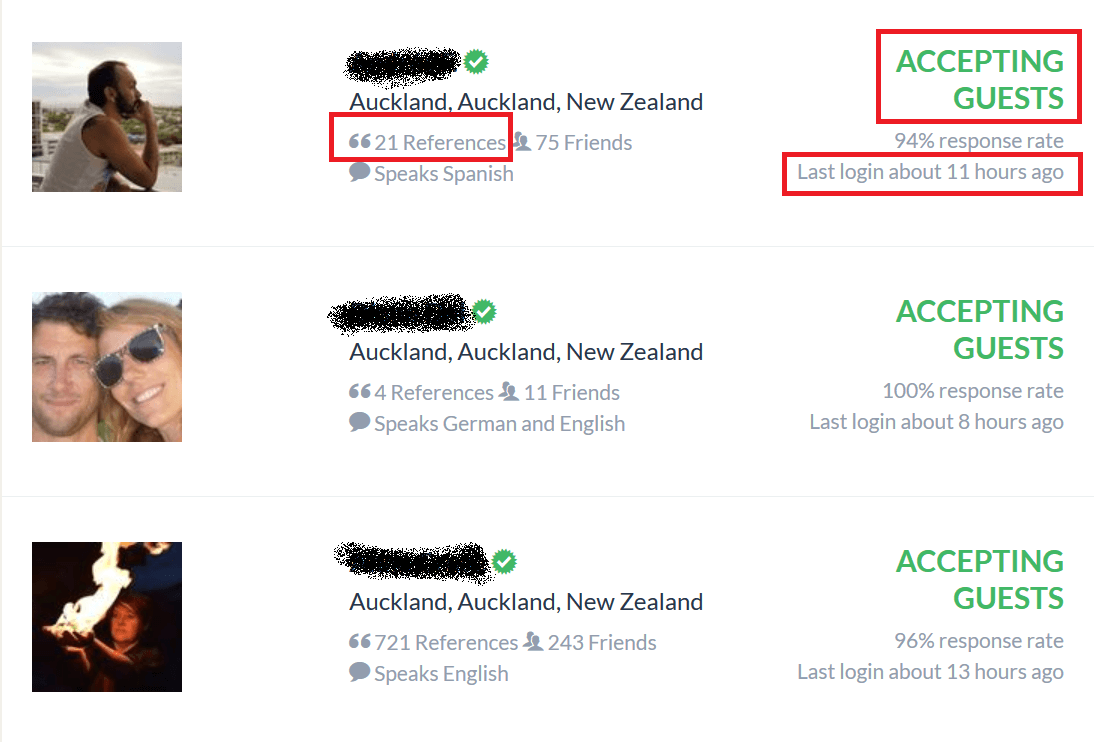
    The search function in Couchsurfing is pretty straightforward. Once you’ve searched for hosts in your destination, you’ll get a list of profiles like this:

    You’re looking for a few things here. First, look for people who are accepting guests. They’ll all be listed first in the results anyway. Next, look for references. If they’ve been well-referenced, you can be pretty sure they’re good people. And finally, look if they’re active. Couchsurfing will show you when their last login was, so if it was within the last couple of weeks there’s a good chance they’re still active on the site.

    Obviously the next step is to click into these profiles and take a closer look at their references and photos, and if you think they’re someone you’d enjoy hanging out with. Once you’ve found a few hosts that are suitable (I’d recommend choosing around ten), you can start sending your requests.

    3. Send (good) Couch requests

    It’s important to take time when writing your requests. I actually don’t mind receiving copy/paste requests if the person is an experienced Couchsurfer and I can see they’ve given a lot to the community. Even I send them sometimes if I’m really pressed for time. However, if you are a new Couchsurfer, with zero references, you shouldn’t be copy pasting your requests. It comes off as lazy, and even a little arrogant, that you would expect people to welcome you into their homes without even taking the time to write a short request to them. At least take the time to write to hosts personally to show that you’re making an effort.

    What does this mean?

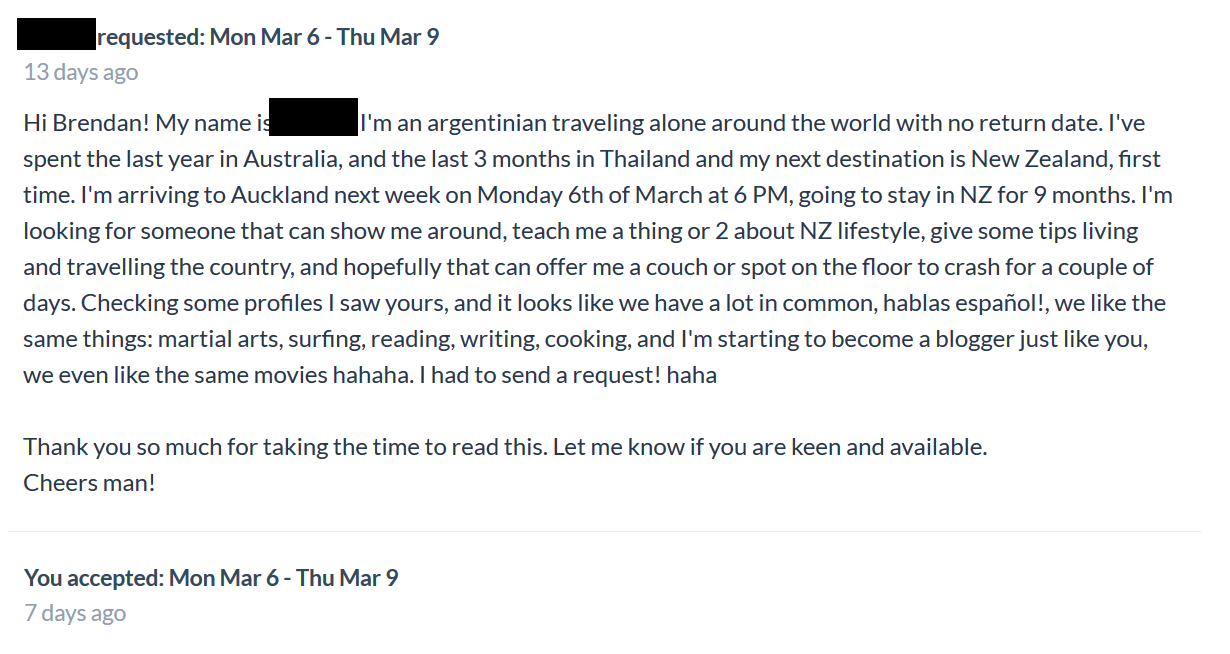
    Read the host’s profile. See what their house rules are. Find out their interests, think about whether they’re someone you’ll get along with, check if they have any requests of their own (for example, some will ask you to not make requests for weekends or particular dates, some will only allow females etc). Then write a request to them personally where you introduce yourself and then give a few reasons why it might be a good idea for them to host you. If they love Italian food and you have a secret gnocchi recipe, you could offer to cook it for them for dinner. Things like that.

    Here is an example of a good Couchrequest that I would accept, even if your reference count was low:

    Here is an example of a bad Couchrequest that I don’t even bother looking at, even if your reference count is high:

    4. Post a Public Trip

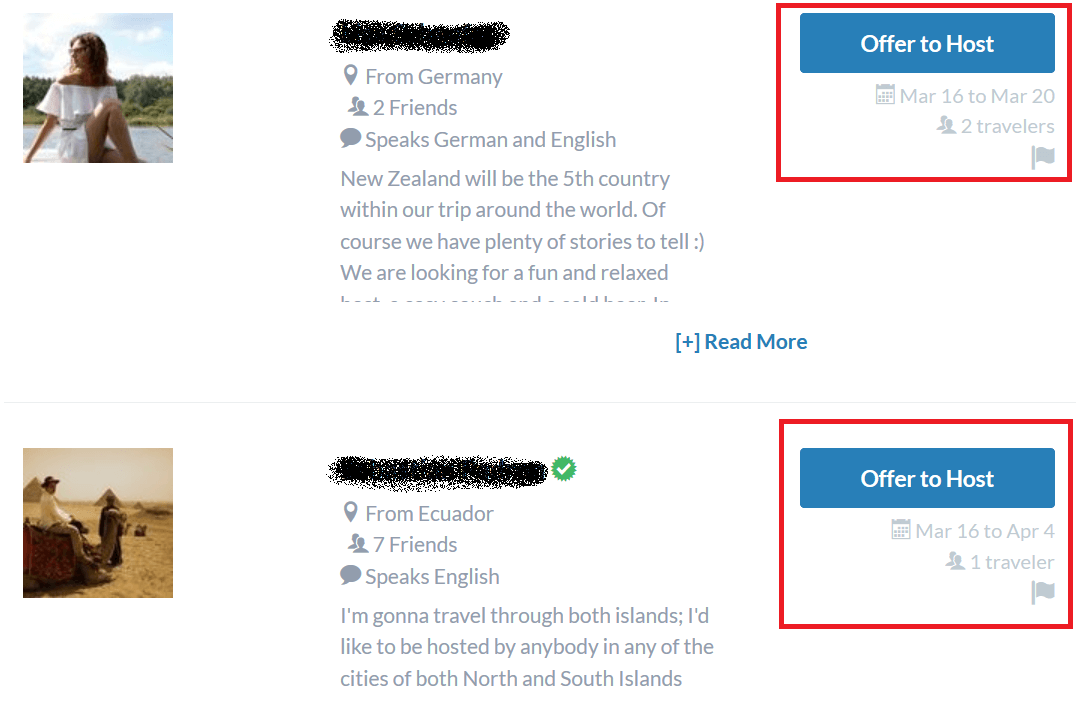
    Another way you can find hosts is by posting your travel plans. Your trip will get listed on the “public trips” list and people might offer to host you. It looks like this:

    I always thought this option was a little odd and never really use it. It’s also where most of the Couchsurfing horror stories come from (and it’s not just a problem for girls). Often it’s harmless funny stuff, but one of my guests recently told me a story that ended with him out on the street in the middle of the night after his host was left a little, errm, heartbroken. Of course this doesn’t mean you can’t find a host through this function, but I prefer to keep my trips private and choose my hosts.

    4. Arrange your stay!


    A post shared by Bren (@brenontheroad) on


    As I said earlier, you should send out multiple requests. At least five, but I find that closer to ten is better. In some places you’ll send just one or two and get accepted (woo Norway) and in some cities you might send twenty five and not even get a response (looking at you Stockholm). So just send as many as you have time for to give yourself the best chance of finding someone.

    If someone does accept you, simply get their details and make arrangements for your arrival.

    5. Follow the rules


    A post shared by Bren (@brenontheroad) on


    There are a few “unwritten” rules when you Couchsurf.

    1. Surfers are expected to give back. Despite Couchsurfing being constantly described as a “free accommodation” website, this is not what it is. Surfers might not pay anything in monetary terms, but they are certainly expected to offer back in other ways. One of the most popular ways is paying for food and cooking for your host, helping with the housework, and maybe even teaching your host something cool that you’re good at. The idea is to make life easier for them while you’re around, not harder.
    2. Be an engaged guest (and host). It’s as much about cultural exchange as it is about finding a place to sleep. It’s expected that hosts will make an effort to show surfers around, and that surfers will be engaging guests and not just put their headphones on and hide in their rooms. If that’s what you want to do that’s cool – just stay in a hostel.
    3. It’s not a dating site. Even though there are quite a few stories of Couchsurfing couples and marriages and babies. But just keep in mind that’s not what the site is designed for.
    4. If you surf, you host. It’s not cool to be surfing hundreds of times, and never hosting anyone in return. When you’re back in your home country, try to host a few people to give back to the community.
    5. Respect your host. If you had arranged to stay for 3 nights, stay for 3 nights. Don’t loiter and put them in the uncomfortable position of kicking you out. Clean up after yourself. Keep your area of the house tidy (I’m bad at this). Don’t treat it like a hotel. Don’t treat it like your own house. Treat it like the home of a very important person who is doing you a very big favour.

    6. Leave a reference!

    References are in many ways the currency of Couchsurfing. They’re the stripes that let people know you’re active and giving to the community. If a host has taken you into their home and been good to you, leave them a good reference (and if they’ve been a schmuck you should leave a bad one). Much of the site relies on the reference system to function (after all, we’re all strangers), so it’s important to do your bit to keep the community safe.


    Meetups and events

    Another (and probably more popular) aspect of Couchsurfing are their events, meetups and forums. As it has gone more mainstream Couchsurfing has almost become like a social network, where other travellers can connect and share travel plans and knowledge. This is useful for meeting up with other travellers in the city you’re visiting, finding hitch-hiking partners, finding someone to fill an extra spot on a group tour or road trip, or even just for asking for travel advice and ideas. If I’m in a city where I know nobody and have nothing to do I’ll usually check the events list that night for something interesting to do. Even if you don’t surf or host, you can still get involved in the community this way.

    Is it safe?

    The million dollar question.

    In my opinion, it’s actually safer than hotels and hostels. If you stay with a well referenced Couchsurfing host, you’re staying in the private home of someone that has been vetted and vouched for by a community of other travellers. And because the connection is personal, they will generally be more concerned about your well-being than any hotel receptionist. Many times I’ve gotten lost and I’ve had my host on the phone giving me personal directions, or even coming out to pick me up. When’s the last time a hotel did that for you? (without charging you a million dollars and three human souls).

    Your belongings will be a lot safer too. In a Couchsurfer’s home you’re staying with one stranger. In a hostel or hotel you’re with hundreds of strangers. Things get stolen out of hotel rooms all the time. Much rarer in the home of an experienced Couchsurfer.

    And probably the biggest reason that the community is so safe is because of who we are. We’re travellers. And you probably need to be a traveller at heart to understand why this community works. I don’t think I know a single friend from home who would ever try this. It’s bizarre to them. But it makes perfect sense to me, and the thousands of other active members. Couchsurfing takes a lot of time and energy to be involved in and there is no money to be made here. The members are involved for the love of the people and the community and nothing else. That’s the easiest kind of stranger to trust.

    In the end Couchsurfing requires the same common sense that the rest of travel requires. Of course there are incidents, but no more common than incidents in any other aspect of travel. Do your homework, use your instincts, trust good and kind people, and everything should be fine.


    Get started

    Just head over to the website and sign up for a free account. You’ll then need to set up your profile, and start making arrangements to host or surf. You can also attend the events and join trips to get involved. How much you get (or don’t get) out of the community is totally up to you.

    See you there.

    Bren

    P.S. If you’re new to Couchsurfing and there is something you’re unsure about – like whether a host looks trustworthy or what the protocol might be in some weird situation, feel free to contact me (or another experienced Couchsurfer) and I’ll try to help you out. This is a friendly community and we’re all here to look after each other!


    What is Couchsurfing? Get free accommodation, travel advice, events and travel buddies with backpacking's coolest community. Bren tells you everything you need to know.
  • 29 Ways To Travel Europe On A Budget

    29 Ways To Travel Europe On A Budget

    If you’re looking to start a backpacking career, there probably is no better place than Europe. It’s safe(ish), there’s a common currency, it is super easy to get around, most people speak English, there are so many countries, it’s packed with history and famous sights and the backpacking culture is booming.

    Only one problem – money.

    Europe is expensive. But if you are smart, and you look in the right places, it’s possible to do it on the cheap. When I shared my numbers with you last year, many of you were surprised at how little it cost me. Truthfully I could have done it a lot cheaper (shoulda coulda schmoulda) if I’d had a little more discipline. Europe is one of the most travellable (is that a word?) regions in the world and there’s no reason you should miss out as a budget traveller. If you want to see the historic continent, follow my tips below and money should never be an obstacle.

    1. Sleep free with Couchsurfing


    A post shared by Bren (@brenontheroad) on


    I’ve said it so many times already but I need to stress how beneficial it is to be active in Couchsurfing. If you’re interested in budget travel this is your secret weapon. Not only does it allow you to save thousands and thousands of dollars, it also gives you access to a community of budget travellers just like yourself who will know all the best ways and places to save money. Go to the events, find travel buddies, meet local people who can educate you about the city. It’s a no brainer.

    I Couchsurfed for over 50 nights on my last trip to Europe and many of the people I met were really influential in how my trip turned out. How do you get to stay in a luxury cabin in the Norweigian wilderness for free or get invited to parties on Finnish islands? Couchsurfing.

    How does it work? It’s like a cross between Facebook and Airbnb. Travellers create profiles and other travellers offer to host them whenever they’re in their home country. Couches and beds are always offered free of charge and no money ever changes hands. It is simply a community of travellers helping out travellers.

    If you’re new to Couchsurfing, check out my beginner’s guide Couchsurfing 101: Everything You Need To Know.

    2. Try hitch-hiking


    A post shared by Bren (@brenontheroad) on


    Hitch-hiking is pretty common in Europe and can add quite an interesting twist to your travels. Bonus: It’s free. Some places will be harder to hitch than others, but in most countries you can at least give it a try! There is a pretty comprehensive section on hitching in my guide Triple Your Travel, but here are a few tips to get you started:

    • Try to avoid hitching at night
    • Always have a back up plan (in case you don’t get a ride, it rains etc)
    • If you sense something is off, don’t get in the car!
    • If you’re a newbie try to hitch in pairs (Couchsurfing is a good place to find hitching buddies).
    • Check the hitching situation and choose a good pick-up spot (Hitchwiki is an awesome resource for this).

    If you’re interested, the recap of my hitch through the Baltics will give you a decent look of what a typical hitch hike looks like.

    3. Sign up for Bla Bla Car

    Bla bla car is a ride-sharing website where you can book a seat in someone’s car for a small price. For example, if somebody is driving from Paris to Madrid, they can list their spare seats on Bla bla car and earn a little gas money, while giving others a cheaper way to get between places. I know many Europeans who rely on this regularly to get around the continent.

    The price depends on the driver, but it’s always reasonable. You can click here to sign up for a free account!

    4. Eat from supermarkets


    A post shared by Bren (@brenontheroad) on


    Some people might consider it normal to spend upwards of 30 euros per day on food, but even in places like Norway and Switzerland, you can feed yourself comfortably for 5 euros if you shop at the supermarket. And that doesn’t mean you’ll need to survive on chewing gum and black tea. If you buy a loaf of bread, the cheaper vegetables and cheaper fruits, maybe some yogurt – that will get you through the day pretty comfortably and won’t bankrupt you. I did this in Zurich and for about 6 euros got more food than I could eat in a day. If possible try and shop at the budget supermarkets like Lidl and Aldi – there are also quite a few Chinese/Turkish fruit and vege shops around which will be even cheaper.

    5. Shop at the local markets


    A post shared by Bren (@brenontheroad) on


    Sunday markets and farmer’s markets are legendary budget travel allies. Even in the notoriously expensive Nordic countries you can get fruit and vegetables for 2-3 euros per kg. The cool thing about Europe is it’s actually really common to find fruit and vege sellers on the street, and they’re usually just in local plazas and shopping areas, rather than off in some random farm outside the city. In Finland, which is definitely not a cheap country, I packed up a huge bag of vegetables at one market stall and it only ran me about 4 euros. That’s almost lower than Asia prices.

    6. Dumpster dive


    A post shared by Bren (@brenontheroad) on


    If you’re up for it, try a dumpster dive. I know it sounds gnarly but I did it a couple of times in Norway and it’s actually pretty awesome. Countries like Norway and Denmark have insane food standards and the amount of food getting thrown out every day is crazy. In Copenhagen the lady at my hostel went through the fridges every morning (there were about 10 small fridges – it was a big hostel) and by law she had to throw out any food that guests hadn’t labelled. I watched her literally fill up 2 garbage bags of good and fresh food each morning and throw it out. I’m talking yogurt, chocolate, salami, bread, biscuits, fruit, cheese, vegetables – all of it probably bought in the last few days. The dumpsters behind that hostel would have been dumpster diver heaven.

    7. Share food costs


    A post shared by Bren (@brenontheroad) on


    If you have a bunch of friends at your hostel, cook a dinner together. For 10-15 euros you can get a crapload of food and cook up a pretty big feast and split between 3 or 4 people makes it super cheap as well. I do this quite often and it’s a good way to save money and make a few new friends.

    8. Get the leftovers

    Head to shops that pre-package food (eg. sushi, sandwiches) just before closing and see if they have any specials. Sometimes they’ll just give you the food for free. Fruit and vegetable markets are also good for this.

    Too Good To Go is an app designed for this and allows restaurants to offer their leftover food for super low prices. I used it a couple of times in Denmark and thought it was pretty good. Click here to check it out.

    9. Use buses!


    A post shared by Bren (@brenontheroad) on


    In a lot of countries travelling by bus was my first preference. It was just as comfortable as trains, and cheaper, and often they run overnight so you save a night on accommodation too. You also have no trouble booking them last minute, even just half an hour before they leave.

    I was recommended Flix Bus by quite a few travellers and used them exclusively. In fact I was just chilling in the hostel lounge when an Aussie girl suggested them to me, I downloaded their app right there and booked a ticket for that night on the spot. It was done within five minutes! Super easy. Their buses also have wifi, are comfortable and always ran on time. If you’re lucky you might catch some of their 5 euro special tickets which go on sale pretty often. You can visit their site and download their app here.

    Megabus is also a good cheap option if you’re travelling in/out of the UK. I’ve never ridden with them but they are owned by Flix (or the other way around, not sure) and I assume the service is similar. If you book early you can get 1 pound tickets between cities – not bad!

    10. Get a Eurail Pass (maybe)


    A post shared by Bren (@brenontheroad) on


    A lot of people like to use the Eurail pass but I find it to be quite expensive. I found using Flix bus or Bla Bla Car was usually a lot cheaper and easier to figure out too. Plus it’s more suited to travelling last minute (by last minute I mean travelling without fixed plans, and booking just a few days or a week before). The only downside is the travel time is longer, but if the bus is overnight that doesn’t worry me anyway.

    The thing with the Eurail passes is you need to have a large chunk of your trip planned out to determine whether it’s going to be worth the money. They’re not cheap (around 300+ euro for a 5 trip pass), and even then you still need to pay on top of that for some trains. If you tend to plan as you go, which I would recommend for a longer trip around Europe, it would be much easier to just take the cheapest bus/train/car/flight whenever you’re ready to move. The Eurail pass also has a lot of other rules and conditions. They’re not particularly complicated but it can be annoying to be constantly researching and reading what you’re allowed to do in each country. Put it this way – I’ve never heard anyone with a Eurail pass say “The Eurail pass is so amazing and so easy to understand I love it.”

    My advice is to only buy one if you’re 100% certain you’re going to save money with it. That will require you to do quite a bit of forward planning and reading about how the passes work, but if you end up saving a few hundred euros it will probably be worth it. You can check out the different passes here.

    11. Fly Budget Airines

    Flying around Europe is not expensive and you can find a lot of cheap flights to all corners of the continent. The kicker is you’re going to get charged pretty hefty baggage fees on most budget airlines (usually more than the cost of your ticket), so if you’ve got check-in luggage with you it becomes less cheap. It can still work out very affordable though, and you can usually get from the east to the west or the north to the south for less than 100 euro. If you’re going really long distances (say, Spain to Finland) I’d definitely recommend flying – you won’t save too much travelling big distances like that overland.

    There are a ton of budget airlines operating in Europe now so fares are always competitive. Ryanair, Wizzair, Norwegian, vueling and Easyjet are just a few of the options available. Shop around! You can use my cheap flying guide to learn how to find the best tickets.

    12. Check all your options!

    Between the buses, trains, ferries and planes, it can be hard to stay on top of all the transportation options. One site I’ve found super helpful is Omio, which summarises all the trains, buses and flights between two destinations, and you can book your tickets through them too. It’s built specifically for Europe making it the ideal tool for your Eurotrip. Sites like this will save you a lot of time checking all the different bus and train websites to compare prices, especially in a place like Europe where there are so many options. I’d recommend keeping an app like this on your phone during your trip through the continent.

    13. Shop at second hand stores


    A post shared by Bren (@brenontheroad) on


    These are super popular around Europe and you will find a ton of good stuff in them. After going to Europe without a jacket (duh) I found myself slowing losing parts of my body to frostbite once the winter hit. After spending an afternoon in the H&Ms and Uniqlos looking at crappy 40 euro jackets I came across a Red Cross store and bought a cool puff jacket for about 10 bucks (yeah, the one in the photo up there). Not to mention this was in the stupidly expensive Copenhagen. If you’re backpacking it’s likely your clothes are going to get abused anyway so this is the perfect way to stay geared up on the cheap.

    14. Stay flexible

    There are many last minute deals when travelling around Europe so it helps to stay flexible. If you want to get the $7 Ryanair flights and the $5 bus tickets, you need to be able to travel at odd and unexpected times. Don’t overplan your trip – keep things as open as possible to take advantage of these deals. It’s also important to keep checking – ticket prices change daily.

    15. Travel off-season (or don’t)


    A post shared by Bren (@brenontheroad) on


    This is mixed advice because off-season will give you cheaper buses, trains, hostels (basically cheaper everything) but it is also going to be FREAKING COLD. I only lasted until November until I had to skip to Asia because my nose was going to fall off.

    I also was in Europe during the summer peak season, and other than some hostels being booked out I didn’t experience any problems. My transport was probably more expensive but as I hitch hiked and Couchsurfed I managed to keep most of my costs down.

    One other thing to keep in mind is that a lot of Europeans are on holiday during summer, so it can mean a lot of things are closed, especially in Spain and France.

    If you don’t mind the winter, travelling during off season (October to April) will definitely save you money, but Europe is still great during the summer and you can still do it on a budget without too many problems.

    16. Don’t overtip

    Contrary to what many think, tipping is not compulsory in Europe. If you are happy with the service you can round up the bill or leave an extra 5% if you want to, but it’s definitely not like America where you need to leave 15%+ every time to avoid getting thrown through a window. I actually remember tipping my cocktail waiter just over 10% in Zurich and his eyes popped out of his head. “You must be American” he says to me. He was actually just an awesome waiter.

    It’s also pretty standard to have 10%-15% service charges included in your prices at cafes and restaurants (check the menu), so don’t feel bad for just leaving a couple of coins, or nothing at all.

    17. Check out the tourists passes


    A post shared by Bren (@brenontheroad) on


    These might be a good investment for you if you’re the kind of person that visits a lot of tourist attractions. A tourist pass is basically a multi-purpose ticket that allows you free entry into most of the city’s major attractions, and usually allows you free use of public transport too. Some of them even let you queue jump at the big attractions. After waiting in line for the Eiffel Tower for what felt like three lunar cycles, I started to realise why tourist passes might be a good idea, even if they don’t save you money.

    I’ve looked at the tourist pass in almost every capital city I’ve been to and I’ve never bought one, because the numbers never worked out for me. You usually need to be visiting 2-3 museums, galleries, sights per day for them to be worth it, and I normally visit 1 or 2 in a week. If you’re super into sightseeing though it might be worth it. Check them out. Here are a few examples:

    London Pass | Paris Pass | Berlin Pass

    18. Walk!


    A post shared by Bren (@brenontheroad) on


    A lot of Europe’s major cities are walkable. Stockholm, Zurich, Lisbon, Paris, Copenhagen are all good examples. If it’s less than half an hour from point to point I generally try to walk, especially in the cities in northern and western Europe where public transport is quite expensive.

    Some capitals like Berlin are really spread out and you’ll probably need help to get around, but in the cities where you can save a few dollars by walking you should try to do so. It’s also a really good way to get a feel for the city’s energy, poke your head around corners you’ll never see on the subway, and will help keep you in shape too.

    If places are not walkable, there’s still no need to use taxis. Stick to public transport – it’s great in most major European cities. Uber also operates in most countries in Europe, which is usually a lot cheaper than a taxi, and even if Uber isn’t operational there’s probably an Uber-like app to help you get around.

    19. Rent a bike (maybe)

    Some people recommend renting bikes in the bigger cities. I’m not sure why this is, because usually this costs around 10-12 euros per day and for that amount (or sometimes cheaper) you can usually get a subway day pass. If you hunt around you might get a bike for 8 euros but even then it won’t be much cheaper than a 24 hour pass on public transport. Add on the time and energy you spend actually riding and looking after the damn thing and it doesn’t seem like a very good deal.

    If, however, you just really enjoy riding bikes, or there are some places hidden in hard-to-reach pockets of the city that you’re planning on visiting, then it might be worthwhile. From a saving money perspective though I never found it to be a good choice.

    The one time I did rent a bike was in Copenhagen, when a Couchsurfer recommended this pretty cool rent-a-bike system – basically you register your credit card with them and then just take the bikes from the many stands around the city. The bikes all had iPads on them where you could just type in your destination and it would show you the way – it also had maps to all the destinations. I used it to ride from my hostel to Christiania and it was pretty rad. However, it wasn’t that cheap – around 3 euros an hour. A lot of countries have similar systems though as the continent becomes green conscious, so finding a bike should never be difficult.

    20. Buy sim cards


    A post shared by Bren (@brenontheroad) on


    There’s no need to roam in Europe. You can buy cheap prepaid sim cards in most countries and internet data is generally inexpensive. Even in Finland it was only 1 euro per day for unlimited internet, and in Sweden I got by on just using the free wifi around the place. Eastern Europe has some of the fastest wifi in the world. You shouldn’t have any trouble staying connected for cheap.

    21. Stay entertained for free


    A post shared by Bren (@brenontheroad) on


    If you don’t have the budget to be visiting expensive sights, know that there are countless free things to do in Europe that are just as cool. Usually Google or Facebook are good resources for simply searching “Free things to do in X” and you’ll be have more than enough to keep you busy every night of the week. Art exhibitions, open mic nights, free concerts, markets and festivals are all interesting things you can check out that won’t cost you anything. One of my favourite things in all of Europe was the Mauerpark karaoke at the outdoor auditorium in Berlin, which is hilarious and is free every Sunday in summer (the photo up there is a dude singing a love song to his wife on her birthday. Aww).

    If you look in the right places you’ll find expensive sightseeing is a choice, not a necessity, to see an authentic side of Europe.

    22. Workaway

    If you haven’t heard of Workaway, it’s a work-exchange programme where you offer a few hours of work each day for free room and board. It’s a good resource for backpackers trying to save a bit of money or lay low for a while to recover. It’s also a really good opportunity to learn some new skills, as many hosts will be willing to teach you the skills you need to help them with their projects (it might be building a fence, training dogs, cooking etc).

    Workaway is hugely popular in Europe and you will find hundreds if not thousands of opportunities in every country on the continent. I actually had a Workaway account during my last Eurotrip although I was a little too fussy and didn’t manage to get placed. Lots of really cool opportunities though.

    23. Buy travel insurance


    A post shared by Bren (@brenontheroad) on


    Make sure you buy travel insurance! As a budget traveller it’s doubly important to have coverage, as so many different things can go wrong when you travel indie style. Injuries, accidents, stolen bags etc are very common. In my Berlin hostel we had a situation where a (very expensive) laptop and a camera were stolen out of the lockers on the same night. I also had a pretty close call in Norway where I busted my ankle pretty badly out in the wilderness, and one inch to the left or right could have meant I was getting stretchered out of there. Travel insurance only costs a couple of dollars a day so be smart and get it.

    I buy my travel insurance with World Nomads, who offer really affordable coverage for Europe. You can read my guide on buying travel insurance for a more detailed breakdown on how it works and why you need it.

    Disclaimer: World Nomads provides travel insurance for travelers in over 100 countries. As an affiliate, we receive a fee when you get a quote from World Nomads using this link. We do not represent World Nomads. This is information only and not a recommendation to buy travel insurance.

    24. Hostels please


    A post shared by Bren (@brenontheroad) on


    Hostelling is unparalleled in Europe and you will find tons of trendy hostels in the major cities. As hostels have modernised I’ve also noticed more families renting out rooms now and it’s not uncommon to have kids running around the hostel lounges, along with err, more “senior” tour groups and older travellers. But of course this all comes with a bump in price. In some of the bigger hostels it won’t be uncommon to be paying up to 30 or 40 euros for a dorm bed, especially on the weekends. I always like to try and support the smaller hostels, which are usually cheaper and more homely too. And you’ll still find a lot of hip and trendy places to stay in the lower price range. That photo up there is from the lounge in my Lisbon hostel – that’s nicer than my own house.

    You can use Hostelworld to sort through all the options and find a place that suits.

    25. Airbnb is cheaper than hotels

    Airbnb has made a few waves. In some of the bigger cities, it’s almost impossible to find long-lease apartments – many landlords have decided to put their places on Airbnb instead as they tend to earn quite a bit more money that way. Of course this is bad news for locals but it means travellers have more accommodation options than ever before. In most parts of Europe you’ll probably be able to rent private rooms on Airbnb for half the price of a hotel and also entire apartments if that’s what you’re after. I’ve used Airbnb all over the world and it’s always been great. Between Couchsurfing, hostels, and Airbnb, you should never have trouble finding affordable places to sleep.

    If you haven’t used Airbnb before, you can get $25 off your first Airbnb stay using my link.

    26. Be smart with your currency

    Depending on the length of your trip you could end up paying a small fortune in bank fees if you’re not prepared. If you’re American the solution is easy – just get a Charles Schwab card – it has no ATM fees anywhere in the world. For the rest of us, it’s a little more complicated.

    I like to just take the maximum withdrawal from an ATM (usually a thousand euros), and just live off that for as long as possible. Usually one withdrawal will last me a whole month, so taking the fee hit isn’t too painful. However, my plan was obliterated in Sweden when my cash was refused (not a typo). I had real Swedish kroners in my hand and they wouldn’t accept it – they wanted a credit card. In light of these bizarre events I now think it might be a good idea to get a travel debit card for longer trips in Europe (ask your bank).

    Also if you’re dealing with cash, try and exchange your currency with other travellers where possible. People are arriving and leaving from hostels every day so it’s usually not hard to find someone going to where you’ve just come from. There are no fees and you both can receive the fair rate. You might not always have the right change, but I’ll always choose to lose a few kroners or euros to a fellow traveller rather than a smelly bank.

    27. Free museum days


    History lessons at the Uprising Museum in #Warsaw. Free on Sundays.

    A post shared by Bren (@brenontheroad) on


    If you’re visiting in winter (and summer for some cities) there are free museum days in most major cities. Usually it’s the first Sunday of the month, but some cities have it on Tuesdays or whatever other day they’ve chosen. Just visit the tourist information centre, Google it, or ask at your hostel reception. They will know. This will save you quite a lot of money as some of those big-time museums aren’t cheap to get into.

    28. Free walking tours

    Most cities have free walking tours every day. These are run on a donation basis so it’s nice to give a few euros at the end, but if you want to be that guy who walks off without giving anything nobody will arrest you. You’ll just get bad karma and everyone will give you Monopoly money on your wedding day.

    I’ve done free walking tours in Sofia, Plovdiv, Tallinn, Warsaw, maybe a few other places that I don’t remember. If I’m being honest I don’t actually enjoy them much but they are a pretty good way to learn a few interesting things about the city. They usually focus heavily on the history of the city so if that interests you definitely check it out. Google’s your friend.

    29. Spend your money in the east and south


    A post shared by Bren (@brenontheroad) on

    The south and the east of Europe is much cheaper than the west and the north. You will save a lot of money if you spend the bulk of your time in places like Portugal, Spain, Poland, Greece and Bulgaria, rather than Sweden, Norway, Finland, Denmark and Switzerland (here’s a great list of Europe’s more underrated countries you could visit). In the more expensive countries, try and Couchsurf and eat cheap at the supermarkets, in the cheaper countries you can maybe splash out on a private room and eat in a few restaurants. Be conscious of the difference in prices in each country and adjust your travel style to suit. This means buying clothes and supplies and doing most of your tours and activities in the cheaper countries, while spending less time and money in the more expensive ones. This is just basic good travel planning and will save you thousands of dollars if you do it right.


    That’s it! If you follow the tips above you should be able to comfortably travel through Europe on 35-45 euros per day, probably as low as 25 euros in some of the cheaper countries. Use all your options, be smart with your money, choose your destinations wisely and you’ll be able to enjoy every corner of the historic continent without going broke.

    Good luck and travel safe,

    Bren

    P.S. Got tips to add? Leave them in the comments!

    Heading to Europe? Don't miss this post. Lots of really amazing budget travel tips for keeping your costs down during your trip.

    Disclosure: This post contains affiliate links. Every link represents a product or service I have tried or used myself, and I recommend them honestly. Omio compensated me for a mention in this article. I have used their service and recommend it honestly. For further clarification, please check out my Disclosure Policy.

  • How To Take A Mini Retirement In Bangkok

    How To Take A Mini Retirement In Bangkok

    A few months ago I returned to Auckland from a five week stint in Bangkok. I decided to head to my beloved Thai capital after a few months in the European winter, which was driving me nuts. I finally understand why Southeast Asia is full of Europeans in December and why they’re all so happy.

    Anyways. Whenever I tell people “I was in wherever for two months” they always ask me, “But…what do you do there?”

    And then lots of other questions, like where do I live, and who do I eat lunch with, and all that other stuff.

    These mini stints in different cities are akin to Mini Retirements – a concept I’ve written about before. I discussed most of the common questions in that guide, but I guess if you’re new to the road it can be hard to visualise how it all comes together. So let me show how it all worked in Bangkok.

    Settling in

    I’ve been to Bangkok four or five times now, so it’s not new to me. I generally know which areas I want to live in, where to go once I land at the airport, places I like to eat and so on. So things were smooth and I was settled in a week or so.

    I stayed at the Cazz hostel for the first few days, which is reasonably far down the Sukhumvit line (Sukhumvit is kind of a snazzier central area of Bangkok, lots of malls and hotels and stuff). Since I was quite far down Sukhumvit, there weren’t too many tourists, maybe a few expats, it was pretty chilled out. It was 250 baht per night (about 7 bucks), so there wasn’t a rush to find an apartment or anything, I could’ve stayed there as long as I needed to without worrying about cash.

    After a couple of days of chilling I started to send messages around looking for condos. Facebook was a pretty good resource for this. If you “Like” any apartment condo page you’ll get suggested other ones in the sidebar like this:

    Or you can just search for Apartments in Bangkok and you’ll get a listing and a full map search too:

    There’s a whole bunch of ways you can find apartments overseas, by using Google, Airbnb, tweet some people, ask the people at your hostel and others. I talk about this process at length in my guide Triple Your Travel.

    Haven’t used Airbnb yet? You can get $25 free credit using this link.

    After messaging with a dozen or so different condos I finally found one I liked. I viewed it in the morning and moved in the next day. When I think about it now, I actually made contact, arranged the viewing and stayed in touch with my landlord my whole time in Bangkok just using Facebook chat. So it was all really easy.

    I stayed in the Thong Lor area, which is kind of a uppity expat area, and my condo was 16,000 baht for a month ($440). That’s actually pretty expensive for Bangkok. Because I was on a one-month rate, it had quite a bump to it. If I had signed a 3-6 month lease, it would’ve been closer to 10,000 baht ($275) per month.  It was pretty basic, had a little kitchen with a small stove, microwave, fridge, hot water and wifi (no oven or dishwasher). It also had cable TV and a tiny gym, if that matters to you.


    A photo posted by Bren (@brenontheroad) on

    Another cool thing about Bangkok is it’s all really straightforward, I just showed up with a big roll of cash (16,000 baht rent, 16,000 baht deposit) and gave it to her and she gave me the keys. It was particularly funny for me because half my hostel mates in Berlin a week earlier were all looking for apartments, and the landlords were all requesting interviews and police records and stuff. Some of them had been looking for months and were interviewing with three different landlords a day. It was literally taking over their lives. I didn’t dare tell them I’d found myself a pad within seven days of landing in Thailand.

    Day to day


    A post shared by Bren (@brenontheroad) on


    Once I’d found a place to stay it was time to get back to life. The typical day for me looked like this:

    11:00 Wake up

    11:30 Cook breakfast

    12:00 Do some yoga, stretching, work out

    1:00 Sit around, listen to music, procrastinate

    2:00 Go eat some noodles (60 baht/$1.70). Read a little. Procrastinate.

    3:00 Go to a coffee shop (usually Domus Bakery & Cafe) and work. Usually I’ll get a matcha (65 baht/$1.80) and sometimes I’ll eat dinner there too if I’m hungry (95 baht/$2.60).

    7:00 Domus closes. Go to Dala Thonglor and get a massage (249 baht/$7). No website to show you, but it’s on Sukhumvit Soi 55 somewhere.

    8:30 Go to Soi 38 street food, eat dinner (150-ish baht/$4).

    9:30 Go home, work or read. Sleep whenever.

    And that was pretty much life in Bangkok for a month.

    Other stuff

    Sometimes I would go to the Couchsurfing meeting on Wednesdays, I met some other expats there and hung out with them quite a lot. They also knew about some other expat parties which we went to on the weekends. But quite often I would also eat alone or just walk around alone.

    I spent a few nights down at Q23 Academy which is a martial arts gym in Nana. I didn’t really get to spend any significant time there but if I were staying in town longer I would’ve joined and been a regular there.


    A photo posted by Bren (@brenontheroad) on

    When the UFC was on I’d head down to The Sportsman to watch the fights.


    A photo posted by Bren (@brenontheroad) on

    Because I was on a tourist visa I had to extend it beyond the given 30 days, it was pretty straightforward – I followed this guide by my buddy James at Nomadic Notes.

    Grocery shopping is really easy and there are supermarkets everywhere. For things like fruit I would just buy it on the roadside, for things like milk and eggs I would get it from 7 Eleven, and anything western I would need I would buy from the Villa Market not far from my place. Unless you were buying something crazy like Angus beef, nothing was expensive.

    To get around I either walked or used the Skytrain. The Skytrain costs around 15-45THB (45 cents to $1.50) one way. I also used Uber quite often at night, as Bangkok taxi drivers can be a pain to deal with sometimes.

    Haven’t tried Uber yet? Get your first ride free with this link.

    For my cellphone, I just headed to an AIS store and got set up for the month with a sim card. Took around ten minutes and was really easy. From memory it cost around 400 THB ($11).

    That’s pretty much all the housekeeping I can think of – if I’ve missed anything let me know in the comments!

    What else can you do during a Mini Retirement in Bangkok?

    Not all of you have blogs and freelance careers to work on during the day, and without something to do you’re going to get pretty bored pretty quick. Mini Retirements are all about challenges. Challenge yourself to try something new, to discover a new side of yourself, to push your comfort zones. But most importantly make sure you pursue something you enjoy. Here are a few ideas:

    Study Thai

    Why not learn another language? Thai is quite a unique language and not that difficult (not that I speak it well at all). Not to mention the schools will be super affordable compared to something like French or Italian. If you did an intensive course for a few months you’d be speaking and writing pretty well. I don’t have any schools to recommend, but I’m sure you’ll find one rather easily once you’re on the ground.

    Learn Muay Thai/Thai Boxing

    There are countless Muay Thai gyms in Thailand and they’re usually quite affordable – maybe 3,000-4,000THB per month ($85-$115) and you can train every day. I’ve done a one month intensive camp before in the Philippines and it was one of the best experiences of my life – got in shape, learned tons, met lots of cool people, got punched in the face, punched other people in the face, but most of all it took me out of my comfort zone and pushed my limits. I’ve also had a few readers head to the same gym to do the same thing and they all loved it. Martial arts is a great way to not only physically test yourself but also mentally and spiritually.

    Learn To Dive

    Spend a few weeks diving, get your certificate and then get a douchey GoPro and post lots of cool Instagram photos and make all your friends jealous. You can actually make a small career out of diving if you love it enough, and a lot of travellers choose Thailand as the place to get their stripes. Maybe you’ll leave Thailand a newly minted waterman? Of course you’ll need to head out of Bangkok for this.

    Volunteer

    Volunteering is always a good way to get involved in the local culture and give something back to your adopted country. You could work with vulnerable people or communities, teach, work in animal care or conservation. My volunteering experience in Tanzania was life-changing and I’d recommend it to anyone.

    If this does interest you, it’s important to understand all the angles of volunteering overseas. I was quite unaware of the ethical side of volunteering when I first did it and it was quite a reality check when I had conversations with people more familiar with the subject. Shannon from A Little Adrift is active in this community and has a great website called Grassroots Volunteering – committed to providing ethical volunteering opportunities. Check it out.

    Teach

    Add a new qualification to your name with a TEFL certificate, and then get some experience teaching English to young (or old) Thais. You can get a TEFL certificate on your own and then look for your own placement, or you can have it all organised through an agency like STA Travel. Adding a few new career options to your life is never a bad thing!

    Start an online business

    If you don’t have a business to work on, start one! Bangkok would be the ideal place to start a freelancing business or a blog. You could spend half your time reading books and learning the trade, the other half building your new empire. All you need is a laptop. There are also a lot of co-working spaces in Bangkok where you could network with other expats and creatives – 63 Bangkok is my favourite.

    If you’re interested in starting a blog but don’t know where to start, I have an in-depth guide to getting started here.

    If you’re interested in learning how to monetise a blog, I have another in-depth guide to doing that here.

    If you’re interested in starting a freelance career but don’t know where to start, I also have an in-depth guide to getting started here.

    If you want to learn how to build websites that produce income, I have an in-depth guide for that too.

    And f you’d like to become a Thai supermodel but don’t know where to start, I have a guide for that too right here…

    Just kidding.

    Something else?

    These are all just ideas off the top of my head. You can spend your Mini Retirement doing whatever you want. Start a t-shirt company, become a yoga teacher, take cooking classes, learn how to do Thai massage (aka torture), record your first album, learn to dance. Your only limit is your imagination.

    Go anywhere

    While this post details my own experience in Bangkok, you can transfer the ideas and the concept to anywhere in the world. If Bangkok isn’t your kind of place, go to another city in Thailand, or go to Greece or Italy or Argentina. The same ideas apply.

    For information on the practical side of things, check out my post How To Take Your First Mini Retirement. It discusses things like what to do with your career, how to finance your Mini Retirement, more ideas on things to do, and a more detailed explanation of the concept itself. If you’ve got questions, that post should answer them.

    Safe travels,

    Bren


    Ready for your first mini retirement? Bangkok is the perfect place. Check out how to quickly and easily settle in to Thailand's amazing capital.
  • How To Find Cheap Accommodation

    How To Find Cheap Accommodation

    These days every traveller, no matter how inexperienced, has the ability to find their own accommodation. Travel agents, at least in this regard, are completely obselete. It doesn’t matter if you’re booking six months in advance, the day before your flight, or simply showing up unannounced – you can find everything you need with a few clicks of a mouse.

    When I book flights I almost always take the cheapest option, however accommodation is a little different. Cheap accommodation is great, but you need to make sure you’re getting the right accommodation for you. Some people will need something close to the airport. Some people will need lightning fast wifi. Some people need a gym.

    How do you get exactly what you’re looking for, at the best possible price? In this guide we’ll talk about my favourite resources and how to best use them when looking for a new bed.


    Agoda

    This is my first choice.

    Agoda is a hotel aggregator site which also include hostels and guesthouses, and is my favourite booking site. It has a huge selection of places worldwide and in my experience you’ll often get cheaper prices than anywhere else.

    Another cool thing about Agoda is you can pay for your whole stay through the website, so no money needs to change hands at the actual property – you can just check in and head straight to your room. I love this because you can pay via credit card in your own currency – this saves you a lot on credit card fees and also means I can keep my cash for other things (as I don’t always have a lot!)

    Agoda tips

    • When planning your trip check the site every day. The prices change often, and last minute deals pop up all the time. I’ve had up to 20-30% off just by waiting until the day before my stay to book. If you miss out, don’t worry – there’s plenty of other hotels to choose from.
    • When you book through Agoda, make sure you sign up for an account. Agoda will give you loyalty points for every night’s stay. It’s not the best program (it will cost you around $625 in bookings before you get $25 in rewards) but it doesn’t hurt to rack the points up if you’re making bookings anyway.

    You can visit Agoda and start searching for your next stay by clicking here.


    Booking.com

    Booking.com is my backup choice. In the rare event that I can’t find what I’m looking for on Agoda, I’ll take a look at Booking.com and see if I missed anything. With Booking.com you usually pay no deposit, and instead you clear your entire bill at the accommodation. A good site to keep as backup in your bookmarks.


    Couchsurfing

    Don’t want to pay for accommodation? Couchsurfing is your friend. Couchsurfing is a community of travellers, who either identify as surfers, hosts or both.

    A host is someone who offers travellers a couch to sleep on for free, and a surfer is someone who sleeps on a couch for free. It’s a very simple process – you log onto Couchsurfing, look at a bunch of hosts and then message the ones you think you’ll get along with. They’ll either accept or deny your request – if they accept, you show up to their house once you land and sleep on their couch for a few days. It’s also assumed that they’ll show you around the city and make sure you have a pleasant stay.

    Once you leave, you will write a public reference for the host on their profile, which can be either positive or negative. This will allow future surfers to see if the host is reputable or not before deciding to stay with them.

    Remember, there’s no money involved; it’s based on a goodwill system of travellers helping out other travellers.

    Couchsurfing tips

    • Try and stay with well-referenced hosts. This is especially so if you’re travelling solo and doubly so if you’re female. It’s not hard to find hosts that have 10+ positive references in almost every major city, so there’s no reason to stay with someone who doesn’t look 100% safe. There’s no need to be paranoid, just exercise basic common sense. Couchsurfing is a very safe and close community, but of course there are always gaps.
    • While you’re allowed to stay for free (Couchsurfing rules explicitly say hosts are not allowed to charge surfers), common Couchsurfing etiquette is that the surfer gives back in some way. “Free accommodation” isn’t really a good description. “Hospitality exchange” is a better one, and the exchange part goes both ways. There are many ways for surfers to contribute their part of their exchange; one of the most popular is cooking a meal, ideally something from your home country. You can also leave a souvenir, help around the house with something etc. It’s up to you.
    • If you’re unsure about a host, look at the references on their profile and then send a message to their past guests. I’ve had quite a few people message me asking about hosts I’ve stayed with and if I had a pleasant stay or not. This is a really easy way to do a “background check” on your host and give you some peace of mind. Some people have been known to set up fake references for themselves, although I things like this are rare.

    You can set up a free Couchsurfing profile by clicking here


    TripAdvisor

    Small hotels, guesthouses, and family run B&B’s simply cannot afford to be on Agoda or any of those big websites. Where you will find them is on TripAdvisor. This is perfect, because they’ll have reviews from past guests and you’ll be able to sort through them by review score to find the best one. I’ve found it to be a great resource for lesser travelled countries, especially in Africa. Another good resource to find such accommodation is on Wikitravel.

    TripAdvisor tips

    • Accuracy of reviews is far lower on TripAdvisor than it is on Agoda or Booking.com. Many owners of these guesthouses ask their friends, family and preferred guests to write reviews for them, meaning 5 star reviews are easy to come by. By contrast on Agoda, only guests that have actually paid for a night at the hotel can write a review for it, meaning reviews are mostly honest and accurate.
    • Negotiate! Small accommodations on TripAdvisor will normally point you to their website, where they will have rack rates that are inflated somewhat. Send them emails and bargain them down, and drop subtle hints that you’re looking at other guesthouses in the area. You’ll often be emailing directly with the owner, rather than a hotel receptionist who couldn’t care less about whether you stay or not, so your chances of getting a discount are good.

    Apartments

    When staying somewhere longer term (2 weeks+) I like to look for an apartment.

    AirBnB is the industry favourite right now. This is a sharing economy website where local people list their rooms/apartments for rent. This makes it possible to rent regular apartments for just a few days in a foreign city, which is really convenient and a lot more comfortable/interesting than a hotel. Prices are decent and this can be a great option for cities where hotels are known to be expensive (e.g. Hong Kong, Tokyo). You can also try Wimdu, Roomorama and Flipkey.

    For a more in-depth breakdown of Airbnb tips, check out my article here.

    If you’re new to Airbnb, you can also get $25 of free credit using this link.


    Other tips for finding the right accommodation:

    Location is everything

    Depending on where you’re going, transport has the ability to really dent your wallet. For example, in my hometown of Auckland, even public transport will cost you between $3-$5 to get into town and a taxi will cost you around $10 just for a 5 minute ride. At those prices, staying in the wrong part of town can really end up hurting your wallet.

    Before you book your accommodation, decide what you’re likely to do in the city. Are you going for the nightlife? Stay close to the bars and clubs. Beach? Stay within walking distance. Just overnighting? Stay near the airport.

    Almost every website above has a map function. Use it!

    Never pay the rack rate

    If you are going to stay in a hotel, don’t pay the rack rate. The rack rate is always inflated. I don’t know why they do this but they just do. The websites above will be cheaper than rack rates most of the time. There’s been several times where I’ve wanted to extend my stay and reception will only allow me to do it for the rack rate. I’ve literally stood at reception and booked extra nights on Agoda, and then waited for it to come through their system so she can add it to my room. Sounds silly but it happens.

    Negotiate rates for longer stays

    If you’re staying more than a week you should have a good chance of negotiating a better rate. This has worked best for me with little hotels and guesthouses, but I’ve heard of people having success with this at big hotel chains too. With smaller places, it helps if you have the money on you and/or offer to pay in advance. When you flash a big stack of cash it can be hard for the owner to turn it down.

    Be nice!

    There have been many times when I’ve been upgraded for no reason at all. Whenever I check-in, especially if it’s quiet, I always make a huge effort to be as chatty as possible with the person at reception. Smile, and be friendly, say nice things about the country and ask funny questions. If they have a name-tag, greet them by their first name. And then don’t be surprised if they hand you your keys and say “Enjoy your stay Sir, I’ve upgraded you to Deluxe!”

    Why does this happen? I’m not quite sure. I’ve noticed it often happens when I check in very late, presumably because at this time they know what their occupancy is for the night and what rooms they can give away for free. Also, I notice it happens when reception isn’t busy, probably because the hotel is half empty and they have a lot of spare rooms.

    Lesson here?

    Book the less popular hotels and new hotels, as they’re usually not as busy as the popular chains. But really, just be nice. The people at reception have the power to give free upgrades, so if they like you you’ll probably get one.

    Check the hostel or hotel’s direct website

    One last tip. Before you book, make sure you check the website of the actual hostel/hotel. To do this, simply Google the hotel’s name and their direct website should come up. Sometimes (but rarely) the price will be cheaper if you book direct.


    Making your booking

    Here’s a quick example of the process you might go through when booking your hotel. As an example, we’ll use a hotel I’ve actually stayed at before – Skyy Hotel in Bangkok. These guys actually gave me a free upgrade when I stayed with them, so I’m going to give them this free plug on my blog 🙂

    Let’s go for two nights on April 1-3. The process is pretty simple, just search on each of the booking sites and see who is the cheapest.

    Price on Agoda:

    Notice the small print that I’ve circled in red. Make sure you check that it in fact includes all taxes and service charges.

    Price on Hotels.com:

    Price on Booking.com:

    Price on Skyy Hotel’s website:

    One final check I would do is contact the hotel directly. Simply send them an email along the lines of “Hi, I’m coming to Bangkok soon and came across your hotel on Agoda/TripAdvisor etc. Your hotel looks perfect but I noticed your rates are a bit higher than others in the area. Is that the best rate you have available or can you offer something a little better? Thanks!”

    Depending on the place you can get quite favourable responses doing this.

    So our available prices are:

    Agoda: 3,168 THB
    Hotels.com: 3,419 THB
    Booking.com: 3,360 THB
    Hotel’s website: 3,360 THB

    So the decision here is pretty easy: book with Agoda (unless they offer you a cheaper rate via email). You’ll get the cheapest price and also the Agoda reward points to put towards a free room later on.

    Also note you can continue to check as many hotel booking sites as you wish, but I generally stick with the ones listed above.


    There it is. Hopefully this guide should be everything you need for finding accommodation on your next trip. If you’re looking for something a little more unconventional, you can also check out my post 16 Ways To Travel The World For Free. There are a lot of accommodation options available, many of them free, that will suit the more adventurous traveller.

    Happy travels!


  • Everything You Need To Know About Buying Travel Insurance

    Everything You Need To Know About Buying Travel Insurance

    Note: I have a specialised guide on travel insurance for New Zealand travellers. If you’re a Kiwi, click here.

    Travel insurance: It’s like the washing dishes of travel. Nobody wants to think about it, but sooner or later you just gotta get it done.

    Today I’m going to break this topic down for you so you’ll know exactly what kind of coverage you should have and why you need it. There are many different policies and providers, but if you know what you’re looking for travel insurance is actually really simple. By the end of this post, you shouldn’t need to spend more than ten or fifteen minutes sorting out insurance for your next trip (yes, it is that easy).

    What is travel insurance?

    It’s exactly what it sounds like – protection for your trip. Just like you get car insurance for your car, and house insurance for your house, you can get travel insurance for your travels. Whether it’s theft, injury, natural disasters, or any other crazy travel damper, travel insurance will have you covered for any physical or financial loss.

    Why do you need it? An example…

    Lots of things go wrong when you travel. And even if things don’t actually go wrong, things always have the potential to go wrong. Here’s an example:

    Let’s imagine you’re in the Philippines and you decide to go sand boarding. It looks like so much fun. Once your tour group gets to the dunes, your guide says, “Whatever you do, don’t put your hands out!”

    Yeah okay, sure, I won’t put my hands out.

    You run up the dune and look down at this enormous sand mountain you’re about to conquer. Ready. You lie on the board, take a deep breath and…go. Ohhhh yeah. This is cool. Then you start picking up speed. Whooshhhhhh. And then even faster. You’re zooming! And now you’re freaking out. Please don’t get any faster. But the laws of physics can’t hear you. You’re flying now. Seriously, you can feel the centrifugal force in your brain. This is too fast, you’re going to die, you need to slow down. Without thinking, you put your hand out. CRACKKK. Your wrist jars in the sand and you somersault into the air. That was your wrist breaking. OH MY GOD WHY AM I IN SO MUCH PAIN. You land hard. Another crack. That was your shoulder. I’M GOING TO DIE. You’re lying in the sand crying, your arm flopping around like a noodle.

    You’re taken into surgery to repair your wrist and your shoulder. The surgery was successful, but they’re going to hold you for three days. Your hospital bill is $12,000.

    If you have travel insurance, you’ll simply call your insurance company after the accident. A good insurance provider will not only pay for everything, but also make sure you’re in a reputable hospital getting the right treatment, that the changes to any travel plans are sorted and so on. You’ll pay a small deductible, maybe $100. They’ll pick up the tab for the other $11,900, plus all the subsequent changes to your flights/accommodation that are needed. If you require medical evacuation to a different city or country, they’ll take care of that too.

    How travel insurance has helped me

    You might be surprised to hear, that story above is actually a true story (one of many!) I’ve heard on the road. I’ve just dramatised it a little bit (okay I dramatised it a lot). But here are a few instances where travel insurance has worked for me, too:

    • While I was living in China, I used to buy these bananas on the way home from class. And every night after eating them, I’d feel like something was blocking my throat. After a few weeks, I decided I had better see someone. I went to an international clinic, one of the best in Shanghai, and saw the throat specialist there. She was a German lady with a whole bunch of fancy letters after her name. She stuck a thin tube up my nose, with a camera on the end, and then fed it through my nasal passage and down into my throat (yes, it was uncomfortable). The camera was linked to the monitors in the room, so as she wiggled the tube around I could actually see inside my throat on the big screen TV in front of me. And then she said, “As you can see, there is absolutely nothing in your throat, it’s not infected or inflamed, it looks perfectly fine!” From memory, this elaborate treatment cost around $600, and my insurance company picked up the tab.
    • I had just landed in Kenya, and was about to start my three month journey through East Africa. Two days after I landed, I received a message from my brother on Facebook. My grandmother had just passed. I was thirty hours away from home, but of course there was no way I was going to miss my grandma’s funeral, which was in just a few days. The last minute flight home was around $1,100. Travel insurance agreed to pick up the bill.

    Insurance works.

    What things should you look for in your coverage?

    When choosing a policy it is essential that you understand the terms. Here’s what you need to look for. I’ll divide this into three groups: (1) Absolutely Essential, (2) Important, and (3) Everything else.

    Absolutely essential:

    • Accident and sickness medical: This includes hospital and specialist care, dental care, surgery, post injury care, ambulances, and medical evacuation. I would look for coverage of at least $100,000 (a simple surgery in many countries can cost up to $20,000).Travellers from some countries (such as Australia and New Zealand) will be able to find coverage of up to a million dollars. While you’ll probably never need this it’s nice to have!
    • Emergency medical: This relates to times where you’re stuck on a mountain or in the jungle, or in a country that doesn’t have appropriate medical facilities to treat you. It should include emergency evacuation by plane or helicopter. As you might guess, this is expensive.I’d recommend coverage of at least $300,000-$400,000. It should also cover transport of your remains home in the event of your death (this is important – it will be very expensive for your family to fund this). Again, in some countries it’ll be standard to get up to a million dollars of coverage – maybe a little overkill but nice to have.
    • Personal liability: This covers situations where you’ve caused damage to people or property and are at risk of being sued. This will cover your legal fees and any compensation you’re required to pay. Look for cover of at least $500,000.

    Other important things:

    These things are not life-or-death, but will still be important to have.

    • Trip cancellation: If your trip is cancelled for any reason (you break your leg, there’s a hurricane, your passport got stolen), you’ll get reimbursed for all the expenses you’ve already paid. That includes flights, accommodation, tour fees etc. At least $5,000 coverage is ideal.
    • Trip interruption and changes: If you have a serious injury on the road and you’re in hospital for a week, you might still want to continue your travels but things would’ve changed. You would have missed flights, missed tour dates, you might have been evacuated to a different country. With this coverage your insurance company will cover the costs of all these changes. Look for coverage north of $2,000.
    • Baggage and personal effects: If you lose your GoPro, your iPad, your passport, even your sexy new hiking boots, travel insurance should cover the cost of replacement. How much they’re willing to cover depends on your policy, and usually you’ll need to declare and pay extra for coverage on more expensive items, like a fancy camera or expensive camping gear. Look for standard coverage of at least $2,000.

    Depending on the type of trip you’ve planned, it could also be important to seek special coverage, like a specific sport or activity you plan on doing (some companies won’t cover certain activities).

    Everything else

    Most companies will offer coverage for a few other things, like your rental car deductible, missed concert or event tickets etc, but the ones listed above are the essentials. Make sure the coverage is rock solid on each of them. The other stuff will be mostly a bonus.

    Is there anything insurance won’t cover?

    Some people think because they have travel insurance that everything under the sun is covered. It’s not.

    For example, if you hire a motorcycle but you don’t actually have a motorcycle license, you probably won’t be covered if you have an accident. This is kind of obvious (would your car insurance at home cover you if you didn’t have a driver’s license?) but some people seem to get caught out by things like this.

    If you missed your flight or train because you were hungover, they probably won’t be covering that either.

    I could write out fifty scenarios like this, but much of this comes down to common sense. But this is also why it’s important to read the policy. If you can’t find the answer to your question in the policy, call or email your insurance provider before you buy.

    Why you should buy travel insurance before anything else!

    This is super important. Often people book their flights, accommodation, pay for all their tours and then just before they leave start thinking about travel insurance.

    This is risky and I highly recommend doing things the other way around.

    Here’s why:

    Travel insurance only covers you for things you’ve committed to after you’ve bought your policy. If you book a two week vacation today and then a cyclone destroys your resort, you can’t suddenly buy a travel insurance policy tomorrow and get everything back. You will not be covered. This is like crashing your car and then trying to buy car insurance for it the next day while it’s already lying wrecked at the bottom of a cliff. It doesn’t work that way. You need to have a policy in place before the incident happens.

    That’s why I always recommend buying insurance first, before anything else. That way, you can start booking things like flights and hotels knowing that it’s all covered in case anything happens. If you’re about to book part of your travels and don’t yet have insurance, STOP. Be smart and get insured first.

    Where can you get good travel insurance?

    If you need to buy travel insurance, my first bit of advice is to check if you’re already covered.

    This is most common with people that have a credit card.

    Usually if you have a gold or platinum card, it will include travel insurance, you just need to let your bank know about your trip. Make sure you read the policy carefully.

    Many will only offer coverage for 30-60 days, meaning it’s not suitable for long term travellers, and many credit card insurance policies are quite limited in coverage as well.

    It is also possible that you are covered under a business policy or a family policy. Check with anyone in your immediately family if their insurance policies include travel (even if they’re business or credit card policies) and if it extends to family members (this is common).

    If you’re still not covered, you’ll need to buy a policy. There are many providers out there.

    Who do I use?

    The company I currently use for travel insurance is SafetyWing

    SafetyWing is a travel medical insurance which I’ve been using for a few years now. I love them because they allow you to subscribe to a monthly plan which is perfect for a long-term traveller like me, rather than buying year-long policies or continually needing to buy new policies everywhere I go.

    However, they also offer policies to cover specific dates, so they’re perfectly suited for your standard short-term trip or vacation too.

    Things I love about them:

    • They’re affordable – Their policies are not expensive. Their Nomad Insurance Essential Plan gets you full health cover for around $2 per day. You can upgrade to full travel cover for around $6 per day. And $0 deductible!
    • Their coverage limits are high – This will depend on where you’re from, but you should be able to get coverage at the upper limits of what I recommended above (standard $250k medical cover, but upgradeable to $1.5m).
    • Extensive coverage – Their plans cover you in over 180 countries.
    • You can buy a policy in the middle of your trip – This is one of their best features. Most providers require you to buy before your trip starts, but with SafetyWing you can get insured mid-trip. My trips are rarely planned and it’s not uncommon for me to be travelling several months longer than I expected. If I’m taking a long trip I can get the monthly pay-as-you-go, for shorter trips I can buy last minute or mid-trip. It’s awesome.
    • Getting coverage is easy – You are literally done in five minutes. There’s no long form to fill out. I put in my age and destinations, check the policy hasn’t changed since last time, and boom. Five minutes. It’s that fast.

    You can get a free quote instantly on their website, or using the widget below.

    Please make sure you read the policy and don’t just check the price. It’s important to know exactly what you’re covered for.

    Still got questions? Leave them in the comments below!

    SafetyWing provides travel insurance for travelers in over 100 countries. As an affiliate, we receive a fee when you purchase a policy. We do not represent SafetyWing. This is information only and not a recommendation to buy travel insurance. For further clarification, you can read my Disclosure Policy.

  • How To Find A Super Cheap Flight

    How To Find A Super Cheap Flight

    Depending on where you live, flights can be a real suck on your travel budget. Thousands, sometimes tens of thousands of dollars. How do you find a cheap flight? It’s the bane of every budget traveller.

    Over the last few years I’ve learned a few tricks, and flights are no longer the draining expense they were when I first started travelling. It can be a bit of a process, but if you’re vigilant in your flight search there is usually a way to get where you want without smashing the budget.

    Below is the general process I use whenever I’m looking to head somewhere new. It can be pretty involved so try and stay with me, but I’m confident you’ll be able to save a bit of money using the tools and tips below.

    Step 1: Start with a flight search engine

    This is your starting point. There are a lot of them out there, but for this example I’m going to be using Skyscanner.

    (Others that I’m particularly fond of are Flight Network, Hipmunk and Google Flights).

    As I’m based in New Zealand I’ll use Auckland as our starting point. For our example, let’s say we’re heading to Tokyo for two weeks – 1 April to 14 April.

    Searching for something like this is pretty simple. Just head to Skyscanner, plug in your dates and destination, click search. It will search (almost) all airlines for you and give you the best available price. Your form should look like this:

    Here are the results:

    We’re given 950 options, the best one being $622 with China Eastern. That’s not bad, but let’s see if we can get that price down a bit.

    Be flexible with your dates

    The best way to save money on a flight is to be flexible. If you only have two specific weeks during the year you can travel there’s not too much you can do, but if you’re without a strict schedule, you can save a lot.

    Let’s search for another flight to Tokyo, assuming we don’t care when we go. All we want is the cheapest flight.

    To do this, leave your search criteria exactly the same but in the date section choose “cheapest month”. It should look like this:

    Skyscanner will then search every month and give you the cheapest possible flight for the year. In the results we’ll see it’s in July.

    To get the cheapest two week trip, you would probably choose the flights I’ve circled in red – the outgoing flight on July 24th for $192, and the return on August 7th for $208 for a total of $400.

    If you remember, our earlier April dates were going to cost $622. In less than a minute, we’ve pinpointed the cheapest possible flight of the year, and saved $222, or 37%. Not bad.

    If July or August isn’t a good time for you, just click the months’ dropdown box and you’ll get an indication of prices for each month:

    This gives us a few more options. Even though July was given to us as the cheapest month, you can see that September and October look equally cheap. However once you click around those dates you’ll find the return leg is probably more expensive, which is why Skyscanner gave us July instead (Skyscanner is kinda smart). Nonetheless you can click through those other months and see if there are other options for you.

    Now if we actually select those flights for $400 and click “Get Prices” we’ll get taken to the actual flight itinerary. In this case the flight turns out to be on Air Asia, for $416:

    You might be thinking, why is it now $416 and not $400? This is actually really common on these sites – there are even times when the opposite happens and the itinerary comes out cheaper – maybe $390 or something. Flight prices are always changing (literally every minute) so I presume this is why this happens.

    Now if you’re ready to book the flight you can just click the green button and book. But maybe we can do even better?

    If you look at the above itinerary, you’ll see it’s an indirect flight, meaning the flight has a layover. In this case, the flight goes through KUL (Kuala Lumpur). One option we have now is to book those legs separately – we’ll book Auckland to Kuala Lumpur, and then we’ll book another flight from Kuala Lumpur to Tokyo.

    Using exactly the same technique from before I’ve found the cheapest flight from Auckland to Kuala Lumpur, which is in May/June for $285.

    That’s pretty good, but we still need to get from Kuala Lumpur to Tokyo. If we can do it for less than $115, we’ll beat our $400 itinerary from before. Obviously we can’t just search any dates – we know the exact dates we’re going to be in and out of Kuala Lumpur (23 May – 7 June) so we have to work with those. Here’s what we get:

    Aaaand we’ve struck out. $285 + $253 gives us $538, way more expensive than the $400 we found before. BUT, this technique does work really often, especially on longer routes. I actually spent a while trying to find an example for you that worked but I lucked out (to be honest I only spent about five minutes and then I gave up, but it does work!)

    That’s the general process for finding the cheapest flight to a specific destination. Be flexible with the dates, try and book your legs separately, experiment with different layover cities. That should already give you a lot to work with. But again, can we do better?

    3. Be flexible with your destination (and get a ridiculously cheap flight)

    We’ve just seen how much you can save if you’re flexible with dates, but what if you’re flexible with your destination too?

    If you’re like me, maybe you don’t care where you’re going. You just want to go somewhere new. So unless you’ve fallen in love with a girl on a Tokyo dating website, or have an infatuation with guys dressed in cosplay, maybe you could pass on Tokyo and try somewhere else. If that’s the case, here’s what I do pretty much every time I travel.

    Go back to Skyscanner and put in your origin. We’ll stick with Auckland for now. Set the search to “One way”. Then, select the “cheapest month” option like we did before. Then leave the destination field blank. It will self populate with “Everywhere”. Your form should look like this:

    Hitting search will give you the cheapest flights from Auckland to everywhere in the world for the entire year. Check out how many places you can go to for under $200 USD:

    Pretty cool. Note that there is some time lag for these results to update. For example, I clicked into that $199 to UK option and it had already disappeared, so it was probably a flight special or mistake fare that’s been finished. But those were all real results at some point in time, and they’re usually pretty up to date.

    (As a side note, if for some reason you’re not loving Skyscanner, you can perform this same search technique using Kayak’s “Explore” tool and Google Flight’s “Discover Destinations”)

    Now all these cheap flights are super exciting, but still we need to ask. Can we do better?

    Let’s do the search again, but this time we’re going to use a nearby international hub as our departure point. For example, the closest hub to Auckland would be either Sydney or Singapore. The Skyscanner search we just did (Auckland to everywhere) says we can get to Aussie for $63 and to Singapore for $180. Singapore is a really good hub (possibly the best in the world) so we’ll use that one.

    Here’s the same “everywhere search” using Singapore as the point of departure:

    The obvious gameplan here would be, buy the $180 ticket to Singapore and then launch your travels from there. Thailand for $29? Vietnam for $31? It’s up to you.

    What if you’re not flexible with dates or destination?

    This means you basically have no bargaining power at all, but there are still one or two tricks you could use that might save you some money. The tips below are some generic flying tips, and you can apply them to all your flight searches, even (especially) the shotgun searches we did above.

    Try using different hubs

    We touched on this already but I’ll mention it again. If your dates are fixed, and your destination is fixed, you can still try and change the hub you fly through.

    In our example we were flying from Auckland to Tokyo. This gives you plenty of options; Tokyo is close to many hubs such as Bangkok, Singapore, Hong Kong, Kuala Lumpur and Manila. Auckland is close to Australia. That leaves you with a lot of search possibilities. As an example, you might be better off flying from Auckland to Singapore and then taking a budget airline such as Tiger Air to Tokyo. You could also get a Jetstar or Virgin flight from Auckland to Australia and try flying from there. In our example the Kuala Lumpur option didn’t quite work out, but there’s a good chance others will if you have the time to search through them.

    I actually remember doing this a few years ago when, instead of taking the Emirates flight from Auckland to Nairobi (through Australia and Dubai), I caught a budget airline from Auckland to Singapore instead, and then flew from Singapore to Nairobi with an Indian airline. It was a simple route, but Skyscanner’s default searches didn’t put it together. I had to do it myself.

    A very handy tool for finding flights on budget airlines into and out of hubs is Whichbudget. It aggregates all the budget airlines and has a lot of smaller airlines the bigger sites like Skyscanner don’t pick up.

    Go directly to the airline’s website

    I’ve actually never found a flight to be cheaper on the airline’s website than it was on Skyscanner. For some reason the search engines are always cheaper (I still haven’t figured out a reason for this).

    I have, however, found flights on the airline’s website that didn’t exist on Skyscanner. This has actually saved my ass a few times – it was particularly common in Africa.

    There’s a lesson here. Skyscanner (and every other aggregator site) will never show every single flight available. That means you need to search a little bit deeper once you’ve done your initial research, which means searching both flight search engines and the airlines’ official websites.

    Again, to make sure you haven’t missed any of the lesser known airlines, do a quick search on Whichbudget too.

    Land in a smaller city

    This works because larger airports are more expensive for planes to land at, and these extra fees get added to your ticket.

    For example, instead of flying into Tokyo you could try fly into one of Japan’s smaller cities. The first one that comes to mind is Osaka, and a quick search shows it is in fact cheaper. If you remember, the cheapest return flight to Tokyo was $400. The cheapest return flight to Osaka is $372:

    Obviously this gives rise to the problem of getting from Osaka to Tokyo after you land (it’s about a 4 hour bus ride, I think), but if you wouldn’t mind visiting Osaka anyway, why not? In this case the flight is only marginally cheaper, so it might not be worth your while, but sometimes it can work out several hundred dollars cheaper. Common examples are landing in Newark instead of New York City, Beauvais instead of Paris, or Clark instead of Manila. There are countless examples like this.

    Fly budget airlines

    If you want to travel long term, you really just need to get used to this. I’ve known people that pay up to $500 more for their airfare just to avoid a budget airline. Of course, that’s fine, but it also means you have no right to complain about flights being expensive.

    One couple I met spent $3,000 on their airfares to Thailand because they didn’t want to fly Air Asia, which could’ve got them there for $1,600. That’s $1,400 in change! A couple could live in Thailand on that for 2 months.

    At the end of the day, just think about how much better a major airline really is. You get a TV, a plate of airplane food, a couple of free Cokes. That’s it. How much is that worth? I’d say about 50 bucks. Get used to flying budget airlines, and spend the hundreds of dollars you’ll save on something a little more rewarding once you land.

    Fly at the right time

    They say the best day to fly is Wednesday, and the best time to fly is the last flight out at night (or very early morning). This is not set in stone but from my experience this is good advice. When flying around Asia, the 2am flight is sometimes less than half the price of the 9am flight.

    Also, be clever about which time of the year you fly. Christmas and other holidays are traditionally bad times to fly; but you can also use the heavy season to your advantage.

    Example: In 2011 New Zealand hosted the Rugby World Cup, and during that time airfares coming into the country skyrocketed. Also, no one wanted to leave the country during that time, so flights going out of the country hit rock bottom. During that time I flew to Buenos Aires for $1,100 return (at the time the fares were usually $2,000+). It was just a product of good timing, and the leftover change went a long way in South America.

    Book at the right time

    If you book too early, you get grouped with the high payers (think people who are flying somewhere for a wedding or a conference). These people reserve their seat early because they need to make sure they fly on that date, and therefore they lock their flights in early and pay a premium. If you book too late, you also get grouped with the high payers (think people attending a funeral or some other emergency).

    How do you avoid that? The unwritten rule is to book in the golden window: 5-8 weeks in advance. That should give you the best chance of getting the best price. Of course nothing is guaranteed, but that’s a good guideline.

    Search incognito

    If you’re doing a lot of searching, do it incognito. To do this, simply click “Open Incognito Tab” in your browser. This means your browser won’t hold any cookies and keep data on where/when you’ve been searching for flights. If there’s a route you’ve been searching a lot, it’s possible the search engine will catch on and bump prices in your searches. Whether or not this is actually true is disputed. Some travellers swear by it, some think it’s nonsense. What do I think? I have no idea. But I do it, simply because it doesn’t cost anything, and it does kinda make sense.

    Watch out for specials!

    I take advantage of specials often. Jetstar often runs flight specials from Auckland that are almost 50% less than normal fare. Air New Zealand is running really good specials constantly. In The Philippines, Cebu Pacific sometimes has $0 flights! Air Asia does all sorts of gimmicky stuff like that too.

    My favourite special is Jetstar’s Auckland to Singapore, which usually pops up around March or June. It’s an awesome bargain, because once you get to Singapore you can fly almost anywhere in Asia for less than $100. Not to mention most airlines charge between $700 – $1,000 for that Auckland – Singapore route. It’s pretty easy to stay informed for deals like this – just sign up for the email newsletter of all the major airlines in your city/country and let the specials come to you.

    Get Price Alerts

    Airfares change all the time. If you’re searching for a specific flight, like we were in our Auckland – Tokyo example, it can be worthwhile to sign up for price alerts. Depending on the alerts you sign up for, you’ll get emails whenever the price is about to drop (or about to rise a lot). Most search engines will have an option to receive alerts, on Skyscanner it looks like this:

    I would also suggest signing up for a second set of alerts from a different service, as every search engine has gaps, as we discussed earlier. Google Flights is a good option, just toggle price alerts on as follows:

    Flight deals

    Lastly, sign up to some flight deals websites. These sites congregate deals from all over the world and bring them to you in one place. Lots of mistake fares (for example, an airline mistakenly puts a fare in the system for $200 instead of $2,000) and limited time specials too. These sites are updated daily, and they do have some pretty amazing deals.

    Some I can recommend are Airfare Watchdog, The Flight Deal, and my personal favourite, Secret Flying.

    If you love a bargain I highly recommend checking them out. They are a very good resource.


    And that’s about all I’ve got. It seems everyone has their own little tricks to hunting down cheap flights online, so if you have any, please share them in the comments section! Flights are almost always the the biggest drain on a backpacker’s budget, so if you can get them under control that’s half the battle won. As we’ve seen above, you don’t need to spend thousands and thousands of dollars on flights to see the world. Know where and how to look, and you should be laughing all the way onto the plane.

    Good luck and travel safe!