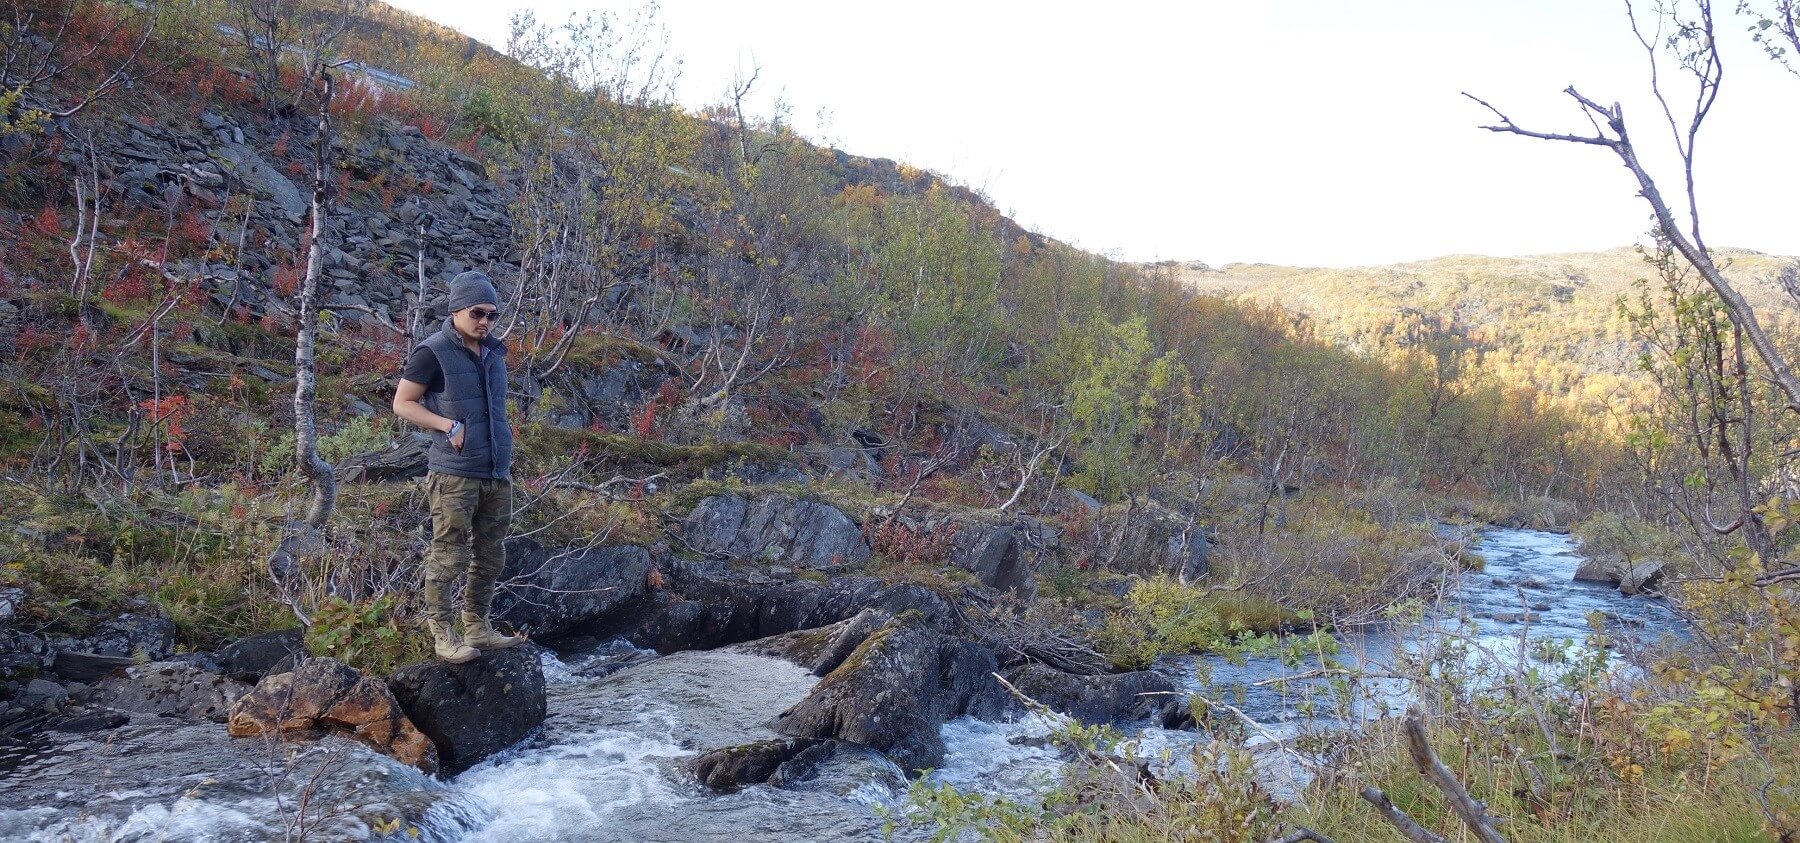
I actually don’t take that many photos of myself while travelling, but there is always a time when I’m alone, sometimes completely, completely alone (as in, 1,000 miles from anybody) and I still manage to get cool candid snaps of myself. All the photos above I took of myself while travelling alone, sometimes in the middle of nowhere.
So how do you do it?
Well, there’s no real big secrets, but there are a few basic camera tricks and some sneaky travel tools.
Really there are only two ways I take my own photos:
1. Asking other people
The most obvious way to get snaps of yourself while travelling is…ask somebody. Pretty obvious. But not a lot of people like to do it. I guess it can be a little embarrassing when they line you up in a shot and then you do one of your Calvin Klein poses. But still – if there’s anybody around I usually ask someone. And there are actually a few good tips that will get you much better photos from a stranger.
Tip #1: Compose the photo yourself first. Find out exactly how far you want to be, what angle, where you want them to stand. Then when you finally manage to convince the poor stranger, just hold the camera in place and say “Could you take it just like this?” Then all they need to do is hold it and push the button. It seems most people actually prefer being guided like this – it takes out all the guesswork for them.
Tip #2: Find someone with one of those huge cameras around their neck. You know the ones I’m talking about it – they look like they cost ten million dollars. You already know that person is going to be an absolute fiend with the camera. Often those people actually enjoy taking other people’s photos, some of them will even start directing you! “Just move a bit to the left, oh wait, let me stand over here a bit, push your hat up there’s shadows on your face, let me get a few more..” That’s always cool when you get one of those.
Unfortunately, that’s bit of a rarity. That’s actually the reason I rarely ask strangers nowadays: So many people still have no freaking clue how to use a camera! Can you believe the number of people who still don’t know how to focus? Or who will take an absolutely terrible photo of you and just think it’s okay. I’m not a supreme photographer or anything, but I always try and take some amazing snaps if someone hands me their camera. And I know it’s a rarity because they usually thank me endlessly.
The other reason is, I like to direct my own pics. Meaning I like to set them up, compose them, think about the kind of caption or story I’ll have behind them, and then take my time trying to get it right. When you interrupt someone’s day to get a photo of you, you kind of need to hurry up – you can’t have them standing there for five minutes trying to trial-and-error the right shot for you.
You can still get good shots if it’s something basic like this:
This is some street art in Lisbon, I think my brother took this in just a single shot. But even with something like this I prefer to take it myself and try to get it the way I like. So, how do we do that?
2. Getting the right gear and taking them yourself
Taking photos of yourself requires a little practice, but you actually don’t need anything fancy. You don’t even need a camera. Your smartphone will do just fine. And you definitely don’t need one of those floating drone things that only Forbes Listers can afford. There’s actually only one piece of equipment you need and it costs about thirty bucks. That is…
I bought it about two years ago and it’s come everywhere with me since then! Here’s what’s cool about it:
It can stand up anywhere
The Camrah tripod has these bendy legs that let you create any angle you want. If you want your camera to be looking up, down, lopsided, whatever you want, just give the legs a twist until you get it right. Quite often you get a ledge that’s a little uneven or you try to balance your phone on a chair but there are some curves that don’t let it sit right. With this thing it doesn’t matter, the legs are like wires, so you can make it stand however you want.
That’s how we took this photo in an abandoned house in Finland. I remember I had to balance it on some stuff, but it came out great:
Probably my favourite thing about this camera is you don’t even need a surface to stand it on. Whenever I have a picture I want to take, the first thing I do is look around for a wall or ledge to sit my phone on, but often there’s nothing. These tripod legs are so limber though that you can just wrap it around something – a tree, a pole, a fence – any standing structure basically.
That’s how I managed to get this snap on my train up to the Arctic. I don’t remember exactly how I did it, but I do remember I was fiddling with it for a long time. I think I ended up wrapping it around a fire extinguisher.
Back when I was a rookie, taking a photo of myself went like this: I’d balance my camera wherever I could find, I’d set the timer to 10, and then I’d sprint into position and strike a pose.
After twenty seconds (just to be sure I gave it enough time), I’d run back to my camera, which was sometimes sitting miles away, check the photo, and then repeat until I got it right.
Obviously I don’t carry my tripod absolutely everywhere, so sometimes I still actually do this. Luckily though there’s a better way.
The Camrah tripod comes with a bluetooth remote, so you can simply set up your phone, connect the remote and then walk into position. Do your Kodak smile, flex your biceps, and then just click the button. This lets you take the photos remotely so you can just stand there and take a hundred if you want! All you need to do is click click click. I’m sure I don’t need to explain why this is so much easier than running back and forth between your camera to re-take your shot every time.
I actually took this shot out in the Norwegian wilderness like this:
Took me a little while to get it right – but if I didn’t have a remote I would have never got it at all. You can’t actually see but there was a small stream in between myself and where I parked the car. So I would have needed to set the timer, then cross the stream, then run through that crazy thick swamp and do my cool Terminator pose, all within ten seconds. Then I’d have to run back and reset the camera to do it again until I got it right. Which of course would have been impossible.
You can use it as a selfie stick
The Camrah legs aren’t that long, but it’s still probably a good 8-10 inches. I use it quite often as an extender stick to get shots over a barbecue or a bird’s eye shot of something, or just to get a bit more height on my landscape photos. Of course you can use it for the obligatory selfie as well.
You can mount both your phone and your camera
The Camrah tripod has two mounts – a basic screw mount that fits most cameras, and also a clinch mount that you can use to hold your phone. I use them both quite often and they work great.
Super easy to travel with
It’s such an easy thing to travel with – it’s about the length of two passports and really thin. Plus you can mold it into any shape you want if you’re struggling to find space to pack it in. I just leave it laying in the bottom of my backpack, I barely notice it’s there. As most of you know, I don’t travel with a lot, so something lightweight and slim like the Camrah tripod is the perfect accessory for me. Plus, it’s so cheap! If you lose it or break it, it’s thirty bucks. Nothing to lose sleep over, just the way I like it.
I knew exactly what I was trying to achieve. There was a list of places I had to go, things I had to do, experiences I had to tick off a list. Some vanilla, some sordid, some grand. I wanted battle scars, war stories. I was a boy. I wanted to become a man out there. I wanted to experience everything.
For years, I roamed around the world, and eventually I did exactly that. I experienced everything.
Then the sunset came. It was unexpected. Because the truth is, I never dreamed I would actually succeed. It all seemed so faraway and impossible. I thought I’d be chasing that “travel around the world” adventure my whole life. But like they always say, dreams really do come true.
I think back today, to the person I was before I stepped on the plane. The person that used to go to that cubicle every day. I suspect I was much like everyone else. I woke up, snoozed the alarm for half an hour, ironed a shirt, slipped the tie on. And I say slip it on because I never actually untied it each night, just loosened it enough to slip over my head, so I had one less thing to do the next morning. That’s how much I really hated the morning. Not to mention the morning’s main event: Sitting in the car half asleep for forty five minutes and hating my life. I can’t believe I never crashed during those commutes. I was a zombie.
During that life, the thought of travel tantalised me. It consumed my every thought – all the places I could go when I finally quit this job. I could go to South America and learn to salsa with the pretty ladies. I mean, South America. That’s Argentina, Ecuador, Colombia! Man, those places must be so incredible. I’m going to go China, I’ll finally learn to speak Chinese. I’ll eat noodles at the street carts every day, have those pancakes with the fried egg every morning. And maybe, just maybe, Africa. Wow. Will I ever really go to Africa? Probably not in this lifetime. How would I even survive out there? I can’t even imagine. Maybe. One day.
I was 25 when I finally quit my job. I didn’t really have a plan. But I bought a plane ticket. I didn’t realise what an important moment in my life that was. It was important because something was changing. I was actually doing something. I was actually going somewhere. And I was battle-ready, with a suitcase full of hand sanitiser and malaria medicine and anti-diarrhea pills. Invincible.
Life changed pretty quick after that. I mean, I’d travelled before, but I’d never really travelled before. I’d gone places with Mum and Dad and stayed in hotels and caught taxis everywhere. But I’d never met anyone. Never had a conversation with a local. Never been on a date. Never talked to the person next to me on the bus. Never been invited to someone’s house for dinner.
When those things started happening, my mind was blown. Over and over again. Every single day. I would lie in bed at night, questions burning through my skull. I couldn’t understand how the world was so big, how little I had known. How much I now had to see and learn. I really felt like Jim Carrey, in the Truman Show. I felt like I’d been living a lie my entire life.
Why was I always told these places were dangerous?
Why was I always told they were unkind?
Why did they try to keep me in one place my whole life?
What were they trying to hide?
From that point on, for many years, I refused to go back home. I’d go back for one or two months, see the doctor, see the dentist, say hi to my Mum, and then I’d leave again. There was nothing for me to learn there. All the people did was watch rugby and go to the gym anyway. No thank you. I had discovered a new world, a new life, a new community. I had a mission now, and New Zealand had to be left behind.
For half a decade I continued my quest. Every day, I learned so much. My fellow travellers taught me different travel hacks and tips, they recounted stories of faraway and obscure places that I added to my ever-growing list. I met a new and interesting person every day. Each of them had lived such a different life to me and had such different values – it was like an endless philosophy lecture – and my perspectives were tested daily. It was a wild ride of different friendships, relationships, challenges and confrontations. One day I stared death in the face and wasn’t scared for a second; another day something as simple as buying a coconut at the market terrified me beyond belief. I discovered something new about myself every day.
Eventually I learned, that was the real journey. This wasn’t a journey around the world. It was a journey into oneself.
I traversed the world and learned to surf, to dance, to fight, to cook, languages, yoga, food, sports – all these new skills and experiences I had to absorb, from all over the world. I felt like a video game character – levelling up with every new challenge. I saw all the famous sights I could handle, and then some, the most magnificent places in the world.
But none of that changed me. Not to the core. They were just the dressing.
It was the people that held my hand through those experiences: The conversations we had, the way they lived, the things they taught me. Things they said – most likely just ordinary sentences to them – were profound and thought provoking for me. They made me contemplate who I was, and who I wanted to be. One smile from a child was enough to challenge a lifetime of beliefs. They say people don’t change, but it’s not true. People do change. I know, because I have. It just takes something powerful. You only have to hope it’s powerfully good, and it changes you for the better. The journey into oneself.
Today I look at travel, this good friend that has given me so much, and there are few burning desires left. Most of the things I had lusted for, I have gotten. Of course there are places I still want to go, things I want to see. But travel used to be mysterious, and it’s not anymore. I no longer sit there and wonder what it would be like to “see the world“. I’ve been lucky to enough to leave footprints on every continent, and if I died today, I would gladly write the dying words – “I travelled the world, and it was everything I thought it would be.”
Often I tell people: Life is short, chase your dreams.
But now I realise there’s an equally important question: What do you do when all your dreams come true?
That seems to be the mystery now. Who will be standing next to you at the end of it? Who will you share the memories with? What will you build for the people ahead of you? And what will you leave behind?
By far the most common email I get these days is “Hey Bren, I would love to travel the world, I just don’t have the money right now. How do you afford to pay for it all? How do you make money while you’re travelling all the time?”
It’s easy to get around, cheap flights in and out every day, and the food is some of the best in the world (seriously, I spent 80% of my time eating).
I’d say this is one of the best countries to visit as a family – endless activities, no need to worry about scams or traveller’s diarrhoea, and most tourist attractions are kid-friendly too. It’s also surprisingly visa friendly, with most countries able to visit visa-free.
Not to mention – this might be the safest destination on the planet. No exaggeration – it’s not uncommon to see expensive bikes just left outside stores with no padlock. People often leave their phones on the tables at restaurants when they go to the bathroom. Crime here is punished with a severe stick, so it almost never happens. If safety is at the top of your list for a family vacation, this is the spot.
It’s also great no matter what you’re looking for. Family vacation, great, but even as a solo backpacker or a few friends looking for a party, I believe you’ll find it hugely fulfilling too.
The question is, where to stay in Singapore?
As small as the country is, it’s divided into some pretty unique neighbourhoods, all with their own quirks and attractions. Don’t worry though, I’ve got you covered.
One thing I’d also recommend for a first-timer to Singapore is the Singapore Klook Pass!My girlfriend and I visited recently and it was her first time in the country, so we grabbed the pass and saved so much money on Universal Studios, Gardens By The Bay, Night Safari and so much more.
We did the 5-attraction pass with Universal Studios ticket (Universal is AWESOME by the way, definitely go). If you plan on doing a lot of sightseeing, the pass is super worth it. Check it out here.
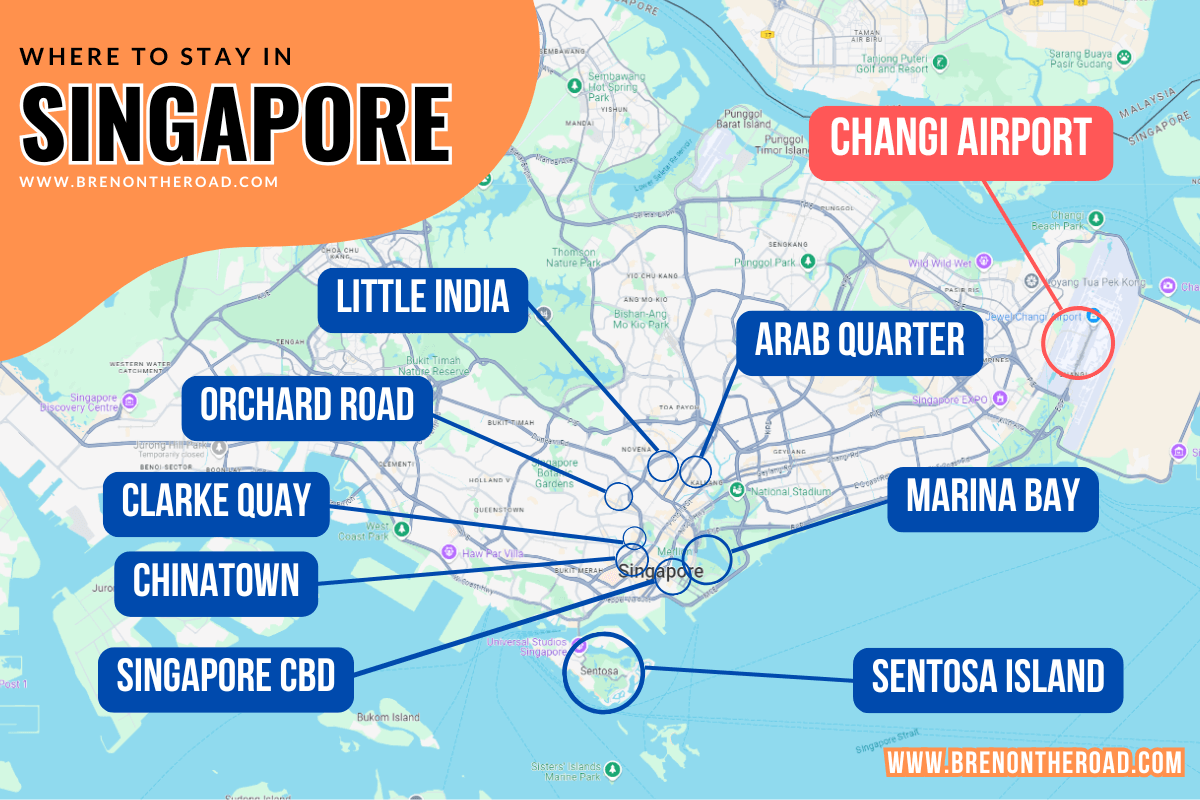
Map of Singapore
Singapore is small and easy to navigate around, and its public transport system is a dream compared to many Asian cities.
This means the question of where to stay in Singapore is not a huuuge decision, as you can visit all other areas of the country pretty easily anyway.
However, it’s always nice to have things you like on your doorstep, and especially in the Singapore heat there will be days you don’t want to venture too far anyway.
Below I’ve broken down the eight main areas in Singapore that are top choices for visitors. I’ll give you a brief run-down on what to expect from each, plus some accommodation options to suit every style and budget.
I’ve suggested a few different accommodation options for each of these main areas, with something to suit every budget.
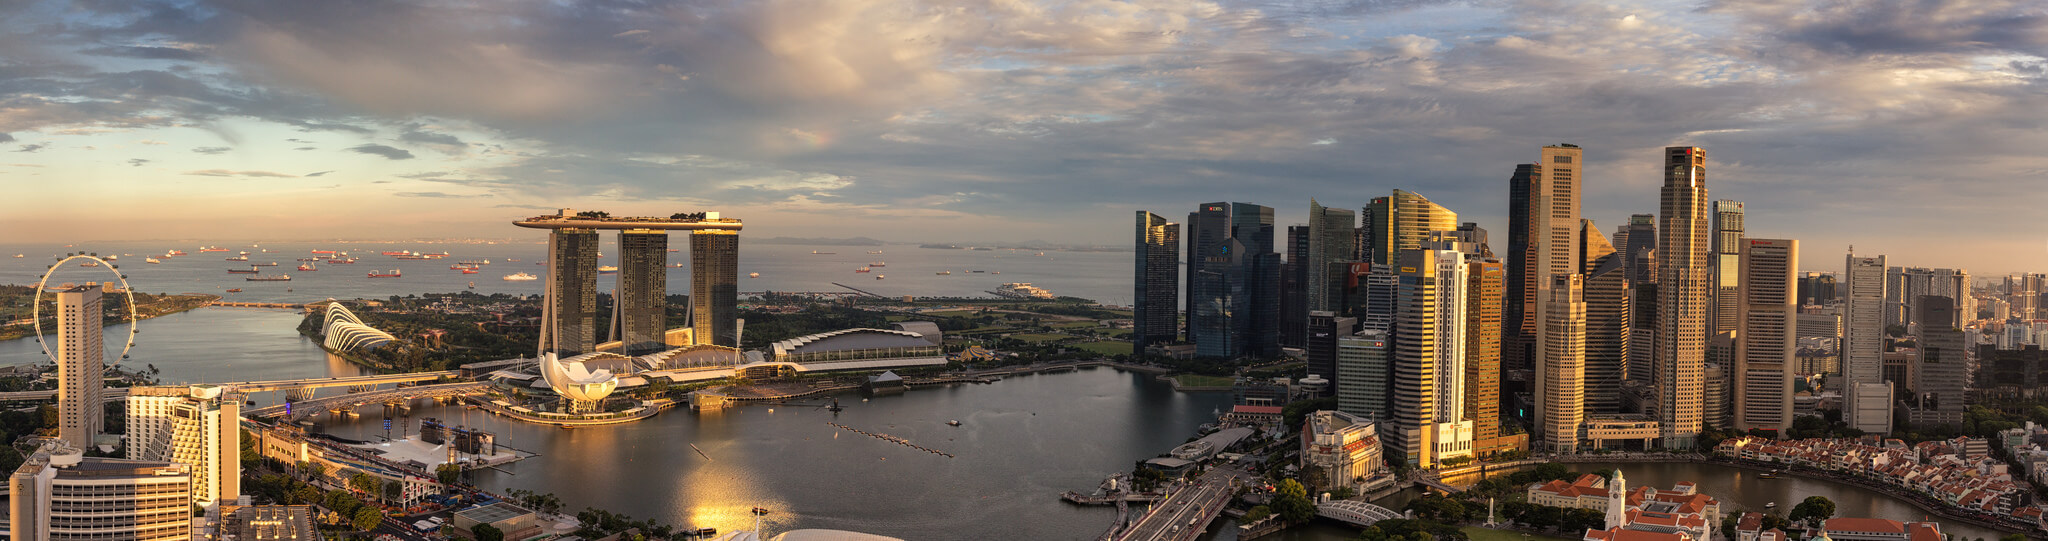
1. Marina Bay
Let’s kick this off with one of Singapore’s most famous areas – Marina Bay.
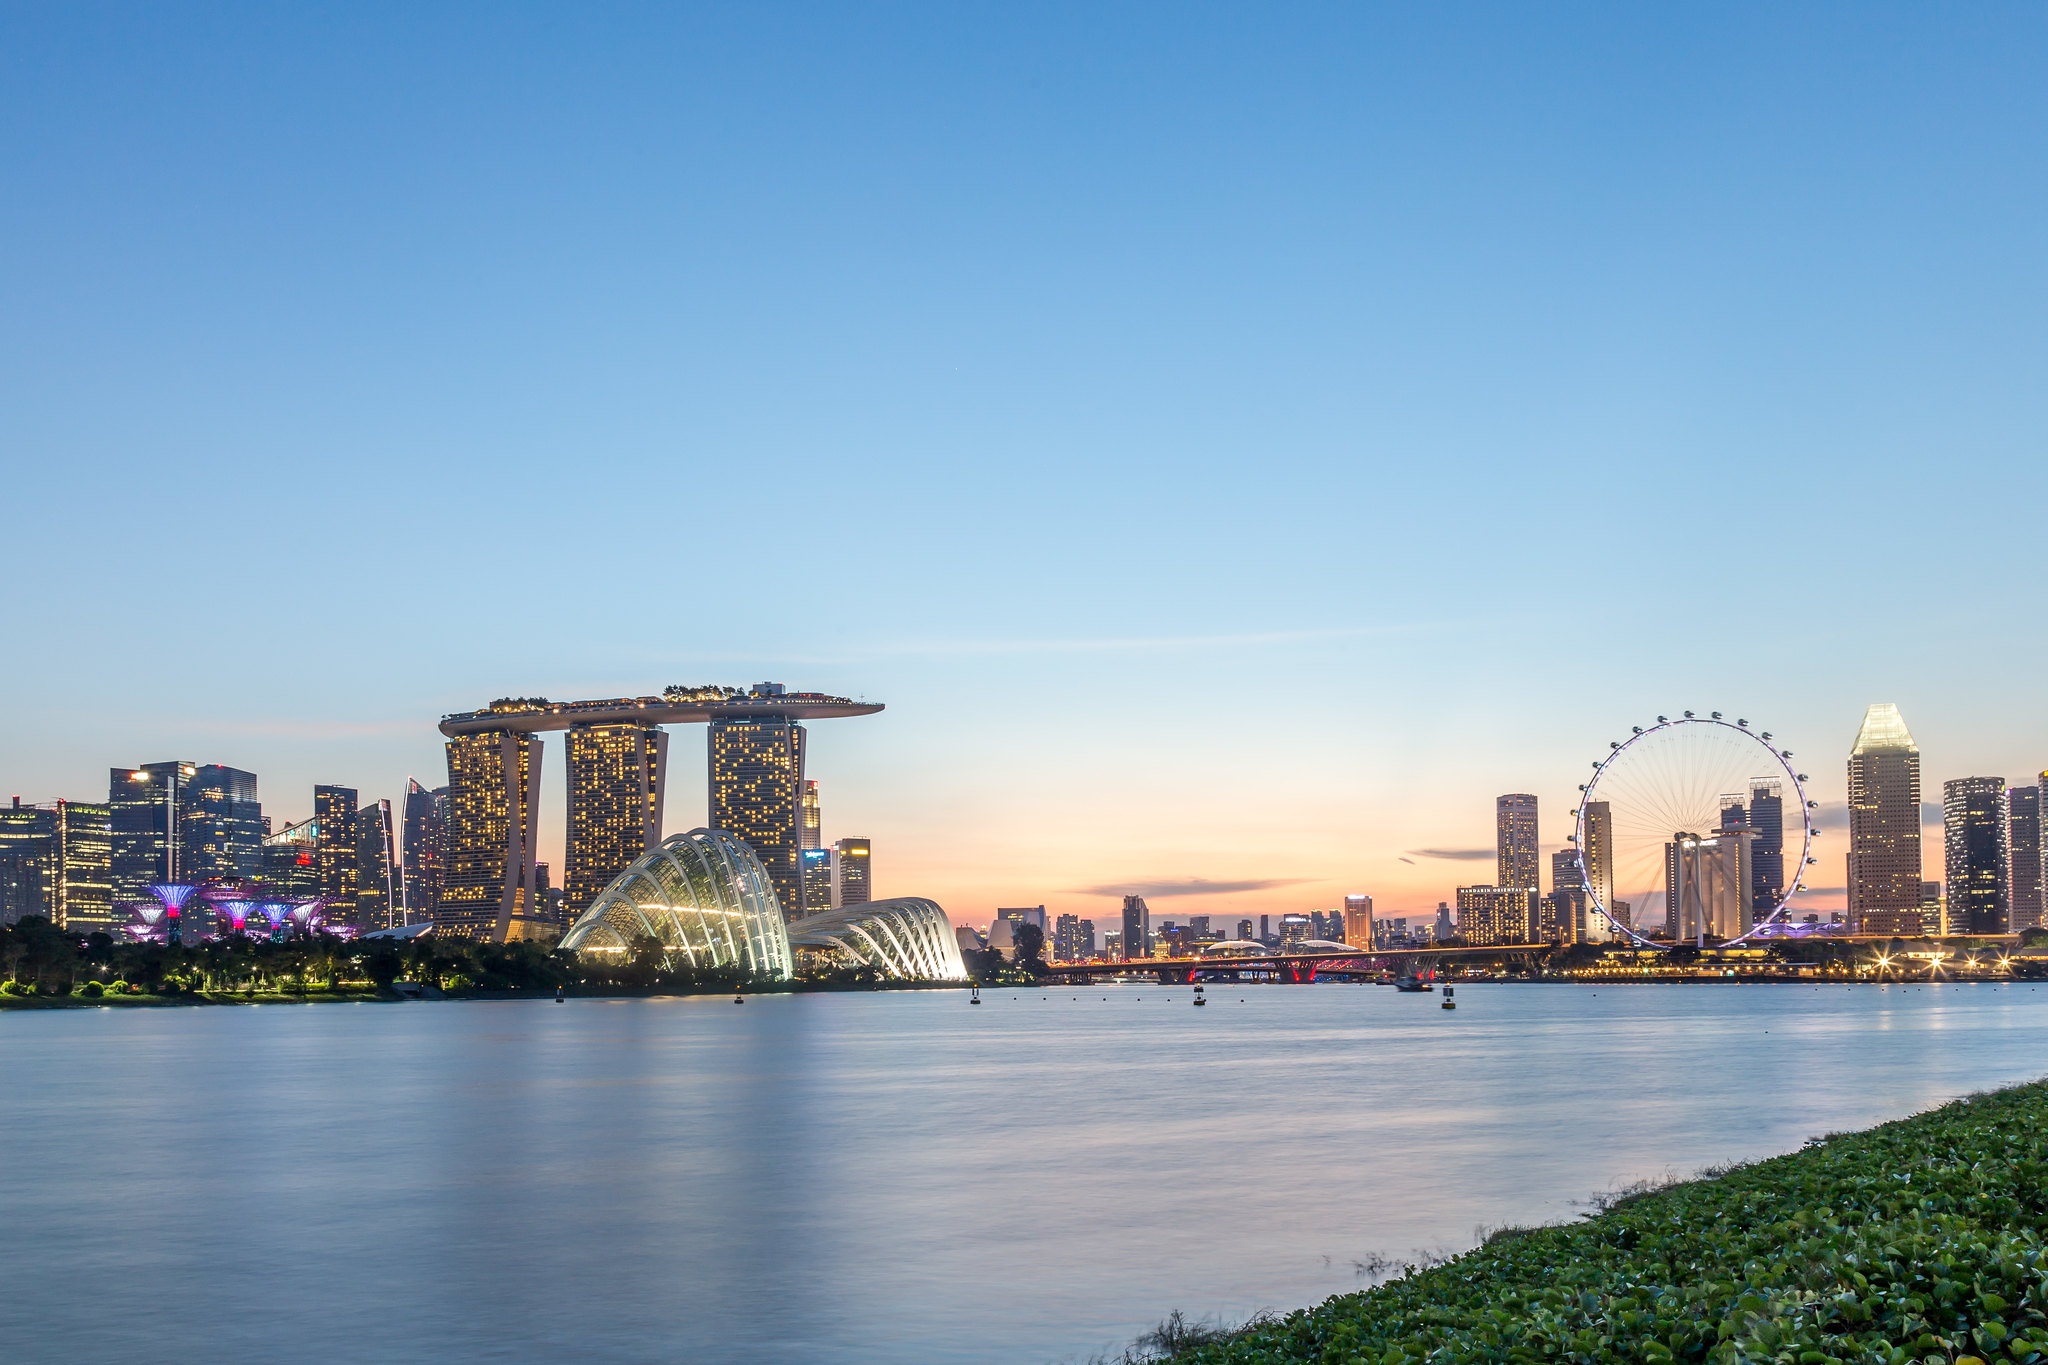
You’ll probably be familiar with the Marina Bay Sands hotel, which is even more stunning in real life. Don’t worry, there are a lot of cheaper, more basic places to stay! This area of town is super fancy, packed with luxe hotels and shiny floors.
It’s popular among tourists for several reasons, the main one being The Gardens by The Bay. For anyone unfamiliar, this is a little wonderland of tropical plants, towering structures and an amazing atmosphere.
This haven is a complete contrast to the strips of skyscrapers and expensive bars and restaurants that line the water.
If you like your cities buzzing with the finer things in life, this is the area for you. Couples will enjoy the expansive dining options and the sight-seeing that there is to do here.
There are lots of shopping opportunities here, as well as great nightlife and fantastic food.
Some of Marina Bay is a world away from other Asian cities, like hectic Bangkok, and it can take some time to adjust.
If you look closely, however, you’ll find little local food places tucked down side streets, and canteens packed with locals enjoying ‘Kaya Toast’ – delicious coconut butter sandwiched between bread and topped with pandan or eggs.
This hotel is perfectly located in the centre of Marina Bay, meaning that you’re a stone’s throw from the main attractions, restaurants and bars. The rooms here are designed with comfort in mind, but are also very sleek. Relax by the outdoor pool and wind down in style.
Also you can obviously stay at the famous Marina Bay Sands if you can get a room. I don’t actually know anyone who’s stayed here, everyone just seems to visit the viewing deck and maybe have a meal there, but I have heard it’s a stunning hotel as well. If it’s in your budget, go for it!
For the backpackers and budget travellers – there aren’t many cheap options available in this area! If you’re on a budget, try staying just outside Marina Bay in nearby Orchard Road, or maybe the CBD.Some suggestions below – keep reading!
Looking for things to do on your trip? Check out these ideas:
2. Orchard Road
The ideal location for anyone who enjoys shopping, Orchard Road is home to a variety of accommodation options.
Picture a long street, stretched out with malls, cafes and a whole lot of tourists.
I loved this area for its friendliness and familiarity! Arriving in a new place can be overwhelming and, although you want to embrace the local culture, you sometimes need to camp out in a Starbucks for an hour.
We spent almost every night walking up and down Orchard Road and never got bored. Always lots of street performers, delicious food and shopping to do!
If you’re looking for a date idea, we made each other rings at Fewgram and it was way better than we expected – super professional and you actually get to make some high quality silverware!
Orchard Road is packed with local boutiques, international chains and fine dining spots.
This area of Singapore is bigger than it looks, so wear comfy shoes and spend the day hunting down bargains. It’s very easy to reach from most other areas of Singapore, so you can still take a day-trip here if you choose to stay elsewhere. There are small patches of greenery along this strip of retail heaven if you need a break.
If you’re travelling as a family, this is an ideal spot! There’s plenty of child-friendly entertainment, huge air-conditioned malls if you need a breather from the heat and all the comforts of home if you’re struggling. This area isn’t really angled towards solo travellers as the main activity is shopping, but it’s still a fun place to enjoy.
Where to stay in Orchard Road?
For the budget traveller
Lloyd’s Inn is the perfect place for anyone wishing to explore Orchard Road.
Its location is ideal, and the inn itself is very stylish. It feels more like a quirky Aribnb than a budget hotel. Forget grungy dorms and cluttered rooms – this place is all about minimalism! The space is nice and quiet, so is better suited to couples or friends travelling together. If you like clean lines, a European-vibe and calm garden areas, head here.
Set in an old colonial style building with mega-spacious rooms, this might be the nicest hotel in the Orchard Road area. The pool is huge, making it the perfect place to come back to after a day of shopping! Goodwood is located near to Orchard Road without being in the busy, noisy nearby area. You get the best of both worlds with this luxe gem.
Clarke Quay is one of the best places to visit if you’re after something a bit lively. This is Singapore’s hub of nightlife, late-night dining and great music.
The docks here are packed with mismatched buildings that have been redeveloped as trendy bars and clubs. The architecture itself is beautiful, and you can easily spend a whole day just wandering around the Riverside area.
There are some beautiful, quiet areas if you want to get away from the thrum of the city. Make your way up to the nearby For Canning Park and take in the incredible views. Spend the evenings immersing yourself in its nightlife and fun atmosphere.
If you fancy a night out, work your way around quirky old buildings, bar-hopping and making the most of the buzz. This tends to be a pretty touristy area, but that’s definitely not a bad thing!
Solo travellers are pretty much guaranteed a good stay here, as there are plenty of places to meet new people.
It’s also the starting point for the famous Singapore River Cruise – worth doing if it’s your first time in the country.
Where to stay in Clarke Quay?
For the backpacker
River City Inn is great for any travellers who want a dorm room without having to lower their standards.
The rooms come in a variety of sizes, and are all nicely decorated and homely. If you’re planning to stay around the Clarke Quay area, this hostel is in the perfect location for you!
Champion Hotel City is a great choice for anyone travelling through Singapore on a budget.
This hotel is just the right level of chic without breaking the bank. If you fancy being close to Clarke Quay, book a stay here and relax into a blend of relaxation and excitement. Quirky decor and a rooftop views await you!
Stay at Park Regis Singapore. This hotel is one of the most well-known on the island and offers the ultimate in comfort and luxury, and is an ideal location for those wanting to explore nearby Riverside. Bag yourself a spacious room with amazing views, a huge swimming pool and impeccable customer service.
The Central Business District (CBD) is one of the cooler places to stay in Singapore, and is packed with expats and 20-somethings living abroad. While ‘the CBD’ technically covers many areas of Singapore, it’s mainly used to refer to the central zone just south of the river. It is often referred to simply as ‘The City’, due to the buzz of business and activity going on here.
This area of Singapore is home to dazzling skyscrapers, hawker-food markets and amazing little cocktail bars. Grabbing a Singapore Sling at Raffles Bar is something well worth adding to your travel-checklist – when in Rome, after all…
There are some little parts of this region that are total contradictions of themselves – tiny, colonial-era buildings squeezed next to huge, shimmering towers of commerce. You’ll be walking between mirrored shards of banks and businesses when a temple will randomly pop up. I love Singapore for its order, as well as its ability to surprise.
The CBD is great for couples and group travellers, but it can be a little tricky to meet new people if you’re travelling alone. Those travelling with young children may feel a little out of place in the business-zone of Singapore, despite being very much welcome. Foodies will love the huge outdoor canteens and cheap food options!
Wink @ McCallum Street is a good choice. It’s slightly closer to the Chinatown side, but is still in a great location for anyone wanting to visit the CBD. You’re close to some amazing foodie havens, and the hostel itself is a lovely place to hang out. Stay here as a solo traveller and find plenty of new friends.
ST Signature Tanjong Pagar is within walking distance of the CBD area in Singapore, and offers everything a traveller could dream of. Clean rooms, friendly staff and great WiFi! This is a great place for anyone new to the world of hostels, as the rooms are all welcoming and spacious.
Imagine stunning views across The City, a ginormous pool to relax in alongside the hub of sky-rises and, incredibly, an indoor pool surrounding the lobby steps – with Koi Carp in it. See what I mean?! The best of the best.
As with most countries, Chinatown is one of the cheaper and quirkier places to stay. It’s within a short distance from other touristy areas (although, everything in Singapore is!) and is packed full of things to do. I loved this area for its eclectic mix of architecture – it’s both old and new; traditional and modern.
There are lots of temples here that you can visit, often cornering streets of colourful-but-weathered buildings and newer coffee shops. Temple Street is the main section of Chinatown, and is lined with beautiful architecture and historic sites merged with modern attractions. Kitschy cafes make the perfect people-watching spots.
One great way to view the area and surrounds is through this popular Chinatown food tour – eat your way through the place while hearing the lore of Chinatown, which runs deep!
This is a fantastic area to visit and stay if you have small children – there is always something new to distract yourself with, and simply walking around becomes a fun activity in itself. If you’re travelling alone, take your time exploring the various sites of worship, from Buddhist temples to mosques.
Where to stay in Chinatown?
For the backpacker
The Bohemian is the perfect choice for anyone who wants to meet people without splashing the cash.
It’s near to public transport links, meaning you can easily zip your way around if you’re on a bit of a tight schedule. The dorms are roomy and light, and there’s great WiFi connection throughout the hostel. This is a great accommodation choice for solo travellers.
This is a pod/capsule hotel with a fun design, it will feel like you’re sleeping in a spaceship. Perfectly located if you’re wanting to spend time (eating, of course!) in Chinatown, and don’t have a huge budget.
This is one of a series of luxury hotels in Singapore, with this particular location designed like something out of Avatar.
A beautifully designed green building with a futuristic touch, the services and quality of this hotel are second to none. It has an entire wellness floor with gyms and pools, a garden walk above the city, and a fantastic Asian restuarant to serve you any time of day. Decadence mixed with style – you won’t be disappointed.
Little India is normally one of the first places I head to in a new city. The food, for one, is incredible. But I also love the general vibe of colour and fun and celebration that these areas bring. Singapore’s Little India is no different – streets lined with vibrant buildings, steam clouds scented with all the spices you can imagine and constant smiles.
This is the perfect area to stay for any type of traveller. Solo adventurers will find friendliness on every corner; children will be entertained by the endless lights and lanterns. This area of Singapore can feel a little bit touristy, but the food is delicious and authentic. Spend your days here wandering around street markets, ducking in and out of temples and indulging in chai tea.
Where to stay in Little India?
For the backpacker
Little India is a fun and friendly place to visit, and 7 Wonders is a great spot to keep you in the centre of the action. offers just that in their hostel. The beds are comfy, you’re in an amazing location and the price is very reasonable! There are lockers to ensure security, and a nice chill-out area to meet other travellers. Best rates here.
For the high roller
One Farrer Hotel and Spa is right in the mix, but is a world away from the busy streets and lovable mayhem of Little India. If you like huge pools, in-house spa treatments and marble floors, this is the place for you. Every little detail has been carefully thought through, making this a beautiful place to escape and relax, while still immersing yourself in all that Singapore has to offer. Best rates here.
7. Sentosa Island
This little island is nestled just off the southern tip of Singapore. While Singapore isn’t usually viewed as a beach getaway, this island is perfect for lazy days. Hop across from mainland on a boat, or take the cable car over and enjoy the amazing views.
This island is the perfect place for anyone seeking a bit more fun! Spend your days here at the Butterfly and Insect Kingdom, Oceanarium and Universal Studios Singapore. You can usually get cheaper entry tickets by booking all these online, so make sure you check the prices.
Sentosa Island is great for families with small children, as there are plenty of attractions. The beaches here also make a lovely place to hang out and relax, making this an ideal destination for any sun-seeking couples. Nip over after a stay in the nearby CBD of mainland and wind down…
Opt for your own private pool for those days when you can’t quite be bothered to walk to the nearby beach. This 5-star resort offers the best of everything, so get ready for a whole lot of pampering at their in-house spa.
Budget travellers: Sentosa isn’t a great option for those on a budget. Try stay in one of the other areas and make Sentosa a day trip.
8. Arab Quarter
Another lovely gem in Singapore’s rich cultural tapestry, the Muslim quarter is a great place to visit. Packed with local charm and quirky buildings, the Arab Quarter is the place to visit for great food. Any European will be overwhelmed by the choice of cafes and hipster brunch spots – cafe culture here is way bigger than many areas of Asia.
Get some clothes tailor-made and explore the fabric stalls. This is a wonderful place for anyone into textiles and art! It’s full of boutiques and corner shops crammed with hidden treasures. Head here as a solo traveller and immerse yourself in the vibrant culture, taking in the sights, smells and beautiful sounds from local mosques. If you’re wondering where to stay in Singapore for a bit of hipster love, this is the spot.
This is a fantastic place to take small children, or travel alone. Hostels are available, but there are also world-class hotel resorts for those who enjoy the finer things in life. It’s also known as Bugis neighbourhood and has great transport links to other areas of Singapore.
Where to stay in the Arab Quarter?
For the backpacker
Backpackers who are tight on money should book a stay at Bluewater Pods. It’s a short walk from Arab Street so you’ll be in a great location to explore, with lots of nice cafes and restaurants nearby. The decor is bright and cheerful, which makes a nice change from gloomy dorms! Best rates here.
This hotel is everything you’d expect from a top-end 5-star hotel – spotless, sleek and classy. With a great on-site restaurant and nearby eateries to enjoy, you’ll be spoilt for choice. The rooms are BIG and light, giving you an amazing view of all that Singapore has to offer. Not to mention the huge pool, state-of-the-art fitness centre and just a few minutes from the buzz of the Arab Quarter.
Changi Airport has a metro station which will get you to most parts of Singapore easily for only a couple of dollars.
However, keep in mind the last train leaves around 11pm, so if you’re arriving late at night you might not have access.
There are also buses which are slightly harder to navigate but nothing you can’t figure out or ask for help with once you land.
If you’d like to take a Grab (Singapore’s version of Uber) that’s also available and there’s a dedicated Grab pickup spot at arrivals. Grab is not that cheap in Singapore like it is in other parts of Asia, so expect to pay 2-3x more than you’d pay in somewhere like Bali or Thailand.
Of course, airport taxis are also available, the good thing about Singapore is you don’t need to worry about taxi drivers hustling you as soon as you reach exit the terminal, all taxis are metered and you simply take the next one in the queue.
Singapore has an excellent public transport system between the buses and trains, and if there is traffic, it won’t be like the gridlocked traffic you see in other parts of Asia. In Singapore owning a car is very expensive, so most people don’t drive, and as a result the roads are (mostly) free-flowing.
My recommendation for most first-time visitors is to use the MRT (metro) to go most places, but have the Grab app available on your phone in case you’re ever stuck in the rain, or find yourself far from a station. Singapore is very hot and the rain comes down hard, so there are times when walking isn’t going to be fun!
The cost to get around Singapore is very affordable, and you shouldn’t pay more than a few dollars a day on the metro system. Get yourself a concession card if you’re using it daily, which you can buy at any ticketing booth.
Getting Internet In Singapore
You can actually buy your tourist sim before you arrive in Singapore by getting an esim online.
Singtel has plans available here, so you’ll be sorted as soon as you land.
You can also buy a global esim if you’re planning on visiting a few countries in a short period. I use Airalo.
Alternatively, you can just buy your sim at arrivals when you land, which is also very straightforward. If you somehow forget to do that, you can buy a tourist sim at any 7-Eleven convenience store. However, self-bought sims do take some fiddling around on your phone to set up, so it’s much easier to have it done for you at a proper mobile shop.
Safety In Singapore
Singapore is arguably the safest country in the world and the chance of violent crime happening to you here are almost zero. Law and order is paramount and even if you leave your Ferrari unlocked with a bag full of cash inside, I’d be willing to bet nothing will ever happen to it. Singapore is safe!
However – with safety comes strictness, and laws in Singapore are very strict. Do not litter, do not be drunk and disorderly in public and whatever you do, do not get involved with any drugs at any time for any reason! Drug offences are punished extremely harshly in Singapore, and there have been several famous cases where foreigners received the death penalty trying to sell or use drugs in the country.
Behave yourself, use your common sense, and Singapore will likely be the safest and most stress-free destination you ever visit.
Enjoy Singapore!
Bren
Looking for things to do on your trip? Check out these ideas:
This article is a part of my travel tips series for New Zealand travellers. If you’re not from NZ, this post won’t apply to you. You can see the rest of the Kiwi traveller guides by clicking here.
My travelling whanau.
What’s up?
Today we’re talking about travel insurance.
As with most things, this aspect of travel is a little different for us New Zealanders. In fact, travel insurance has different rules/limits/prices in pretty much every country around the world. Like my previous guides on Schengen travel for Kiwis and banking for Kiwis, I’m going to grind down our options to see what is truly the best Kiwi travel insurance for us New Zealanders on the road.
Why you need travel insurance
I’ve noticed a lot of Kiwis tend to skip over this part of travel.
Nah bro, it’ll be sweet.
Nek minnit you’re in a Thai hospital with a broken arm and $5,000 of medical bills at your bedside.
This is why even on the smallest of trips, you need to get insured.
Bali for a week? You need insurance. Big six month trip after graduation? Yes, insurance. Even if you’re just heading to Aussie for a weekend? Insurance insurance insurance.
I would even go so far as to say it is the most important thing to buy when you travel. Yes, more important than your passport. Forgetting your passport can’t kill you. Not having travel insurance can.
Let me tell you why.
Not all countries are like New Zealand. Back home, if you get in a car crash on the way to Rotorua the ambulance will pick you up and take you straight to the hospital. They’ll fix your broken leg. Go home and rest. No need to pay a cent. Back to work next week.
Most of the world is not like this.
In other countries, accidents cost money, especially when you’re a foreigner. If you fall down a mountain while hiking in Nepal, the bill to airlift you out of there and get you to an emergency room could be close to $50,000. If you need extended care, some hospitals can cost up to $10,000 per night. These are not bills you want to be left with after your holiday. Can you imagine coming home from a trip $100,000 in debt?
Those are extreme (but possible) scenarios, however travel insurance will also cover you for things like car accidents, missed flights if you get sick/injured, missed tours and hotel rooms you’ve prepaid for, even stolen baggage and electronics if someone jacks your bus or train.
The best part is, most good travel insurance policies will only cost you $3-$4 per day. For that price travel insurance is always worth it.
Now of course, there are several choices when it comes to buying insurance. The policy you decide to go with should depend not only on price, but also what kind of coverage they offer. Let’s go through the things you should be looking out for:
Absolutely essential:
These are the things that are non-negotiable. Your insurance policy must have the following:
Accident and sickness medical: This includes hospital and specialist care, dental care, surgery, post injury care, ambulances, and medical evacuation. Look for coverage of at least $500,000.
Emergency medical: This relates to times where you’re stuck on a mountain or in the jungle, or in a country that doesn’t have appropriate medical facilities to treat you. It should include emergency evacuation by plane or helicopter. As you might guess, this is expensive. It should also cover transport of your remains home in the event of your death (this is important – it will be very expensive for your family to fund this). Look for coverage of at least $500,000.
Personal liability: This covers situations where you’ve caused damage to people or property and are at risk of being sued. This will cover your legal fees and any compensation you’re required to pay. Look for cover of at least $500,000.
Other important things:
These things are not life-or-death, but will still be important to have.
Trip cancellation: If your trip is cancelled for any reason (like the All Blacks lose and you kick a pole and break your leg), you’ll get reimbursed for all the expenses you’ve already paid. That includes flights, accommodation, tour fees etc. At least $5,000 coverage is ideal.
Trip interruption and changes: If you have a serious injury on the road and you’re in hospital for a week, you might still want to continue your travels but things would’ve changed. You would have missed flights, missed tour dates, you might have been evacuated to a different country. With this coverage your insurance company will cover the costs of all these changes. Look for coverage north of $2,000.
Baggage and personal effects: If your camera, laptop or phone gets swiped on the train, travel insurance should cover the cost of replacement. What is covered will depend between companies. Look for standard coverage of at least $2,000.
Depending on the type of trip you’ve planned, it could also be important to seek special coverage, like a specific sport or activity you plan on doing. If you’re going on a surf trip, double check that you get full coverage while you’re in the ocean (some companies won’t cover certain activities).
Everything else
Most companies will offer coverage for a few other things, like your rental car deductible, missed concert or event tickets etc, but the ones listed above are the essentials. Make sure the coverage is rock solid on each of them. The other stuff will be mostly a bonus.
What are the travel insurance options in New Zealand?
There are a many options for you to consider in New Zealand. I don’t have time to investigate them all (pretty much every bank and insurance company will offer something), but I have chosen six of the most popular providers to look into. Of course, feel free to research a few more if you feel the need.
In the summary below, I’ll compare each of them on the provisions I consider most important, including price, and hopefully I’ll be able to give you a recommendation on who is best and who to avoid. Here’s who we’ll look at:
Southern Cross: A popular Kiwi insurance company that is a familiar name to many of us.
World Nomads: Global insurance company with flexible policies and very popular among backpackers.
Safetywing: Designed specifically for frequent travellers and very affordable.
1cover: Multinational company with a New Zealand arm that has good, affordable policies.
American Express: Big American company that offers policies in New Zealand.
I haven’t looked into every single aspect of their policies, but I have rounded up the most important things: Medical, emergency medical, dental, cancellation, personal belongings and personal liability, among others. Here’s how they stacked up:
Basic travel insurance plans
First, we’ll look at the basic, entry level plans. These are the plans that cover just the essentials.
The below table summary is based on a one week trip to Europe for a single, 30 year old traveller:
Note: Some of these numbers might not be 150% accurate, because each company has different names for things so it was difficult for me standardise it. But I’m confident the numbers above are pretty close to what you’ll get.
Too many numbers? Here’s the short version:
Safetywing is the clear frontrunner on price, but the policy is really thin – it literally covers only medical and personal liability.
However I’d be happy with that as long as I wasn’t going anywhere crazy and not planning on doing anything crazy (like a trip to Aussie, maybe).
American Express has the best coverage but is the most expensive. Also note if you’re an Amex Airpoints Platinum holder, your travel insurance is free if you book your tickets on your card. Usually they have a 300 Airpoints dollars signup bonus too. You can check here!
Comprehensive plans
Next up are the premium plans. These are the plans that cover the essentials such as medical and personal liability, but also cover all the other little things like personal items, loss of income etc etc.
Not all policies are the same though, so make sure you read each policy carefully before you buy. Here’s what the numbers look like:
To me all these policies look pretty similar across the board. I don’t think it would matter too much which one you choose – meaning the deciding factor for me would be price. I’d go with the cheapest –1cover. The policy is great and covers all the essentials.
The exception would be if you’re travelling for months at a time, in which case I would choose Safetywing. Their comprehensive plan is specifically designed for long-term travellers.
One word of caution here though: Going with the cheapest isn’t always the best option. Let me explain:
Why not just choose the cheapest plan?
First of all, no two companies are the same. For example, 1cover might be the cheapest for a one month trip but it might not be the cheapest for a one year trip. Therefore it’s important to check out the prices for your exact travel dates and determine what is actually the cheapest.
Secondly, you should choose the policy that best suits you. If you are carrying a lot of expensive camera equipment, each company will charge a different premium for the extra cover. You’ll need to get in touch with each company and get a quote for your personal situation. Likewise with the activities you’re planning to do. If you’re climbing in the Himalayas, some companies may not be willing to cover that. You’ll need to check who is happy to cover you for the travel plans you have.
The above rates are also based on a single traveller. Perhaps you are travelling as a couple or a family – that’s going to change things. Some companies will be tailored more for families and some tailored more for single backpackers, so make sure you check. Some companies will offer better cover for your family at a higher price, which could be important for you.
As you can see there’s many reasons why the cheapest company may not be the best for you. Before you pay anything for travel insurance, double check the policy and make sure it covers everything you need it for. If you cannot tell from the policy statement, call and ask! A policy is worthless if it doesn’t cover everything you’re at risk for.
Check if you’re already insured
Do you have a credit card? Perhaps you’re already insured.
If you have a free or low-fee credit card, it’s almost certain you won’t have travel insurance included with it. However, if you have any kind of platinum credit card, there’s a good chance you’re already insured.
Many banks in New Zealand offer you free travel insurance for short trips (usually up to 30-60 days) if you have a premium credit card. Call your bank or credit card company and ask.
Sometimes it’s even worthwhile to just upgrade to platinum before your trip to get the free cover. Since the annual fee on a platinum card is usually only $100 or so, if your travel insurance is going to cost more than that you might as well just upgrade your card instead.
Also check any family or business insurance policies you have. Many have travel insurance written in and you may already be covered under a policy that a family member has.
I recommend getting an Airpoints credit card, so you can earn points for free flights. Many of the platinum cards offer free travel insurance too. I have a breakdown of all the Airpoints credit cards in New Zealand here.
What to do when shit happens
The first thing you should do if something happens overseas is call your insurance company. Every travel insurance company will have a 24 hour number you can call. Not only is it important to call and get their advice on what to do, they have contacts and can connect you to the right doctor/hospital/lawyer.
The exception is when you’re in an emergency. If you’ve been in a bad car crash and you’re losing blood and your vehicle is in flames, just call the police and get to the hospital. Hopefully that’s just common sense, but ensure your safety first. You can sort out the insurance details later.
This should also be obvious, but make sure you keep all your receipts and invoices. Take photos of them and store them online somewhere as well, your email or Dropbox is a good place. You will need all these documents when it comes time to make a claim.
Summary for those who were too lazy to read the article
*Based on a one week trip to Europe for a single, 30 year old traveller:
Before you buy a policy, call your bank or credit card company – there’s a chance you’re already insured.
Make sure you keep all documents like receipts and invoices for claims.
Call your travel insurance as soon as any incident happens overseas – they can advise you on what to do.
Safe travels!
Bren
P.S. The only insurance companies above I have actually purchased policies with myself are World Nomads and Southern Cross. Both were great. I cannot vouch for the others.
P.P.S. If you’ve had experiences with the above companies or any other NZ companies, leave them below and let us know about it. I can’t dig into every single insurance company in NZ, but any experiences you share will be helpful for others!
Disclaimer: World Nomads provides travel insurance for travelers in over 100 countries. As an affiliate, we receive a fee when you get a quote from World Nomads using this link. We do not represent World Nomads. This is information only and not a recommendation to buy travel insurance.
This is in Uganda. I’ve checked into this budget hotel and you know, I’m hungry. After I buy a sim card for my phone, I ask the lady where her favourite place to eat is. She points across the road to some little place with a blue door. Awesome.
I walk in there and ask the guy behind the counter what they’re cooking. He says they’re serving beef stew and rice today. Perfect. I’ll have a beef stew with rice please.
So I sit down and I’m trying to get my sim card to work, and within a few minutes my food comes. It’s exactly what he said it was – beef stew and rice. I eat some. Nice. I finish the whole plate.
It’s actually my first day in Uganda. And I don’t really have energy to go exploring or anything, so I just sit there fiddling on my phone. After about 45 minutes, my stomach turns a little. Brrrrrrrr.
I dismiss it as just a little tummy rumble. Just getting used to this Ugandan beef, yeah?
Then a few minutes later, another rumble. Hmm.
This goes on for about half an hour and doesn’t concern me too much, I’ve experienced this before even at home. Sometimes you eat too fast, or just eat something funny. But then suddenly I feel a bit of outward pressure with the rumble. I clench my, err, cheeks together, and now I’m all perked up, like a dog hearing rustling outside the window in the middle of the night.
Are my bowels about to explode?
Better visit the bathroom.
I run upstairs to my hotel, which is just a few doors down. As soon as I sit down, I unleash merciless havoc on the toilet.
Crap. Literally.
A class case of traveler’s diarrhea.
What is traveler’s diarrhea?
That story was back in 2015, and it was pretty clear to me that I got it from that restaurant. Either the beef was bad, or they didn’t wash their spoons properly. Who knows.
As for the cause of the diarrhea itself, I don’t know if there’s a difference between that of traveler’s diarrhea and normal diarrhea. Both are usually caused by eating some crappy food that hasn’t been cleaned or stored properly. Bacteria such as E.Coli gets into your guts and then just starts messing everything up.
However, when we talk about traveler’s diarrhea, we are often referring to sudden diarrhea we get overseas, especially after eating something seemingly innocent such a salad at a food stall, or a piece of grilled meat.
It is unlikely to get diarrhea from things we eat in our home countries, even if they are slightly contaminated with something, because we’ve been eating those things our whole lives. Our bodies recognise them and can handle them just fine.
However, overseas, many germs are brand new to the body. Our body has never seen them before. This often causes the stomach to reject it and we get stuck to the toilet for a few days. You might also have heard this referred to as Delhi belly, Bali belly or Montezuma’s Revenge.
The most common culprits are meat that hasn’t been refrigerated or cooked properly, unclean dishes and cutlery, or salads that have been washed with unclean water. Another common cause is people drinking tap water when they shouldn’t. Southeast Asia is a hotbed for travelers diarrhea, as are places like India, China, and many parts of Africa.
What are the best ways to prevent traveler’s diarrhea?
After many years on the road travelling to many far-flung places, I’ve had to deal with traveler’s diarrhea several times – notably in Cambodia, Tanzania and Uganda. Some ways of dealing it are just common sense and some work better than others, but after experiencing this unfortunate dilemma several times I now have a decent system on how to prevent it and haven’t had any troubles since.
The first thing I’m going to tell you here is, YES, you do need to worry about this. You need to take conscious measures to prevent traveler’s diarrhea.
Having traveler’s diarrhea is a miserable time and will keep you out of commission and maybe even bed-ridden for up to a week or more. That’s a big chunk of your trip.
If you’re heading somewhere with questionable food safety and want to make sure your guts (and your toilet) stay in good shape, here are my best tips to help you do so:
1. Dukoral
This is one of your options. Dukoral is an oral vaccine that I’ve taken several times, particularly on my first few trips to Africa. It should be available from your doctor and in many countries you don’t even need a prescription.
What does Dukoral do?
It protects you against both cholera and diarrhea caused by the E.Coli bacteria, presumably in the same way as most other vaccines – by introducing the non-toxic bacteria to your stomach so you can produce antibodies.
I have used this vaccine on several trips, and it works great. What I love about it though is the set-and-forget nature of it. You drink the solution twice before your trip – each dose one week apart – then you’re protected for three months. Super easy.
The only issue I have with taking things like this regularly is I feel like they impede your body’s ability to deal with these things on its own. If there’s ever a case when I haven’t taken the vaccine, I feel like my body is going to crumble with the slightest bit of bad food (this is bro science and I have no idea if it’s true, just a personal thing).
I used to reserve it for when I’m going to a place that’s very questionable – think small villages in rural Ethiopia, something like that, but nowadays I don’t take it at all, instead relying on the preventive measures I’ll describe further below.
However if you are highly susceptible to gut problems and diarrhea, and haven’t travelled a lot in the developing world, I’d say this is a good option. But that doesn’t mean there aren’t alternatives. What can you take instead of Dukoral? Keep reading!
2. Probiotics
Do you know how important probiotics are to your health?
In our guts we naturally have trillions of bacteria. Most of them are good for us. They boost our immune system, help with digestion and most importantly, keep the bad bacteria in check.
Unfortunately many of us have ravaged our gut flora through constant use of antibiotics. Not only do we use them when we’re sick, but it’s also in much of the food we eat, especially meat and dairy. Almost all commercial livestock is treated with antibiotics, especially cows and chicken. That means traces of antibiotics are found in our milk, cheese, eggs and meat. Most people are constantly ingesting antibiotics on a daily basis.
The problem with antibiotics is they don’t discriminate. They kill both the good and bad bacteria in our body. Sadly it is hard to avoid antibiotic exposure in modern life.
Here’s how this applies to traveler’s diarrhea:
If you eat a dodgy salad in Cambodia and get a few nasty bugs in your system, there’s a chance it’s going to shut your body down. But if your gut is healthy with trillions of strong and healthy flora, a few bugs like this won’t be a problem. The good bacteria in your gut will knock those suckers out without much trouble at all.
Research is even emerging that a healthy gut is one of the most important aspects of a healthy immune system (studies here and here). And in studies like this one, the medical community has been starting to see probiotics prevent food poisoning and can be an effective remedy against traveler’s diarrhea.
I’m guessing it will start becoming more mainstream soon (and it already is) but honestly I’m not too concerned about what the docs think. If I start taking probiotics and stop getting diarrhea, that’s proof enough for me! And myself and many other travellers have been doing so throughout our travels. Probiotics work.
What is the best probiotic for traveler’s diarrhea?
You might be thinking, you’ll just pack some probiotics and take them during your trip, everything will be dandy, yeah?
Unfortunately it’s not that easy.
Replacing and building a healthy gut takes time, so I would recommend you start taking probiotics at least a month before your trip. In fact, I recommend you start taking them right now, and continue to do so regularly whether you’re travelling or not! I personally take a 50 billion probiotic supplement every day, regardless of whether I’m on the road.
The thing is, you can’t just grab any probiotic off the supermarket shelf and think you’ll be okay. You need the right type of gut flora, and also the right quantity. If you’re travelling with it, you also want it to be a shelf stable probiotic.
Remember, some studies estimate we have up to 100 trillion bacteria in our guts. If you take a probiotic that contains 250 million units, it’s like a drop in the ocean. It’s no better than just eating a spoonful of yogurt.
So how much do you need?
I try to aim for between 10-20 billion colony forming units per day. Ideally more. If you’re about to go somewhere where your gut will be really tested, such as rural Asia or Africa, you might to get a product that gives you up to 50 billion units per day.
I know that sounds like a lot but it’s perfectly safe. You can’t overdose on probiotics unless you really try – any excess will just get passed out in your poop. In fact, this guy actually did try to overdose and still couldn’t do it.
I’ve taken up to 200 billion units in a single day and was totally fine.
You also need the right type of probiotic. There are thousands of strains of gut flora out there, and not all of them are shown to be effective against traveler’s diarrhea.
In this study I cited earlier, the three that were found to be most effective were Saccharomyces boulardii, Lactobacillus acidophilus, Bifidobacterium bifidum.
Luckily the latter two are quite common, but the first can be more challenging to find.
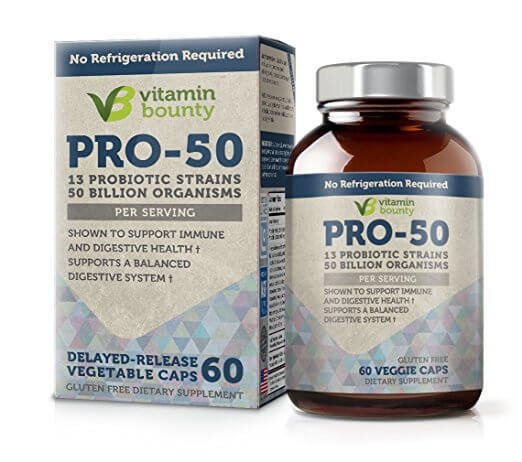
It’s the probiotic that I currently use and have been using for several years now. It’s one of the best probiotics for travelling – both due to its formula and how compact it is to travel with, and it’s also shelf stable. I highly recommend it.
Each bottle contains 30 servings, and each serving gives you a whopping 50 billion colony forming units (most common probiotic supplements only give you around 1-5 billion).
It also contains all three flora that were recommended to be in probiotics for travel (Saccharomyces boulardii, Lactobacillus acidophilus, Bifidobacterium bifidum) which can be quite hard to find in one supplement!
If you’re worried about getting traveler’s diarrhea, I highly recommend carrying a strong probiotic like this. Multi strain products like this are the best probiotic to prevent traveler’s diarrhea and will keep your gut in fighting shape during your trip.
Of course you can also use any other “good” probiotic from your local pharmacy or health store, but this is the one I like and recommend. Just make sure whatever you use has a sufficient number of units and the right strains!
Remember, taking probiotics before travel is important! You want to start working on your gut health at least a month before your trip, so make sure you get enough. I’d recommend getting a bottle for the 30 days before your trip, and then a second bottle to use during the trip itself. But ideally you should be taking them regularly regardless of whether you’re travelling or not.
Again, I have never had any tummy problems on the road since taking daily probiotics, and I travel to some pretty dodgy places and eat some pretty dodgy things. They really work. It’s easily one the best travelers diarrhea treatments I’ve tried.
How to travel with probiotics
The most important thing when buying a probiotic for travel with is to make sure it is shelf stable.
This means the probiotic does not need to be refrigerated for the bacteria to stay alive. The obvious reason is – it’s unlikely you’ll be able to keep your probiotics in the fridge at all times, especially if you’re on the move a lot. The Vitamin Bounty probiotic I’ve recommended above is shelf stable.
Secondly, buy a probiotic that has a very high unit count, at least 50 billion plus. When you’re at home, it’s fine to buy 10 to 20 billion unit products and eat them periodically with your meals throughout the day. However when you’re travelling this isn’t practical. You want to be travelling with as few bottles of probiotics as possible, so get the highest count you can. Anything over 50 billion is perfect.
Lastly, take them properly. I find the best way to take probiotics while travelling is to take it first thing in the morning with a big breakfast. Probiotics populate the gut best with food.
Extra tip: Prebiotics
One thing that probiotics need for optimal function is an equal amount of “prebiotics” to support them. Prebiotics are highly fibrous foods that feed probiotic bacteria and help them flourish in the gut. Without sufficient prebiotics, your probiotic supplements will not survive in the gut and will simply die and go to waste.
Some of the richest sources of prebiotics are oats, asparagus, chicory root, jerusalem artichoke, leeks and dandelion greens. I usually try to get my prebiotics from foods, and always eat a lot of oats and asparagus, every day if possible. However during my trips I usually take a prebiotic supplement as well. I’m not too fussy about prebiotics and just take whatever is available at pharmacies around the world. Something like this is the type of thing I usually take.
3. Probiotic foods
Have you ever heard people tell you that you should eat more yogurt if you’re having tummy problems? People used to say this to me all the time. Especially when travelling in places where diarrhea is common, the girls would always be telling me to eat more yogurt.
Even doctors and nurses have told me this in many places.
The reason is simple: yogurt is a fermented food, and therefore contains live cultures (probiotic bacteria) which populate and protect your gut, just like the probiotic supplements we talked about above. They basically achieve the same thing. The same goes for other fermented foods that are recommended for probiotic reasons, such as sauerkraut, kimchi, kombucha and kefir.
When I learned this I started adding yogurt to my travel diet immediately, usually stopping by a supermarket to buy some every day.
However, there’s a few reasons I don’t recommend relying solely on probiotic foods and here’s why:
Unless there’s a swanky health store where you’re travelling to (unlikely in most places where you’re susceptible to traveler’s diarrhea) it can be hard to find a high quality yogurt with live cultures. Even then, you don’t know how many or what strain of probiotics you’re getting, plus a lot of the yogurts these days are processed and flavoured with sugars and preservatives. The same goes for other fermented foods.
There is also a problem with storage and refrigeration. In fact, my friend Jodi actually got food poisoning from yogurt that she suspects wasn’t refrigerated properly. Ironic.
But the main reason I don’t rely on foods is – you can’t travel with them. It’s just not practical to pack a jar of sauerkraut or yogurt in your suitcase or backpack and take it around the world. Unlike probiotic supplements, which are ideal for travelling with, it can be hard to guarantee that you’ll get enough probiotics each day when just relying on food sources.
For that reason I don’t recommend relying just on probiotic food. Of course, do eat it whenever you get the chance – I try and have a bottle of sugar free yogurt or kefir every day while travelling (check the packaging to make sure there are live cultures present).
But in my opinion it’s best to have probiotic supplements with you as well to ensure you get a constant daily dose.
4. Anti-diarrheal medicines
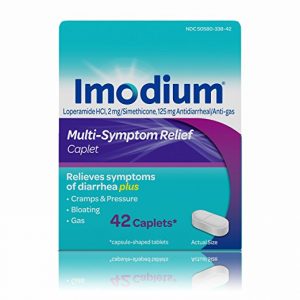
When I first started travelling, my doctor gave me Loperamide tablets, also known as Imodium. This is a drug that gets to work in the large intestine and slows down bowel movements, meaning your poop has more time to “bulk up”, so to speak. I’ve used this a couple of times earlier in my travels and while it works, I haven’t used it since then.
The reason I don’t like these pills is because they are reactive rather than preventive. Usually you’re supposed to wait until you actually get diarrhea, and then use the pills to treat it. I prefer to be a bit more proactive and just not get diarrhea in the first place. Using a vaccine like Dukoral or preparing your gut with healthy probiotics makes a lot more sense to me. However, I do still have Loperamide tablets in my toiletry bag from many years ago – I guess they’re there for peace of mind more than anything!
If you’d like to take some Loperamide with you on your trip, you can grab some basic Imodium pills, or even just get a generic brand off Amazon. Something like this Kirkland product would be fine.
Other tips for preventing food poisoning and traveler’s diarrhea
There are also many common sense things you can do to keep you and your stomach safe.
Always sanitise your hands before you eat! I carry a basic hand sanitiser everywhere (just like this one). The world is filthy and every car door, bus seat, dollar bill and ticket machine is crawling with germs. Of course this doesn’t mean you need to wear gloves or anything stupid like that, but always clean your hands before you eat.
Drink bottled or boiled water. At home the tap water may be safe to drink, but in many countries around the world you are not supposed to drink tap water. In most developing countries bottled water is ridiculously cheap anyway – a day’s worth of water often doesn’t even cost a dollar.
Try to eat in busy places. This means the food turnover is high and they won’t be serving you meat and vegetables that has been sitting around for days. Contrary to what most say, I find street food is also great because you can watch the food getting cooked right in front of you. If anything looks unclean, you can see it! This is unlike many restaurants where everything is done behind closed doors.
Hope that helps. Good luck and safe travels!
Bren
Disclaimer: Obviously I am not a doctor, and this article should not be taken as medical advice. The above is based on my personal experience only. You should consult your own medical professionals before starting any treatment plan.
A few weeks ago I didn’t know anything about Namibia, other than the fact that the new Mad Max was filmed there (and even that didn’t mean much – I still haven’t seen it). I just figured the country had a lot of desert. I also noticed their rugby team was full of white guys when they came to play in New Zealand, so I presumed the country had some European elements too. Other than that I knew nothing (like my buddy Jon Snow).
Namibia turned out to be a nice surprise. Quick history lesson: The Germans got here first. They came and built all this German looking stuff (really straight roads, parallel lines, geometry nerd stuff). Then in WW1 the South Africans came and smoked the Germans and took over. They enforced apartheid and turned it into a second South Africa. Later on when Europe started granting African colonies independence, South Africa refused (I guess they really liked the sand dunes or something). Even the UN ordered South Africa to get outta there but they didn’t want to. That’s when “South West Africa”, as it was known back then, got a liberation army together, did some guerilla stuff and finally got independence in 1990. Namibia was born.
Namibia seems to fit that history nicely. At only 27 years old, it feels like a resilient adolescent, still choosing a path, working hard to be seen, searching for an identity. But it also feels like a place not too sure of its voice yet, and not stomping its feet too loudly. More Khalid than Kanye (how you like that for a music reference!)
Here’s a quick recap of my tour around the country.
This is where we started, but lasting first impressions were made before we even reached the town. As we made the long drove up from Walvis Bay airport, we passed miles of untouched coastline. The water was brimming with endless peeling 4 foot waves, not a single surfer out there. I’d barely been in the country 15 minutes, but had already pledged to come back with a surfboard and shake hands with that ocean. Hopefully sometime soon.
We got to the town of Swakopmund around 40 minutes later. It’s a sleepy place of around 70,000 – a small main square, typical of most small towns, with many different coloured faces walking around. Quite cosmopolitan. This is also a good launching point to visit the famous Namibian dunes (I’ll get to that soon).
We didn’t do much here. Walked around town, strolled along the beach, wandered through all the supermarkets. The German influence is very apparent, similar to other German-developed towns on the continent. There’s a little bit of edge to this place too. It has a few fancy restaurants, long stretches of beach, a lot of sunshine. It’s very brown and sandy, like the desert, but it has everything you need. Other than that, I can’t tell you much. I only stayed one night.
From Swakopmund we headed to Windhoek – an interesting name for a capital. I looked into where that name came from; nobody seems to know for sure. Also for some reason the only photo I have is of the supermarket, so that’s all I can show you right now!
The rest I shall illustrate with words. First, in the foot of that photo you’ll see a display of little packets of meat. That’s biltong, Namibia’s answer to beef jerky. I ate many packets in one week. You must try it.
As for Windhoek itself, it’s very low energy for a capital, at least during the day. There are shopping streets and malls, like any other you’d see around the world, lots of appealing restaurants, people of all colours walking around, a noticeably hip fashion sense. It’s almost a mini Johannesburg. I didn’t really get a chance to explore, but it feels young. I can imagine there’s a fun social scene behind the curtain, if you get the chance to look.
Another thing I noticed were a lot of luxury cars – a Mercedes or BMW around almost every corner, sparkling as if they get waxed every morning. Where does all this money come from?
On the flipside, there’s a more modest side to Windhoek too. Close density housing with the telling sea of corrugated iron rooves, winding mazes of dusty roads and pop-up shops. But passing through these areas always saw crowds of kids running and playing in the streets, gates left open, people riding bikes around. Things like that are usually a sign it’s a safe and close-knit community, rather than areas of hopelessness or crime.
Around the streets of Windhoek I got a lot of smiles, waves, curious stares. It felt like a friendly place.
My 48 hour impression was: Windhoek is cool. You could have a lot of fun here.
Etosha National Park is one of the biggest game reserves in Africa. It’s quite a drive up from Windhoek (around five hours), although this seems to be a standard component of most African safaris. Safari parks aren’t just sitting in the middle of cities, after all.
On our first game drive we saw all the standard stuff (zebras, giraffes, elephants, impalas, warthogs). We didn’t get to see many cats, save for a couple of distant sleeping lions. Compared to the Serengeti, where you see a good handful of lions every day (and sometimes cheetahs and leopards, if you’re lucky) it was a bit lacklustre.
After setting up camp that night, we headed off to see the waterhole. This is something cool about the Etosha campsites. They’ve built them around waterholes, so even during the night, you can walk over to the waterhole (fenced, obviously), and see if there is any wildlife wandering around. They’ve been set up like little stadiums, so you can sit there for hours (all night if you want to, it’s 24 hours) and watch life in the wild unfold.
This touches on what Etosha really has going for it – there might not be as many lions or leopards around, but the campsites are super well maintained. When I camped in the Serengeti it was like going to war in the 1920’s. We all tented up on a large patch of dirt, no facilities, the toilets were some of the skankiest I’ve ever seen. You couldn’t pay me to use them again.
Etosha is the opposite. The campsites are run by Namibia Wildlife Resorts, and have hot showers, real toilets, soap and toilet paper. There’s wifi (for a fee), swimming pools, and shops where you can buy snacks, booze and souvenirs. At each camping post there are also plugs where you can charge your phone and camera. And that’s for the campers. I imagine the actual suites are lavish.
They even had a cable TV where I managed to catch the Mayweather v McGregor fight at 4 in the morning in the middle of nowhere. Go Etosha!
I’m not really an animal kind of guy, after a couple of safaris, gorillas and Galapagos, I think I’m done with the wildlife thing. But if you’re looking to do your first safari, Etosha isn’t a bad choice at all.
Sossusvlei
Sossusvlei is an area of the Namib Desert, a UNESCO heritage site and also home to the famous Dune 45 and the world’s biggest sand dune, Big Daddy.
If you hadn’t guessed, the desert is vast. This is a good place to come if you want to feel small and insignificant (and hot and sweaty). You need to take a tour to visit this place, indie travel would be difficult here.
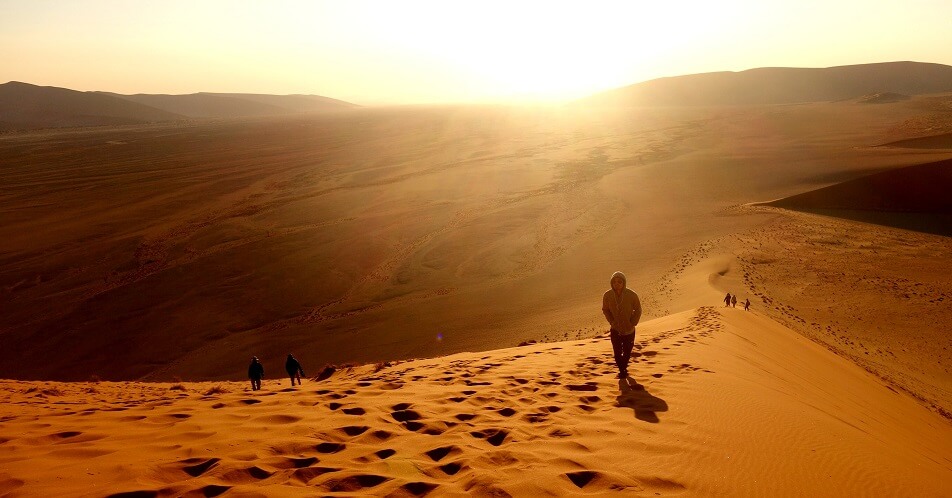
On our first day, we woke before sunrise and climbed up Dune 45 to catch the sunrise. It’s a steep but rewarding climb, if you can manage to wake that early. Not so many do, so it’s got a small crowd, but not an overwhelming one.
From there we took a 6km trek over to Big Daddy. It was packed with tourists when we got there, and the sun was really dishing out punishment. For reasons I won’t go into (let’s just say Germans aren’t always punctual and Chinese tourists do some really weird shit sometimes) we were a few hours behind schedule and didn’t have time to climb the monster dune. Ideally I would’ve been able to sit here right now and tell you I’ve climbed the world’s biggest sand dune! Sadly I cannot, but I’m sure one of you will be able to do it for me 😉 It would be a stunning view from the top, if you ever get the chance.
As for the campsites out in Sossusvlei, they’re just as good as Etosha – good showers, a bar, a pool, power sockets, real toilets. Not a bad place to spend a few days on the road.
The verdict
That was my week in Namibia. Short, but interesting, different from what I expected.
For a country that’s only 27 years old, it impresses. The streets are clean, supermarkets well stocked and there are coffee shops and shopping malls that wouldn’t look out of place in Europe or Australia. Lots of nice houses line the wealthier streets. Things are orderly and well kept, people relaxed and it’s hard to feel unsafe walking in the main areas. Some of it is certainly the Africa you see on television, but much of it is not. Of course it lacks a few things, like a good public transport system and zippy internet, but for a country barely out of its teens you can let that slide (let’s be fair, New Zealand doesn’t have those things either, even after a few centuries). Like with all good things, it’ll come in time. Besides, they make up for it with the best bacon biltong in the world!
If you’re ever in that part of the world, I’d say it’s well worth the journey over. Don’t forget your surfboard.
Over the past few years I’ve seen the dividends of all my language study from my twenties. Often on the road I get the chance to chatter in a foreign language, which often leads to people asking me, “Bren you speak Spanish too? How many languages do you speak?”
The truth is I speak far fewer than I would like, and nowhere near as well as I would like. But even my scruffy résumé has served me really well on my travels. Just a few words in another language has opened doors to some incredible experiences.
Language has fascinated me ever since I started travelling – that we all say the same things in such different ways. This led to me spending much time and money during my travels to learn language and reduce my dependency on English. Funnily I always thought language was fun for everyone – like video games and eating ice cream. It didn’t occur to me that many people actually don’t like learning language. Which explains why so many never do.
What’s the fastest way to learn a language? It’s not complicated. Their a certain things that are better to learn before others, certain words you should learn and certain ones you shouldn’t bother learning at all. If you focus on the right areas, you can find yourself speaking rather quickly.
Language doesn’t need to be a mammoth task, and it doesn’t require months and months of studying to be able to say a few basic things. In this guide I’ll take you through a few tips and hacks that will have you holding your own in just a few days. Once you experience that and have your first conversation in another language, however broken it might be, I promise, travelling will never be the same again.
For me it’s mostly about respect. The world is a big place and England is only one country in the top left corner. Not everyone in the world speaks English or even cares to try. Yet every day I see travellers confused and frustrated that locals in other countries don’t understand English.
Would it not be weird if someone walked into your coffee shop and said “一杯咖啡和一碗沙拉“, and then got angry when you couldn’t understand them? Yet we English speakers seem to do that all the time.
It goes both ways. If you respect the locals by trying to communicate in their own language, they will respect you back for the gesture. You will make more friends, have more interesting conversations, be welcomed into more communities, and be given more opportunities to experience local life.
Even if you only learn to say “nice to meet you” and “thank you”, you will be surprised how far that will take you.
What’s the fastest way to learn a language?
Here is my basic breakdown, divided into difficulty:
Level 1:
Greetings
Numbers (1-100)
Basic nouns
Basic verbs
Level 2:
Numbers (100+)
Basic adjectives
Basic adverbs
Verbs in the present tense
Basic sentence structure (Noun + verb. e.g. “eat apples”)
Level 3:
Verbs in past and future
Fuller sentence structure (.e.g. “John likes to eat red apples”)
Level 4:
Everything else
If you are trying to learn the bare minimum before a trip, I recommend sticking with Level 1.
This will give you the best chance of communicating without learning anything complex, and sticking to those subjects is definitely the fastest way to learn a language if you just need very basic communication.
Level 1 only requires memory and no real understanding of the language structure, but will still give you the tools to say many everyday things. That’s perfect! And you can do it in a couple of days.
Level 2 will take you longer but is not difficult. Level 3 and above is where a little more “study time” is required.
A 7 day plan:
Let’s say it’s a week before your trip. Obviously I’m not going to teach you to become fluent in a new language in 7 days. That’s impossible. There are people who’ve spoken English their entire life and are still horrible at it.
But if we learn smart we can definitely learn to say a lot in a new language in that short time.
Here are a few interesting things to consider:
Even if you speak a new language broken, almost everyone will still understand you. For example, in a restaurant, you don’t need to say “May I please have a bowl of fruit?” You could just say, “Please, bowl, fruit” with a big smile, and you’ll get exactly what you want. I’m not saying you should aspire to speak broken, I’m saying you don’t need to be perfect to start.
If you like chicken, you’ll probably say that word quite often. And if you don’t like shrimp, you probably won’t say that word at all. So you need to personalise your learning, rather than just learning generic lists. This cuts your learning time exponentially.
Most words you learn in a typical language course are useless. For example you might learn the word “elephant”. How often do you say the word elephant? Maybe once or twice a month. Whereas you say the words “eat” and “toilet” probably every day, and the words “why” and “because” every second sentence. So in reality you only need to learn a few words, much less than you would expect. Just 100 words will get you much farther than you would imagine!
What I’m getting at is learning a language should be highly personalised, like going to the gym. A grandfather who is 100kg overweight and a 14 year old girl will have totally different training plans. It is the same with language. You can improve your progress exponentially this way.
Consider this as an example; my Swahili is slightly better than my Chinese. Why is this strange? Because I spent an entire year studying Chinese full time at a university in Shanghai, with professional teachers, exams, textbooks, countless hours of study, homework, class every day. With Swahili, I’ve only done around 50 hours of self-study while in Tanzania. How does 50 hours of self-study get better results than an entire year in a top university?
The answer; learn smarter. In my Chinese course we had to learn long lists of completely useless words, like mainframe and parliament. Not only that, I had to learn to write and read them in Chinese characters. That led to hundreds, maybe thousands, of hours spent learning words I might use once or twice a year. Imagine how silly it was that I could write the Chinese character for embassy, yet couldn’t order a simple cocktail at the bar.
When I started learning Swahili I wanted to be smarter. Because I didn’t have exams or teachers, I got to decide all my own material. I used my experience of studying Spanish and Chinese to help me strip the language down to the bare essentials, and create the most efficient language course, designed specifically for me. Not only did I learn faster and better, it was a lot more fun as well. Once I was able to converse about basic things, my vocabulary and understanding rocketed quickly just from everyday conversation.
The plan below will introduce you to this approach; how to get to a basic conversational level in a new language in just 7 days. I’m going to go through the steps using two languages; first, Spanish, as it’s a language familiar to many. But I’m also going to do this demonstration in Italian.
Why Italian? Because I’ve never learned a word of Italian in my life, I have no Italian friends and I’ve never even been to Italy. By laying out the steps to learn Italian in 7 days, this will be a perfect simulation of starting a language from absolute zero.
Note: This also that means some of my Italian below might (definitely) be wrong, so any Italians reading please chill. You can feel free to correct me in the comments too 🙂
Day 1: Numbers
Numbers are important because you use them for almost every activity (room numbers, bus fare, shopping, table for four, etc). Also it’s a nice, easy thing to start with when learning a new language.
We learn 1-10 to begin with. Anybody can do that in any language.
For most languages, 1-10 takes you a long way. For example, in Chinese if you can count to ten you can count to 99. And if you learn three more words (“hundred”, “thousand”, and “ten thousand”) you can count to a million.
If you’re learning French however, counting to 100 is like an epic academic quest for enlightenment.
So it all depends on the language. But we’re just worried about 1-10 for now.
So the first thing you will learn is:
English
Spanish
Italian
One
Uno
Uno
Two
Dos
Due
Three
Tres
Tre
Four
Cuatro
Quattro
Five
Cinco
Cinque
Six
Seis
Sei
Seven
Siete
Sette
Eight
Ocho
Otto
Nine
Nueve
Nove
Ten
Diez
Dieci
If you don’t know how to pronounce a word, Google Translate has an audio option, too:
Counting to ten is a cool first thing to learn because you can kind of sing it to yourself over and over, in the shower, in the car, wherever you want. It’s like your new ABC’s. It sticks with you too – I can do it in maybe ten to fifteen different languages now, just from memory.
In reality you should be able to learn to count to ten in any language within 15-20 minutes. A nice surprise for me here was that Italian numbers are so similar to Spanish, which I did not know before! That made it an easy start.
Leave it there for Day 1.
Day 2: Greetings and basic words
Greetings are probably the thing you will use the most so it’s good to learn the most common ones.
Whenever you walk into a restaurant, greeting your waiters at breakfast, the receptionist, even taxi drivers and strangers on the street. Also for Day 2 it’s a good idea to throw in some basic words that you will use all the time (please, thank you etc).
Here is a list of starting suggestions. I’d also encourage you to add your own!
English
Spanish
Italian
Hello
Hola
Ciao
How are you?
Como estas?
Come va?
I’m fine
Bien
Bene
Good morning
Buenos dias
Buon giorno
Good night
Buenas noches
Buonanotte
Please
Por favor
Per Favore
Thank you
Gracias
Grazie
Yes
Si
Sì
No
No
No
Excuse me
Disculpe
Scusami
Sorry
Lo siento
Scusa
Why?
Por que?
Perché
What?
Que?
Che cosa?
Who?
Quien?
Chi?
Which?
Cual?
Quale?
Where?
Donde?
Dove?
You may also be wondering where and how you find out all the translations for these lists. I’m just using Google Translate, but Google will give you all kinds of free online dictionaries etc. The resources online are endless – it shouldn’t be difficult.
I made a similar wordlist for Swahili recently and just asked a Tanzanian friend to sit down with me and translate everything – took maybe half an hour, so that’s another way to do it.
Day 3: Basic verbs
To populate this list, think of the verbs that you do every day. Don’t include verbs like “paint” and “sail” because you probably don’t do those things every day (unless you’re a painter or sailor).
Remember, we’re trying to narrow things down to the most usable words. Limit your list to 20. Here’s a good starting list:
English
Spanish
Italian
To eat
comer
mangiare
To drink
beber
bere
To sleep
dormir
dormire
To wake
despertarse
svegliarsi
To walk
caminar
camminare
To run
correr
correre
To wait
esperar
aspettare
To cook
cocinar
cucinare
To buy
comprar
comprare
To go
ir
andare
To come
venir
venire
To see
ver
vedere
To want
querer
volere
Bonus points: After you learn this list of verbs, you would get a lot more mileage out of them by learning how to conjugate. That just means instead of learning the verb in infinitive form (to eat) you could also learn how to say “I eat”, “You eat” etc.
For example in Spanish, the verb to eat is like so:
to eat
comer
I eat
como
you eat
comes
And a quick Google tells me that in Italian it is:
If this all sounds like gibberish to you then don’t worry, just learn the verbs as they are and speak broken to begin with. People will understand you. Also many of you would have studied conjugated languages in high school and already know how this works, so go ahead and spend a bit of time learning the basic forms (I, you, they). Of course this doesn’t apply to all languages.
Day 4: Basic nouns
Now it’s time to learn the objects we use every day. Food we eat, items we use, that kind of stuff. Here’s a good list to start:
English
Spanish
Italian
Food
la comida
il cibo
Drink
la bebida
la bevanda
Room
la habitación
la stanza
Car
el coche
l’auto
Restaurant
el restaurante
il ristorante
Bus
el autobús
il bus
Coffee
el café
il caffè
Tea
el té
il tè
Juice
el jugo
il succo
Beer
la cerveza
la birra
Supermarket
el supermercado
il supermercato
Brother
el hermano
il fratello
Sister
la hermana
la sorella
Taxi
el taxi
il taxi
This list is the most open to customising. It’s important to learn things common in your life that may come up in conversation. For example if your favourite sports are boxing and surfing, add those words in. Learn how to say the name of your home country. If your favourite food is chicken and chips, add those too. If you’re a lawyer or engineer, add those, and so on.
Likewise you need to account for where you’re travelling to. If you’re going somewhere to surf, learn the words for ocean, beach, surfboard. If you’re going hiking, learn the words for boots, mountain etc.
This is what effective language learning is about. Instead of memorising any old word list, create your own. If you’re not a pilot and none of your family or friends are pilots, don’t learn the word for pilot! Minimise your workload.
For this list I’d set a word limit of about 25-30 words. At this point would be a good time to go back and start revising all your words from Day 1-3. You can forget them quite quickly.
Day 5: Common words
This list is all about words that come up in general day-to-day conversation. Did you know just 100 words in the English language make up 50% of all written material? There are maybe 250,000 words in the dictionary, but a small collection of 100 words make up 50% of your average book.
Unfortunately that doesn’t help us with our cause much; most of them are words like “be” and “the” and “that”, and obviously going around saying “be that the” in another language won’t do much for us. But the concept is a good one to follow. What are the keywords we most commonly use in general conversation?
English
Spanish
Italian
Up
arriba
su
Down
abajo
giù
Left
izquierda
sinistra
Right
derecha
destra
Near
junto
vicino
Far
lejos
lontano
Man
hombre
uomo
Woman
mujer
donna
Fast
rápido
veloce
Slow
despacio
lento
Here
aquí
qui
There
ahí
là
This
esto
questo
That
eso
quella
Some
alguno
alcuni
All
todo
tutti
None
ninguno
nessuna
Inside
dentro
dentro
Outside
fuera
fuori
Hungry
hambre
affamato
Thirsty
sed
assetato
Sometimes
a veces
a volte
Always
siempre
sempre
This list is super important because many of these words will come up in day to day interactions. Asking for directions, asking questions, explaining things to people, pointing to things on a menu. You’ll be surprised how often you use the word “sometimes” or “there”. No matter which level of language you get to these words will always be useful – learn this list well!
Day 6: Basic phrases and replies
The interesting thing about languages is they are routine in many ways. For example, if someone asks “How are you?”, 90% of the time the reply will be “I’m good” or “I’m fine” (except in Australia, where they’ll say Yeeah yeah bloody good mate just watching the footy yew!)
Likewise in Swahili if you say “Mambo” to 100 people, 99 of them will reply “Poa”.
One thing new language speakers do is learn a bunch of words and phrases like “What’s the time?” and “How much is it?” but never prepare themselves for the answer! If you are anticipating an answer you will have a much higher chance of understanding it, even if they say it fast or mumble it. You will also be able to put together an answer if the same phrase is said to you.
Here are a few good examples to start with:
English
Spanish
Italian
How much is it?
Cuanto cuesta?
Quanto costa?
It’s twenty pesos/shillings
Veinte pesos
Venti euro
What is your name?
Cual es tu nombre?
Come ti chiami?
My name is Batman
Mi nombre es Batman
Mi chiamo Batman
How old are you?
Cuantos anos tienes?
Quanti anni hai?
I am 20 years old
Tengo veinte anos
Ho vent’anni
Where are you going?
A dónde vas?
Dove vai?
I’m going to…
Estoy llendo a….
Andrò a…
What are you doing?
Qué haces?
Cosa fai?
I am…(eating)
Estoy (comiendo)
Sto (mangiando)
Where is…(the dog)?
Dónde esta…(el perro?)
Dov’è… (il cane)?
It is…(inside the house)
Esta… (en casa)
È (in casa)
Do you like it?
Te gusta?
Ti piace?
Yes, I like it
Si, me gusta
Sì, mi piace
How is it?
Cómo es?
Come è?
Good
Bueno
Buono
What’s the time?
Qué hora es?
Che ora è?
It’s 2 o clock
Son las dos
Sono le due
Who is he/she?
Quien es el?
Chi è lui?
She is (my sister)
Ella es (mi hermana)
Lei è (mia sorella)
I would like…
Quisiera…(por favor)
Vorrei…(per favore)
Day 7: Practice!
And that’s it.
If you learn everything above, you would have actually learned a few hundred words, will be able to say many basic day-to-day words and phrases, and will probably understand quite a few things said to you.
Take notes, write down the parts that you struggle with, revise revise revise.
Remember language is largely a practice and usage skill, meaning the more you use it the better you will get. Your knowledge also compounds, so while it may seem highly difficult at the start it will get much easier as you learn more words and phrases.
We’re also skimming the fat on a lot of work that goes into language. Most language schools try to educate you on all four skills (reading, writing, listening, speaking), and we’re instead focusing 90% on speaking. That’s going to decrease your learning time a lot without much downside at all (unless you plan on reading the newspaper every day or writing an essay).
Also remember, the above lists are just examples. Remove or add words/phrases to make the lists most usable for you, so they represent the things you most use/say in your everyday life. These lists are not complete – they are there for you to build on.
How much time will you need? The above shouldn’t take you more than 1-2 hours per day. I translated all the lists above into Italian in less than 30 minutes. It helped that it was so similar to Spanish and French (I didn’t expect that) but most romanised languages you should be able to do in similar time. Non-romanised languages like Thai or Chinese will take longer but not painfully so.
After that it’s just about putting in time. Keep it in a doc on your phone or if you’re old school like me write it on a notepad. Everything above will fit on one page. You can read it on the train or while you’re lying in bed at night. Remember there’s no super IQ needed here – it’s mostly just memorisation so anybody can do it.
The last and most important tip of all is: Speak! As soon you touch down in the country, use it every opportunity you can. Learning everything is useless if you never use it. Don’t be afraid to make mistakes (nobody is expecting you to be perfect), make it fun and use a few more of your words each day. I’ll admit it’s intimidating at the start, but after a few days you won’t be able to shut up.
Just a handful of hours and I promise you, your next trip will be a completely different experience.
So I’ve got another fun little experiment to share with you guys today.
A while ago I heard about the idea of a “micro-niche site”, and a few months back I finally decided to build one. Not for any particular reason – out of procrastination more than anything. But it turned out to be a pretty fun project.
For those of you ready for a new pet project, below is my complete guide on how to build a micro niche site that makes money from scratch. I’m going to share the whole process with you, how I built it, and how much money it’s made.
What is a micro niche site?
A niche site is just a fancy name for a website about a specific topic.
For example, you might make a website all about school snacks for kids. You could post recipes or snack ideas or summaries on which snacks have the most sugar – whatever you want.
A micro niche site is just a more narrowed down version of that. For example, you might build a site about school snacks for kid’s with allergies (or vegetarians or diabetes). Not the best example but hopefully you get the idea. The goal of the site is to give information to people about a very specific topic. Because your site is so niche, it makes it easier for people to find you.
How to build a micro niche site
As you know I like to keep things super simple around here, so I broke this down into 4 simple steps. To build a micro niche site you need to:
Get a website up and running (duh).
Choose a good niche.
Write a bunch of helpful articles (keyword: helpful).
Get traffic to the site.
That’s really it.
The best thing is how low-risk it is. You can do it from your bedroom, you don’t need to take a course or go to a special school, and it should cost you around $50 to get started. To start a mini-business that could make you a passive income from anywhere? That’s pretty cool.
My micro niche site took maybe 30 hours to get it a money-making stage (I wasn’t really counting). I didn’t take any courses or read any books on how to build a micro niche site, I just read a few blog posts and tried it.
Now it only takes me an hour a month to maintain and has already made a tiny bit of money – nothing I’ll be able to retire on, but it has paid back my investment in the first two months and is now just making me a cool $30-$50 per month on auto-pilot. If I want to scale it up I can, and if I want to just let it run, I can. So that’s pretty cool.
Update: As of May 2020 the site is now making around $300-$500 per month. I now spend my time on my other bigger sites, so I only spend about 1 hour per month on it mostly answering comments. So it’s still mostly on auto-pilot!
Let’s go through the process step-by-step:
1. Get a website up and running
If you haven’t owned a website before, this step may sound complicated. It’s actually super easy (shouldn’t take more than an hour). Getting your micro niche site up and running requires 3 things:
Choosing a web host
Installing WordPress
Installing a theme
All super simple steps – I’ll walk you through them.
Setting up your web hosting account
Getting hosting is like renting a piece of land on the internet where your website will sit. Without hosting space, you can’t own a site.
Luckily web hosting is super affordable these days and even ten year olds can afford to have their own blogs.
While there are thousands of web hosts to choose from, not all of them are good. And if you are going to start a website, trust me, you want a good host.
I can’t stress that enough.
A bad host where your site always crashes and is slow and the support team never answers your emails – it’s hell and you might as well not have a website at all (believe me, I’ve been there).
I’ve been a site owner for almost 10 years now, have been with many hosts, and there is only one host I recommend now for new site owners: Dreamhost.
Super affordable! $2.50 per month on their Starter plan with this link.
Great support. When I migrated my sites to Dreamhost, the support team were great and responded to everything super quick.
SO EASY to use. They have a one quick WordPress-install, and you can even ask support to just do it for you.
Free domain name!
A great (and fast!) premium plan to upgrade to if your site starts to grow.
Also, they are one of the official hosting recommendations by WordPress, so if you plan on using WordPress (if you’re reading this guide, then yes), they’re an ideal choice.
If you’re not sure exactly how to open your hosting account, I’ve got a guide below that will take you through it step by step. Simply click the orange box below.
Getting started with Dreamhost (click to expand)
Let’s get your hosting account set up! This should only take 5 minutes (probably less).
First, head to the Dreamhost homepage by clicking here.
This should take you to a page that looks like this:
Click WordPress hosting as shown in the screenshot above, and you should get taken to their hosting options.
If this is your first site, I highly recommend choosing the Starter plan. You’ll get hosting for one site, a free domain, one-click WordPress install, unlimited traffic and a free SSL certificate. That’s more than you’ll need!
Just click the Sign up Now button, and you’ll get taken to registration.
The first screen is your domain registration. Since you get a free domain name with Dreamhost, this is where you choose it. Click the “Register a new domain” button:
It will then take you to a screen to enter the domain you want:
If you know what domain you want, simply enter it now.
Choosing a domain is bit of an art, there’s not really any right or wrong answers. However, you do have a choice of whether you want your domain to be more “branded” or for it to be informational.
For example, a niche site on golf clubs could be “golfclubreviews.com” or it could be something more like “thehappygolfer.com”. It’s really up to you, I have seen both types of domains work perfectly fine, so I wouldn’t say one is more effective than the other. Just choose something that feels right to you!
Once you’ve chosen your domain, you’ll get taken to the final screen for payment:
The DreamShield and Dreamhost Email add ons will cost you extra, so I would just remove them, they aren’t essential.
You can also keep the “Pre-Install” WordPress button checked so WordPress is already installed on your website for you. This is super convenient and it means you can skip the following section and simply get started on building your site.
Once you enter your credit card or Paypal details and finalise your payment, you’re ready to go. Congrats! You’ve now got your very own website.
Installing WordPress
WordPress is the most popular website software in the world.
If you want a fast, secure, nicely designed website, I would highly recommend using WordPress. Best of all, it’s 100% free. The other great thing about WordPress is it’s super simple to use. No nerdy stuff, no weird programming or coding. Just install and go.
If you’re hosting with Dreamhost, WordPress will already be pre-installed for you, because they’re awesome like that.
If you’re using another host, or if you forgot to check the “pre-install” WordPress button in the previous step, don’t worry. Installing WordPress on Dreamhost is as simple as clicking a button.
Once you’ve set up your Dreamhost account, go to your Dashboard and click “One Click Installs” in the left hand menu:
You will get taken to the WordPress install screen.
Simply choose your domain name from the drop down box (it will be the same domain you chose during signup) and click Install It For Me Now:
That’s seriously it.
Wait for it to do it’s thing, and you now have a working WordPress site 😉
Installing a theme
Now, your WordPress theme.
A theme is like a pre-made design for your website. Instead of paying a web designer thousands of dollars to design a pretty website for you, you can just install a WordPress theme with one click and your site will look great. This is perfect for dummies like you and me 🙂
If this is your first website, I’m going to recommend that you don’t buy a theme right away.
Why? You’re probably going to spend days shopping through different themes, and it will just be a distraction from the more important tasks. There are millions of free themes you can use in the meantime.
In fact, you can just use the default theme that WordPress gives you – that will suffice for now.
Once you’ve written some articles and you have a better idea of how you want the site to look, you can look at investing in a theme. Changing a theme is as simple as one click, so no need to worry about this so early. Focus on building your site content and traffic.
Of course if you want to buy a theme right away, that’s totally fine too. You will want to get a theme eventually anyway. Once you’ve written some articles and have an idea of how you want your site to look, it’s time to start theme shopping.
My #1 theme recommendation right now is Thrive Theme Builder. It is simply the best theme if you want to customise your theme to look exactly how you want, without writing any code or going crazy.
The blog you are reading right now was designed with Thrive Theme Builder in a few days. Highly recommended! Check out a demo of it right here.
You can also see exactly how I designed this site using Thrive Theme Builder in my Youtube video here.
2. Choosing a micro-niche
Now that you’re all set up we can work on building the site itself. First, your micro niche. What’s your site going to be about? There are two things to think about here:
Is it a subject you are knowledgeable/passionate about?
Is it a subject other people are searching for online?
To help you with this I’ll tell you about my own micro-niche. There’s a little backstory here:
A while ago I had a big rash on my leg. I grew up with bad eczema so I figured it was just a flare up – the stress of blogger life maybe, no big deal. But then it started getting really red and itching like crazy, so I went to the doc. He looked at my skin and told me the bad news: Scabies.
If you don’t know what scabies are, it’s a skin parasite that burrows under the top layer of the skin. It’s not a killer parasite like malaria or giardia, but holy crap are they annoying. I’ve no idea where I got it – probably from jiu jitsu, but anyway.
The doc gives me some scabies cream and tells me to smother it on, it’ll be gone overnight. I think cool, no biggie.
However, the cream doesn’t work the first time, and I’m kind of a hypochondriac. So I freak out a little bit.
I spend the next two weeks reading absolutely everything I can about scabies on the web – the history, all the different treatments, all the horror stories, some people saying they’ve had it for 5 years and want to kill themselves.
Now I’m thinking shit! I’m going to die from scabies! (nobody has ever died from scabies). So now I’ve gone really crazy, and I’m reading all the latest scabies studies, taking notes, reading up about all these weird plants and oils that are used in rural Indian villages and by the Aborigines and by the Ancient Romans. Then I go and try all the treatments, and spend a few days smothering different concotions all over my body.
A week later I’m cured.
I start writing up an email to my doctor about all the research I did, and I figure this information should really be public. Especially since many of my Google searches weren’t really fruitful, they just came back with people crying “Waa I’m dying” and things like that. Since not everyone has the time to be reading through pages of scabies studies like I did, I figured I could summarise it all and give people answers to treat scabies properly. Surely a site like that could be really valuable to people!
So that’s the long story of how I became an armchair expert on scabies and decided on my micro-niche.
Not the most glamourous subject, but perfect for a project like this.
This might not be the best example of choosing a micro-niche, because it sounds like you need to go through some weird experience like that which is not the case at all. I actually had about 7 or 8 micro niche ideas, but I just chose scabies because it was (a) on my mind at the time, and (b) felt like the easiest the subject to write about.
Also there probably weren’t many other sites to compete with, because who the hell wants to spend thirty hours writing a micro niche blog about scabies…
The truth is, you can get a good micro niche out of any subject (yes, any). Games, parenting, fishing, avocados, BB guns.
Seriously, anything.
Try and think about an experience that caused you to start researching/buying new things, or a particular problem that you needed information on recently and started Googling.
If you actually had trouble finding information, even better!
Since a good site doesn’t exist yet, you can make it.
Here are a few idea starters for helping you choose a micro niche:
What is something you have bought online recently?
What is something you purchased at the store recently?
What is a question you have asked a friend for advice on recently?
What is something you cook/make often? (niche recipe sites are excellent).
What is something you’ve typed into Google recently?
What is an item you spent a lot of time researching/shopping for?
What is something you bought that was expensive but you really needed it?
What was something that stressed you out recently that you needed help with?
What is something you’ve bought that has made your life easier?
What is something your friends are really into or spend a lot of money on?
Remember, micro niches are about information. People are searching for information – you need to give it to them!
If you bought a juicer recently, you could make a juice recipes site, even micro niche it down further into specific juices for specific health conditions.
If your kids are playing with new toys or games you could build a site around toys for “insert blank”.
Another really good micro niche site idea:
What is a hobby or interest you’ve taken up recently? If you have none, what is a hobby or interest you would like to take up?
Start that hobby today, and start documenting your progress in a micro niche site.
Example: Let’s say you want to get into archery. Go and buy a bow, gloves, arrows, find an archery club, start learning to shoot. After you’ve done all that, you now have five blog posts you’re perfectly placed to write:
How to buy your first bow Which arrows to buy as an archery beginner? Do you need gloves as an archery beginner? What to look for when deciding on your first archery club Five things I learned at my first archery lesson
Cool, right?
There really are endless possibilities.
Take thirty minutes to jot down some ideas of things that you’ve experienced/are knowledgeable about/are interested in. Write down everything – there are no wrong answers.
In the next step, we’ll help decide which one is a winner.
Validating your micro niche. Is it a site people want to read?
Now you’ve thought of a niche(s), we need to see if people are actually interested in it.
Are there enough people searching for your niche to make a site worthwhile?
Luckily, Google has a free tool where you can type in a subject and see how many people are searching for it. Frikkin perfect.
Now the following process might sound a little heavy. If it confuses you, don’t worry. Once you start doing it, it will start to make sense.
So in my example, we want to find out how many people are searching for stuff about scabies on the webs. If only 500 people per month are searching for scabies information, probably not a great niche idea since nobody is interested it. However if it’s getting many thousands or millions of searches per month, we could be in luck.
Here’s what Google shows:
100k-1 million searches per month.
That’s cool.
Makes sense too – it’s one of the oldest ailments known to humans.
But it is unlikely I’m going to rank highly in the Google search results for a term as broad as “scabies”. You’ll be competing with the Wikipedias and WebMDs of the world.
Instead, it would make more sense to focus on long-tail keywords, or niche keywords.
An example might be, “How to treat scabies with tea tree oil” or “How to kill scabies with natural treatments”.
When people Google search those specific terms, it’s less likely that many sites have targeted those phrases, giving your micro niche site a better chance of ranking in Google.
We are looking for phrases that have:
Low competition
Good search volume.
Luckily the Google keyword planner will suggest many keyword phrases for you. Here are some suggestions for scabies:
Now for a micro niche site you don’t need a shit ton of search traffic, but you still want as much as possible.
1,000 searches a month would be a minimum. That means 1,000 people are going into Google typing that search term, meaning 1,000 potential visitors to your site. If you can target 10+ keyword phrases, that’s a decent amount of potential traffic.
Then look at the competition. If the competition is high, it means a lot of sites are targeting that keyword. You’ll have a hard time ranking highly in Google search results. If competition is low, you have a better chance of landing on the first page and being found.
To do this research I actually use a software called Keysearch.
While this makes things easier, remember you can do all your research with free online tools such as Google’s Keyword Planner. Software like Keysearch just saves you a lot of time. As a guess, the information you can get in an hour from Keysearch might take you 3-4 days with the free Google tools.
Keysearch is $17 per month. You probably only need it for a month anyway for your first site. If you can afford the extra $17, I strongly recommend it. It will make your life 100x easier.
The other reason I like Keysearch is, not only is it faster, it provides much more information.
For example, it shows you the sites that are actually on the first page for that search term, so you can see who you’re competing with, how old those sites are, and gives you more detailed search numbers.
Take a look at what comes up when you analyze the search term “how to treat scabies”:
Now I won’t go and explain all those columns for you, but basically red means very competitive (bad) and green means not competitive at all (good).
Obviously we want to compete for words with low competition, so we want a lot of green in that table.
This search term above has quite a bit of red, so it’s not a keyword phrase I decided to target.
You can also see I’d be competing with sites like Healthline and Mayo Clinic which are super established – that will be difficult.
After spending about 4-5 hours on this I did find some great low competition/high search volume keywords, which are the phrases I’ve targeted in my articles.
A quick note about keyword research: It’s not everything!
Some say good keyword research is everything in niche sites and if you can’t find many good keywords you should abort and choose a different subject.
I disagree.
I think the most important thing is you actually enjoy writing and learning about your niche. For me building a micro-niche site is not a job – it’s something you do on the side – a fun little challenge, like building a model airplane.
If you make some money, great, but if not, it should still be enjoyable.
The other, more important reason is, search stats change all the time. Maybe what you’re writing about isn’t popular today but it might be in 12 months from now.
So as long as you’re writing about a subject you love and find interesting, then go ahead and make the site. In a few years maybe every 18 year old will be searching for your niche, and guess who’s site will be popping up first on Google? Your cool established micro niche site, of course!
The truth is, if you’re interested in this niche, there’s bound to be other people in the world interested in it too. Like I said, this should be enjoyable. Of course do some research, but also ensure you choose a topic you love and have fun with it.
3. Write quality articles for your micro niche site
Now that we’ve found some keywords to target, what do we do with them?
We integrate them into our articles.
There are two types of articles you will need to write for your micro niche site:
Two or three epic, in-depth, expert articles on your subject (1,500 words plus).
A collection of smaller articles to publish regularly (500+ words).
For example, one of my cornerstone articles is a huge 3,000 word guide on scabies treatment. Super well researched, lots of cited studies, super high quality.
I have about three of those types of articles.
All the other articles are minor, less important articles. “How to stop scabies itching at night” and things like that. Why do you need to publish these smaller articles?
To show Google your site is being constantly updated (Google loves this).
To target the less popular keywords and bring more people to your site.
Now to keep publishing content you’re going to need a lot of article ideas. I’ll recommend you come up with at least 30.
Why 30?
Because that gives you enough content to publish an article every week for six months.
After 3-6 months you should have a better gauge of your site’s profitability and can decide whether you’re going to continue and can work on your next 30.
Now you might be thinking 30 articles is a lot, but it really isn’t. If we take my site for example, I’ve got all the usual articles like:
“What are the symptoms of scabies” “How to treat scabies” “The best natural treatments for scabies”
Those were the obvious topics and I came up with maybe 10-15 of them.
But remember, not all articles need to be 1,000 words long and super detailed. I went back into my search history and looked at all the things I searched for when I was dealing with scabies.
I had typed in things like:
“Can you get scabies from the gym?” “Can you get scabies from jiu jitsu?”
Ding! Those are two more article ideas I can add to the list. That led to all kinds of other possibilities like:
“Can you get scabies from a spa pool?” “Can you get scabies from a massage?”
Just think of the types of things people will be typing into Google. Those are the exact articles you want to write.
Another hack is to find another site about your niche, and steal a few article ideas (obviously don’t copy the actual article, rewrite it in your own words and try to make it better).
Remember your 2 or 3 cornerstone articles will account for 90% of your traffic. The main purpose of the other articles is to build credibility with Google and show your site is active.
That means you can really post anything – answers to specific questions, some random thoughts on your niche etc. Even if the post is only 500 words, that’s fine too. As long as they add some value, it’s a good addition to your site.
As for scheduling, I would suggest publishing your “epic” content straight away, and maybe 3 or 4 smaller articles. That should give your site a good foundation to start with, and from then you can aim to publish one article per week. Writing those initial articles may take some time, but niche sites are typically labour-heavy in the beginning and the workload starts to taper off after a few months. Hopefully by then, you’re already collecting revenue each month.
For my particular site, the first few articles I wrote took more than an hour each, but now I’ve done all the big detailed guides, the shorter articles I write only take 15 minutes. That’s 15 minutes a week, or an hour a month! So it definitely gets much easier, just grind it out at the start.
Target your keywords!
To get found in Google, you need to target keywords in your articles. That’s why we spent all that time in the previous step finding good keywords to use.
The way to “target a keyword” is to add that string of words within your article in a decent number of places. Why do we do this?
Because this is how Google knows what your site is about. For example, if someone searches for “best vegetarian snacks for kids”, Google goes and scans the web for a relevant article. Obviously if your article has the phrase “best vegetarian snacks for kids” in it several times, Google will pick it up as relevant and return it to the searcher. This means it’s in your interest to make it as clear as possible to Google what your site is about.
From a practical standpoint, this simply means including the keyword phrase within the body of your article 3 or 4 times, preferably near the start.
You can also try and put the phrase in the URL of the article, and also the article title itself.
SEO (Search Engine Optimisation) is a lot more complicated than that, but that should set you on the right path for now. If you’re new to this, I don’t really recommend diving into SEO right away – it’s heavy and will suck up almost all of your time.
What I’ve told you above is enough to get started.
Focus on getting your site up and targeting keywords in your articles. We can worry about the super geeky stuff later.
4. Getting traffic to your site
This is easily the most difficult and least enjoyable part of the process.
Why?
Because so much of the advice out there is scammy, secret tricks, “spam your website all over the internet” type stuff.
This is why I haven’t really done that much traffic generation, but of course it’s a necessary part of the building your site.
One source of traffic we’re going to rely on is Google, but this doesn’t happen instantly. Because your site is new, Google doesn’t know whether it’s good or not. Usually gaining traction in Google takes around 6 months or more. That’s okay, in the steps above we’ve set ourselves up for Google success in the long term. But we also want to get results from Day 1, remember? Here are some traffic sources that will help us do that:
Facebook – If your site is about one of your hobbies, and it’s something people often ask you about, you can share your stuff on your Facebook page. Obviously treating scabies isn’t a hobby of mine and not something I think everyone wants to hear about, but it might be different for you.
Pinterest – This is actually a really great tool for promoting your site. I would recommend starting a new Pinterest account for your site, make some professional looking pins in Canva and then start sharing them. You can share on your personal Pinterest too. Pinterest has been my main traffic driver so far.
Youtube – You can rank videos super easily in Youtube. If you do a specific title like “How to treat scabies with tea tree oil” you’ll probably rank on the first page within a day. However the challenge is actually making a good video that people will watch. I just uploaded a crappy Powerpoint presentation and it ranked almost instantly, but never drove any traffic. At this stage I don’t think I’ll be investing any time making a proper video, but if this was more than just a side experiment I’d definitely consider it.
Quora – Lots of people ask questions on Quora all the time, like “I dropped my iPhone in jelly will it still work?” If you search for questions like this related to your micro-niche, you can then post an answer and link back to your site. It’s a rather untapped resource that you should definitely check out.
Reddit – There is most likely a subreddit related to your niche. Post your articles up there, you might be surprised.
Forums – Always a great place to promote your site. If anyone has questions related to your niche, answer them and then direct them to a relevant article on your site. Great way to build backlinks too.
Stumble Upon – Super easy to use – just submit your pages and see how they do. I would choose 1 or 2 sources to start with and focus on those. If you see any success keep going, and if you don’t, try something else. Which one is most effective really depends on your promotion style and the niche itself, so just keep trying. Just for reference, here’s what my site traffic has looked like in the 2.5 months since going live:
And here’s what my referrals look like:
As you can see Pinterest is the clear leader. I’ve also been getting a bit of traffic from search engines already, which is nice and hopefully will grow as the site gets older. Honestly two months is still early days, so if you’re struggling with traffic after that long, don’t flip out. Traffic generation takes time.
Update 2018
The site has been growing! I haven’t really been doing much, as there’s not much left for me to write. If I can I write one new post per month, otherwise I just keep pinning on Pinterest and that’s about it. Here’s what the traffic growth has looked like:
And here’s how the traffic sources have changed:
As you can see, Google has picked up the website and delivered much more traffic over the last few months. Search is now the biggest traffic driver, with Pinterest a close second. I think the reason traffic is grown is because Google is getting smarter and my posts are really in-depth. It goes to show hacking SEO isn’t everything – if your content is top quality, Google will find you eventually.
Update 2020
Traffic in 2019 was almost double 2018 at 137,000 page views. I did barely any updates in 2019, maybe just a few new articles, but most months I didn’t do anything. The site has simply grown organically:
As for traffic sources, it’s almost all Google traffic now. I still get some from Pinterest and Facebook, but it’s a much lesser percentage:
Earnings have also grown, which I’ve shared in the monetisation section below.
5. How to make money from your micro niche site?
Now you’ve got people visiting your site, we need to turn this traffic into dollars. There are two ways I’m going to recommend for making money from a micro-niche site. One is advertising, the other is affiliate marketing.
Simply sign up for an account, enter your site details and if your site isn’t a spam factory you should be approved. Then you can start copy-pasting the ads up around your site. When a reader clicks one of those ads, you’ll usually earn between 10 and 50 cents. Simple.
The downside with advertising is it requires a lot of traffic before you see any results. To me, advertising is a more long term strategy for once your site and traffic matures. If this is your first micro niche site, I would highly recommend using affilate marketing.
Affiliate marketing
If you want your site to make money from Day 1, I would suggest using affiliate marketing. Affiliate marketing is when you earn a commission for recommending a product or service. You put a special link to a product on your site, then if someone clicks that link and makes a purchase, you get a commission.
If this is your first site, I’d recommend using the Amazon affiliate program. How this works is you post affiliate links on your site for anything on Amazon (Amazon will provide the links for you). If your readers click that link and then buy something, Amazon will pay you commission of between 1-5%.
The program is particularly great because their affiliate links are valid-store wide. That means if someone clicks a link for coconut oil on your site, but while on Amazon they end up purchasing a laptop, you’ll get commission for that too. Once you get more familiar with building sites you can start looking at other, more lucrative programs, but Amazon is a great one to get started.
Other things to think about:
If your micro niche involves products people will need to buy (for example, if you made a site about coconut oil recipes your readers will obviously be buying coconut oil) it makes more sense to monetise with Amazon. Why? Because you can link to coconut oil (or whatever product) on Amazon and collect commissions.
If your micro niche is more informational and people generally won’t be buying things (for example, philosophy or meditation) then it makes more sense to monetise with Adsense.
Lastly: Make sure you build your site first before submitting an application for either Adsense or Amazon’s Associate program. Post some articles to your site and make it look full and active. When you apply, they are going to review your site to see if it fits their guidelines. This sounds daunting but it’s really not. As long as your site doesn’t look like shit (and it shouldn’t if you’ve followed my guide above) you should have no trouble getting approved!
How much money did my site make?
Since my site was based around home remedies (lots of oils, powders, plant products etc) I included Amazon affiliate links to all those things in my articles, and people have been clicking them and buying them.
At first I was pretty surprised that this was happening, but then I remembered when I was treating myself I was also ordering all the same things! The whole point of the site was to recommend people the same treatments that I used, so it made total sense in the end. The site was working exactly as I intended.
Here’s what the first couple of months looked like:
If you can’t read that, it means the site made $59.02 in its first two months. That doesn’t sound like a lot, but it’s actually more than this blog you’re reading now! (which made zero dollars in its first two months).
Having a site make money from its first month is actually quite rare. However, if you write good content and promote it with a monetisation plan in place, there’s no reason you can’t do it. Even if this site just chugs along making $60 every two months, that’s still $360 per year, with potential to go a lot higher.
Pretty cool for a little side hustle you can put together in just a couple of weekends.
It’s also not uncommon for niche sites like this to be making $1,000+ per month after a bit of love and growth. I’m sure if I dedicate significant time to this site it could reach that level. For reasons I’ll share below I probably won’t do that, but if you want to build a serious niche site income stream it’s definitely possible!
Update 2018
When I first wrote this article the site was making $30ish per month. Now it’s making around $100. Considering I’ve barely done any work on it, that’s pretty cool. Obviously I don’t rely on this site to make a living or anything, so I’m happy just leaving it making pocket money, but it’s fun to watch it tick along.
Update 2020
Earnings have definitely been growing consistently since the site started. It’s been fun to watch. The income has been mostly passive, and even though there are things I could do to improve the site, I’ve tried to leave it as passive as possible for experimentation’s sake. The goal was to create a passive income asset so that’s what it’s being treated as.
Below is last month’s income (April 2020) which came in at $414.26. It’s a little higher than usual, normally it’s closer to $300-$330. Just shows that if you invest a few weekends to build a micro niche site, and do it properly, it will continue to pay you for years.
Update 2022
The last monetization method I hadn’t tried was selling a product.
Of course the goal was to experiment with everything possible on this site so I wrote an ebook, which was basically a treatment plan summarised into about 20 very short and easy to follow pages. The goal was to create something that someone could read through in 15 minutes instead of spending an hour scouring through all the blog posts for the information they needed.
I created the book in Canva (free) and split tested it — one page was selling at $10 and the other was selling at $27.
Surprisingly, they sold exactly the same amount of copies, so obviously I went with the $27 price point.
I really wasn’t expecting much from ebook sales, but it’s actually turned out to be the top income generator for the site (a testament to the importance of experimenting and testing everything!) The ebook has now brought in $2,500 in sales:
I have since used this exact same method to build several more micro niche sites which around more lucrative topics. Obviously I can’t share all of those with you, but this site I’ve shared with you is a good example of how you can make a profitable niche site about pretty much anything!
Get started today, maybe your first site will bomb, but it’s the learning process that is important. Once you have successfully built one site, there is nothing stopping you from building 10 or 50 or 100.
My advice? Start today! Here’s a cheat sheet for you to get started below:
Summary: Building Micro Niche Sites That Make Money From Day 1
Get a website set up. I use Dreamhost and highly recommend them. If you’re ready to get started, click here.
Choose your micro-niche. Try and choose something you’re knowledgeable/interested in.
Think of 25-30 article ideas.
Write 2-3 epic articles to start with (ultimate guides etc). Monetise with affiliate links. I recommend using Amazon Associates if this is your first site.
Target your keywords to make sure Google can find your site. I recommend Keysearch.
Start making your site look reputable with a professional design. You can do this yourself with a WordPress theme. I use Thrive Theme Builder.
Start promoting on social networks like Pinterest, Facebook and Stumbleupon.
Publish one article a week to keep search engines happy.
Watch your site grow and collect your money!
It’s seriously that simple. There’s nothing intellectual or difficult about it. Just set aside the hours to do the tasks and you’ll have a micro niche site that makes money.
One last piece of advice I want to give to anyone trying this is don’t take it too seriously. People always say you need to treat your websites like a business and struggle struggle struggle etc.
I disagree.
It’s going to cost you maybe $50-$100 to get this thing going – there’s no risking your life savings here. Choose a subject you enjoy reading and writing about, say stupid things in your articles, swear if you want to, add stupid photos. There’s nothing worse than slaving over a site about some boring shit that reads like a high school textbook. Treat your new website like a video game and just have fun with it. Even if you only make $2 from it in the end, at least you learned something new and had a good time. And if you do genuinely enjoy what you’re doing, I promise you’ll make much more than that 🙂
A few years ago, I spent some months learning to dance salsa in Ecuador. I spent every afternoon at a tiny dance studio, hidden in some guy’s apartment, and in the evenings they would take me out to salsa clubs to show off our moves. It wasn’t part of an organised “experience” with some company. It was just me at a little dance studio, in a regular Quito neighbourhood, learning to salsa every afternoon.
I spent three months with those people, who became close friends of mine, in what became one of the most memorable chapters of my life.
Often people email me and ask, “Hey Bren, how do you find these experiences when you travel? How do you get away from, you know, just taking photos of statues and stuff?”
And the answer is pretty simple:
Follow your curiosity.
That’s more difficult than it sounds. Probably because it goes against everything society has told us our entire lives. As soon as we’re any older than, say, sixteen, we’re told not to follow our curiosity. If you see something that might be fun, like mixing music, or writing songs, the answer is no. Study. Work. If you’re not a millionaire and you spend any longer than two nights a week writing songs, you’re an idiot.
“How is that going to help you make a living?”
“You’re not good enough to make a career out of it.”
“Who’s going to pay you to write songs?”
Instead you should be taking extra shifts at the restaurant, or doing a computer class, or some other high-work-ethic-proving activity that will help you buy a house some day.
But if you want to live a colourful, curious life; a life that is more than just “pay bills and die”, you need to look beyond that.
The truth is there are a few of us, and in my experience it really is a small few, that need to know what’s out there. Not just in terms of travel, but in terms of everything.
Some of us have to see it all, some of us don’t care.
Some of us wonder, some of us don’t.
If you’re here, I’m guessing you’re one of the ones that do.
And if you do, you’ll understand why your curiosity is so important. You’ll understand that the point of writing songs isn’t to become a professional, or to become the best songwriter in the world, or to make tons of money, or to even sell songs at all. The entire purpose of writing songs is to simply…wait for it…write songs.
This might come as a shock to many – most would say they thought the point of writing songs was to get a record deal and get famous and stuff – sorry. You were mistaken.
Why is this important?
Because it removes the pressure from your curiosity. It gives you the freedom to explore again. And not just for two weeks on a Bali vacation, but every single day of your life.
When I took my first salsa class in Quito, it was this simple: I was chilling in the hostel and I Googled “salsa classes quito”. I called one of the numbers. I made an appointment. I went to the class.
But even I had to battle my curiosity to get there. In the back of mind I was thinking “Should I really do this?” as if it was a life-changing decision. I procrastinated making that phone call for an entire morning. When the first number I called didn’t answer, I almost decided that was it! That was enough of a hurdle; salsa’s just not for me.
The craziest thing was, I wasn’t even doing anything that day. If I didn’t go to a salsa class, I would’ve literally been sitting on the couch doing nothing. If I went to the class and didn’t like it, the consequences were zero, even less than zero. It’s not like I had to reschedule a meeting or rain check on a hot date or rush there from work. But I still I had to push myself to make that phone call.
Luckily, I made a second and third call, or I would have missed out on what was one of the most enriching experiences of my life.
I know for a fact this happens to you too.
Maybe you see a sign for a cooking class, and you think, ooh that would be fun, but then you shake your head and keep on walking. Probably be crap anyway, right? Waste of time yeah?
I know this happens, because people tell me it happens. They’ll say, “Oh yeah I was going to do so-and-so when I was in Thailand.”
And I ask why they didn’t, and they shrug and say “I don’t know.”
Well I do know. Because everybody around you has been doing the same thing your entire life. You can’t see any point of investing in something like that if you only get to do it once, or if you’re not going to be good at it, or if it’s not going to make you any money, or it won’t make your resume look better. So you pause for a moment, and you think about it, and then you shake your head and go “Mmmmm naah” and keep on walking. Better to just drink beer and watch TV, like everyone else.
Tell me I’m wrong. Tell me all your friends back home haven’t been talking for years about learning French or taking piano classes or learning to dance or taking a wood working class.
“I wish I knew how to ski.”
“I wish I knew how to box.”
What are they doing this weekend? Are they all at a skiing class and practising their boxing?
Cough. They’re out drinking. Watching Netflix. Beer sales have never been higher. Netflix subscriptions are through the roof.
There’s a reason the child learns how to do a million things in five years, and us adults go ten years without learning anything.
The child is curious. The adult is not.
Perhaps that’s why the road is so good at helping us rediscover our curiosities. It’s like a second childhood. You land in a new country and you can’t even read signs, nobody understands a thing you’re saying, you can’t even speak, someone gives you food and you don’t even know how to eat it. You’re suddenly three years old again. It’s not a coincidence that your senses are set alight, and you’re inspired to follow your curiosity again.
That’s exactly what Quito was. You might notice that during my time there, I went to salsa class every day, invested many hours into it, and even a bit of money. But it wasn’t anything more than dancing. I didn’t set out to become a salsa champion. I didn’t pack up my entire life and relocate to Quito permanently to train for a big competition. It’s not like I was willing to dedicate the rest of my life to salsa or anything. I just did it, because I was curious, and it was fun. Nobody wanted to give me a job because of my new adventure. It didn’t put me in line for a big promotion. In many ways, it was a completely meaningless experience, as if I was just playing in my backyard. That’s what made it so special.
Here’s the catch. Back home, that experience would have been outrageous. I would never have done it. If I had danced one night a week, that would’ve been fine. But if I’d headed off to dance class every single evening? People would have thought I was mad.
Are you trying to be a pro dancer? No.
Are you training for a competition or something? No.
Then why the hell are you dancing so much?
Umm because I want to? You’re crazy!
Then your 9-5 boss will get mad and say you should stay at work later. Focus more on your career. Dancing won’t earn you a living. Your girlfriend says you should stop spending so much time on that “silly salsa thing”. It doesn’t pay the mortgage.
In regular society, there is a full scale war on curiosity. But let’s not forget that other fact about regular society: Everyone is miserable.
The road is not regular society. The rules are different. So if you want those authentic, inspiring experiences, you need to push yourself to do things you would never do at home. That’s why we’re out here, remember? Follow your curiosity.
There is no pressure when it comes to curiosity. If you sign up for a cooking class, it’s not because you’re trying to be a chef or you’re researching a blog post or you need class credit. You’re just doing it because you want to.
There are no rules when it comes to curiosity. There is nothing that says you can only be curious on Sunday and on Monday you go back to your old life. No. You can be curious every day. Or just once a week. Whatever you want.
There are no boundaries when it comes to curiosity. Small restaurant you want to try? Go. Little town by the forest you want to check out? Hitch a ride. What would a child do?
There is no discrimination when it comes to curiosity. It doesn’t care about race or gender or age. There are no exams for your curiosity. There is no performance review on your curiosity. There are no curiosity KPI’s.
When you see that pamphlet for a basket weaving class, you don’t need to ask yourself “How many baskets will I sell? Should I do it? Will it be worth the money?”
Of course you should do it. Curiosity is always worth the money.
This is where those magical travel experiences are. Behind a curious mind. You need to try things. Ask questions. Make the phone call and book the class. It’s not like anyone ever came and knocked on my door and said “Hey I heard you’re looking for an authentic life-changing experience, come with me.” You go out and find them. But also remember those great experiences that fill you with awe and inspiration – they’re not hiding anywhere either. In fact they’re probably offering salsa classes, in a little studio like mine in Quito, just down the road from your work. You’ve just stopped seeing it.
In travel, in life, these life-changing experiences are all around you. Just choose one and go.