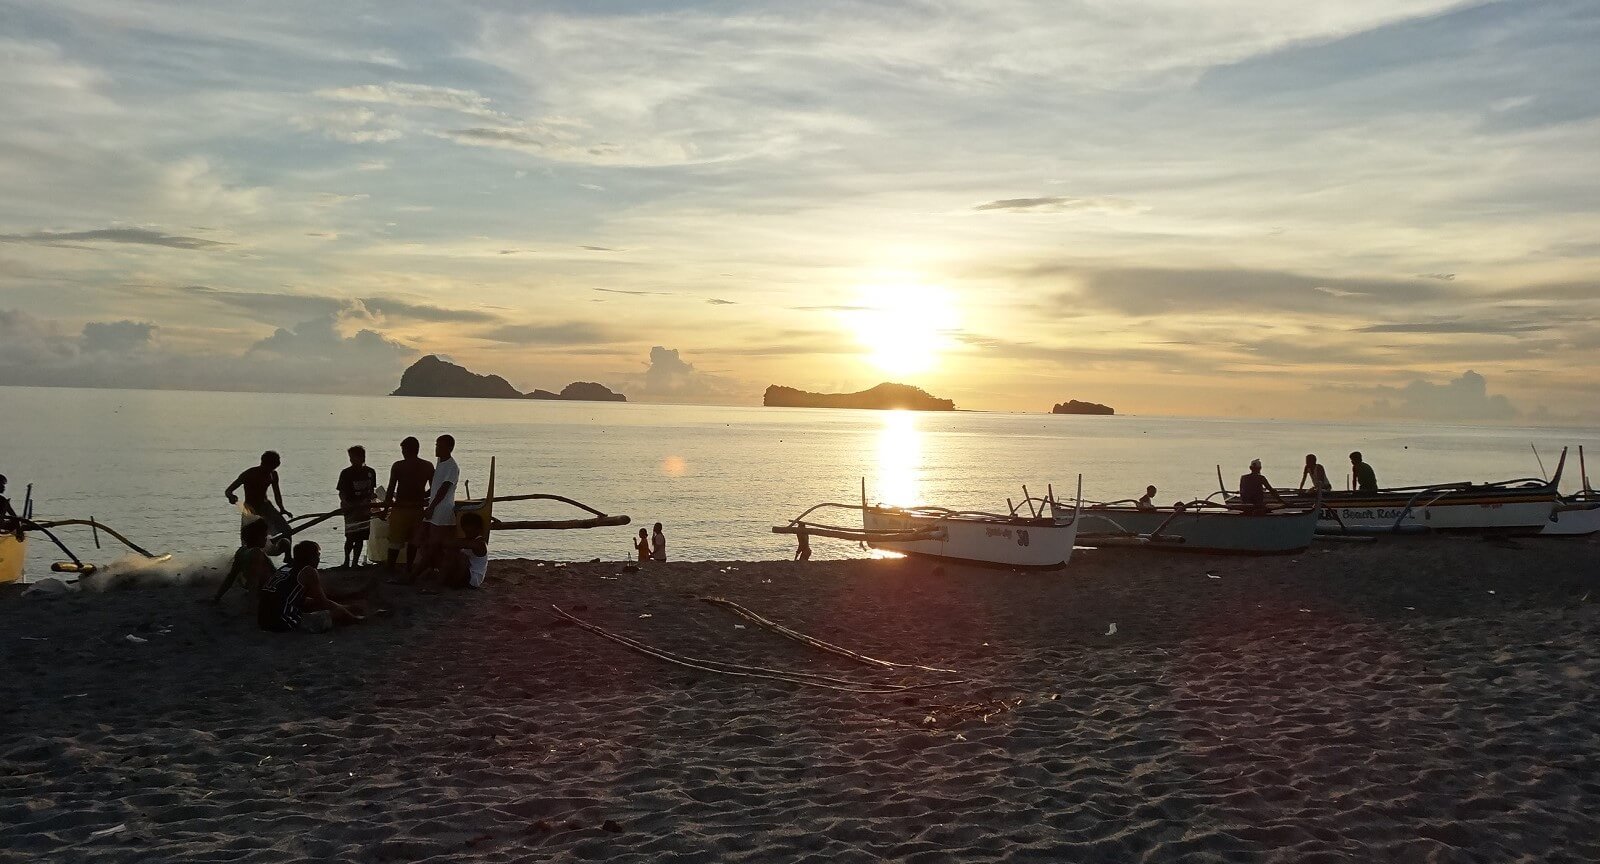
Category: Destinations

  • 10 Reasons Why The Philippines Should Be Your First Stop In Asia

    10 Reasons Why The Philippines Should Be Your First Stop In Asia

    The Philippines was never very high on my travel bucket list. No one really talked about the place, and it seemed to have a reputation for being a rather dangerous place to travel through. Besides, all travellers knew that Thailand had all the best beaches, China had all the work opportunities and Vietnam had all the best food. Why bother going to the Philippines?

    Then finally in March this year I got the chance to visit. What I discovered was a country inhabited by the friendliest people on Earth, littered with unimaginable beaches and an infectious family like culture that made you never want to leave. Some of the most beautiful places I’ve seen in Asia were hidden in faraway corners of the country, still unheard of by much of the backpacker crowd. What I still can’t figure out is how so many travellers in Asia pass on this country full of beautiful people, fresh tropical fruit, picturesque islands and untouched natural beauty. Safe, cheap, beautiful; I ended up staying for 6 months! It’s easily become my new favourite spot in Asicoa.

    Need more proof? Here’s 10 reasons why you need to skip Thailand, Vietnam, Cambodia, Indonesia, Laos and head straight to the Philippines on your next trip to Asia.

    1. The amazing people
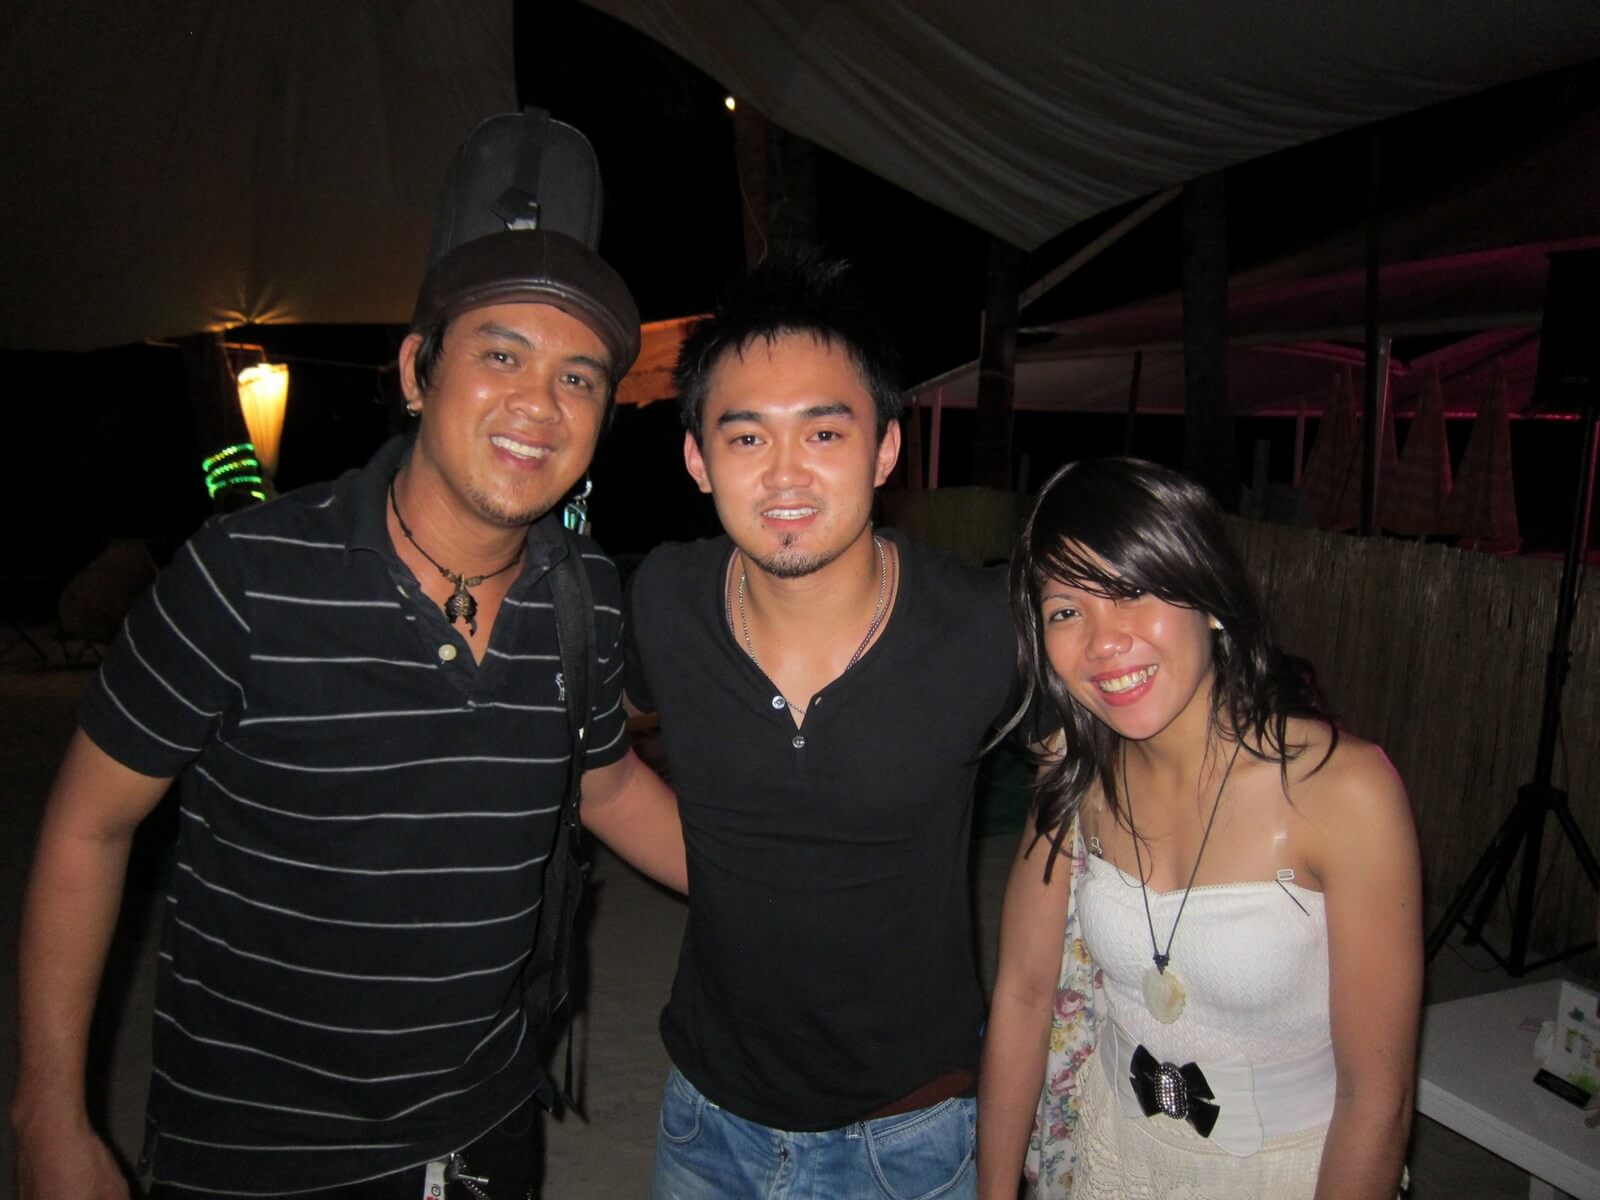
    friendly people philippines

    It’s amazing how friendly the people are here. How the place got a reputation for being dangerous, I have no idea. There was one time where I ran out of cash in El Nido, and since the place had no ATM’s I wasn’t able to get cash to pay for the tour I had been on that day. I was so embarrassed but when I finally told the guy, he just laughed and said “Ahhh no problem, you can pay anytime! I just hope you enjoyed the tour!” A perfect example of the generous, welcoming spirit of the Filipino people.

    They’re also so polite! I’ve never been called Sir so many times in my life. As soon as you walk into 7 Eleven – “Good afternoon Sir!”

    Then I ask her to help me work the drink machine, “Yes Sir, no problem Sir!”

    Then when I go to pay, “Thank you Sir, is there anything else you need Sir?”

    Then when I leave, “Thank you Sir, come again Sir!”

    Then as I walk through the door the security guard holds it open and says, “Thank you for coming Sir, have a good day Sir!”

    This isn’t a one off, it happens like this every single time! I thought the Japanese were polite but this was a whole new level. They don’t try to sell me anything, they don’t try and give me a taxi ride, they don’t try to ask for money; they’re just polite for the sake of being polite, and that’s something that you don’t see around the world too often these days. Filipino’s certainly know how to make you feel welcome.


    2. The incredible food
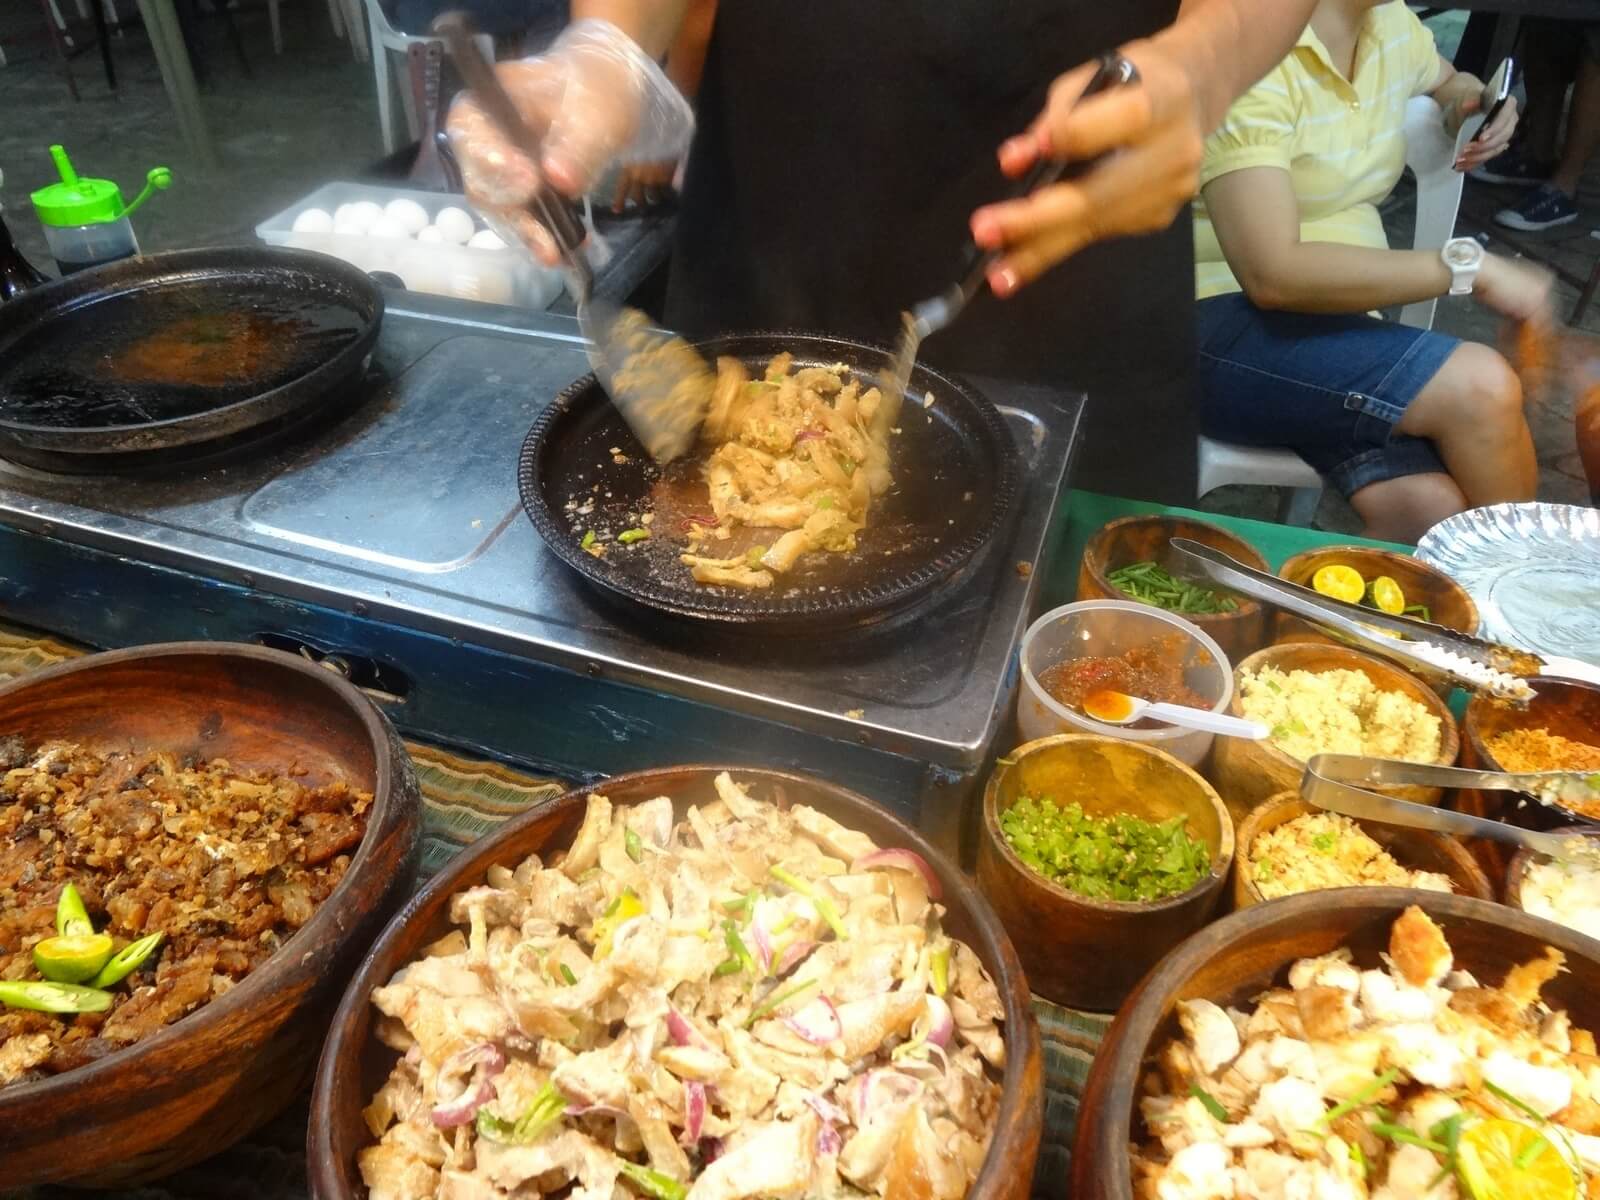
    Food in the Philippines

    What I love about Filipino food is that it’s so different.

    I love eating new things and that’s hard to do in many other parts of Asia. I’d eaten a whole lot of Chinese food before I went to China, I’d had quite a few gallons of Tom Yum soup before I went to Thailand, I’d eaten my fair share of curry and roti before I went to India and I knew all about udon noodles before I went to Japan. Yet before this year I had never seen or even heard of kalderetta, adobo, sinigang, bulalo, turon, lumpia, I could go on forever.

    Some of the food didn’t agree with me completely but there were some things, their soups especially, that were just so different and delicious. There really is a lot of stuff that will be like nothing you’ve ever tasted before. Damn, I’m craving a sinigang right now!


    3. You don’t get scammed or hustled
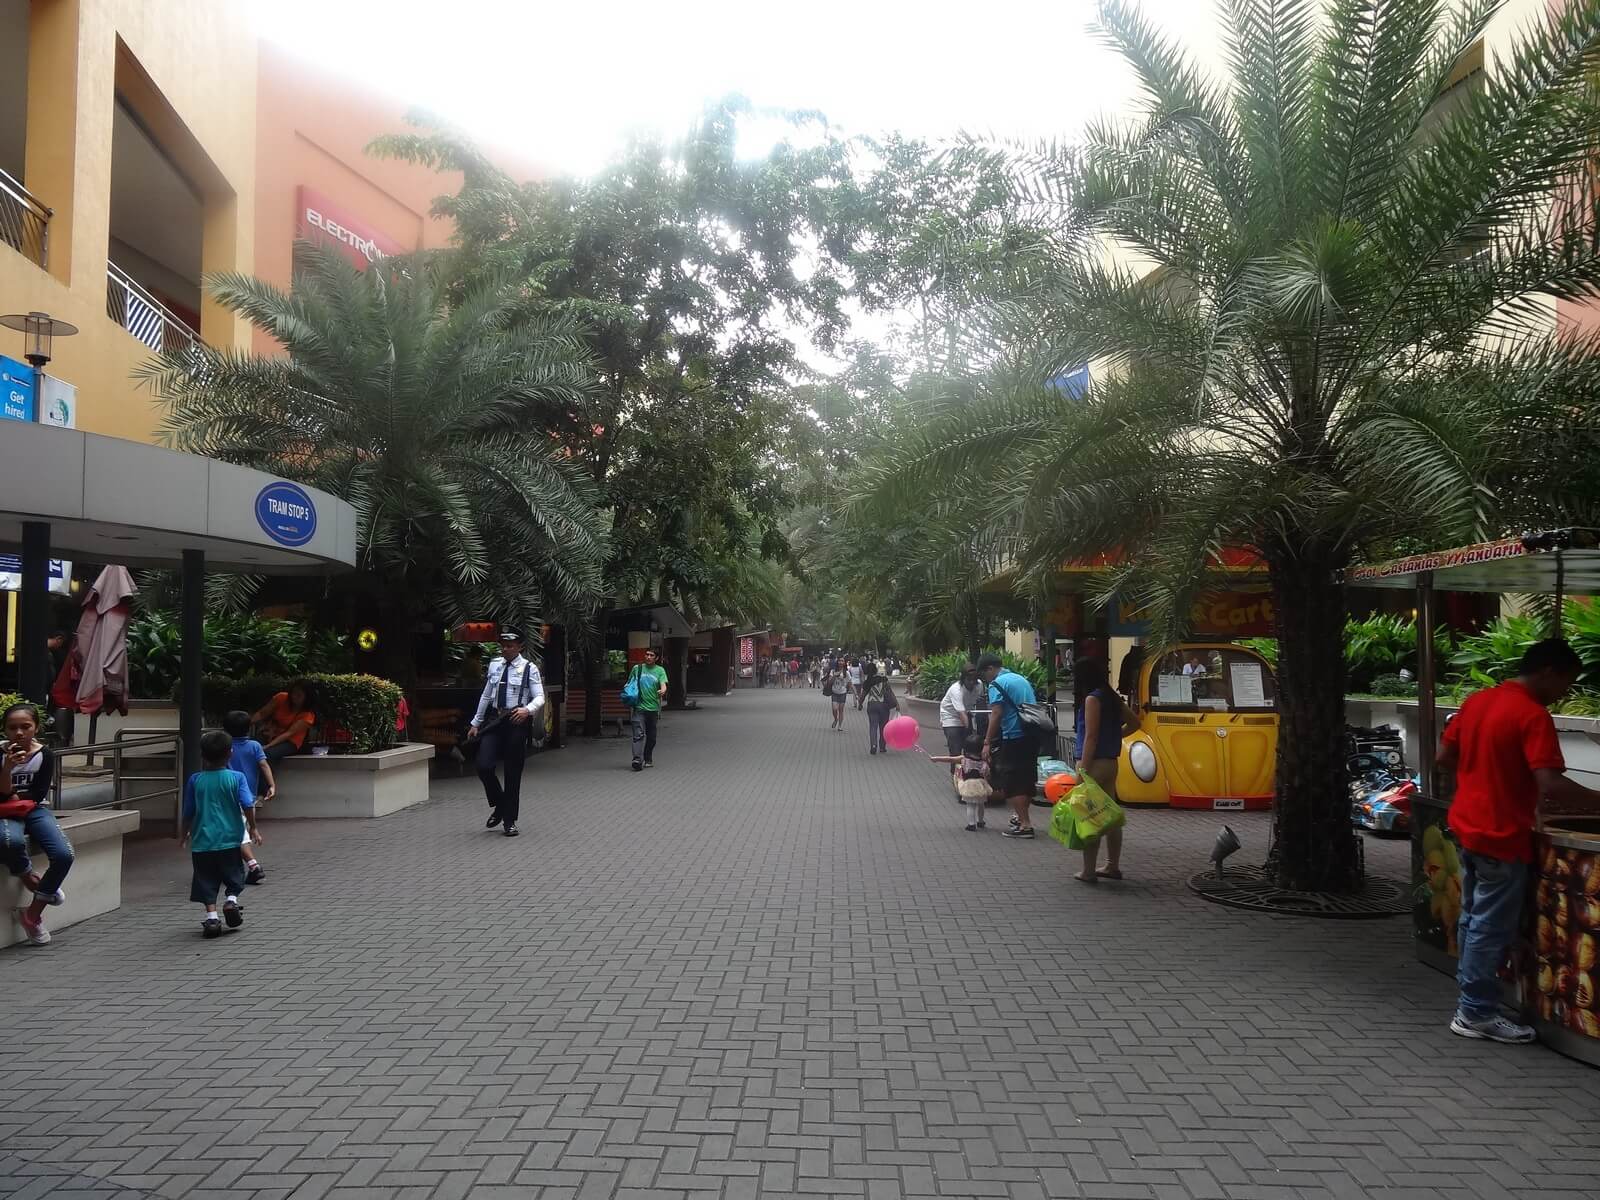
    Mall of Asia Philippines
    No one bothers you when walking down the street

    To me, one of the most unattractive things about Asia is the blatant scamming. If you’ve ever been to the markets in China or caught a tuk tuk in Thailand you’ll know what I’m talking about. Hustling is even worse – take a walk through Phuket one night and count how many times someone tries to sell you something.

    100 times only? Guess it was a quiet night.

    During my 6 months in the Philippines I got scammed once. Other than that, it was so refreshing not having to watch my back every second of the day. A couple of times I even tested the taxi drivers, telling them I had no idea how to get back to my apartment when I actually knew the way perfectly. Did they drive me around the block and run up the meter? Nope.

    Maybe the country’s strong religious roots has something to do with it, but whatever it is you’ll definitely appreciate it.


    4. It’s off the beaten track
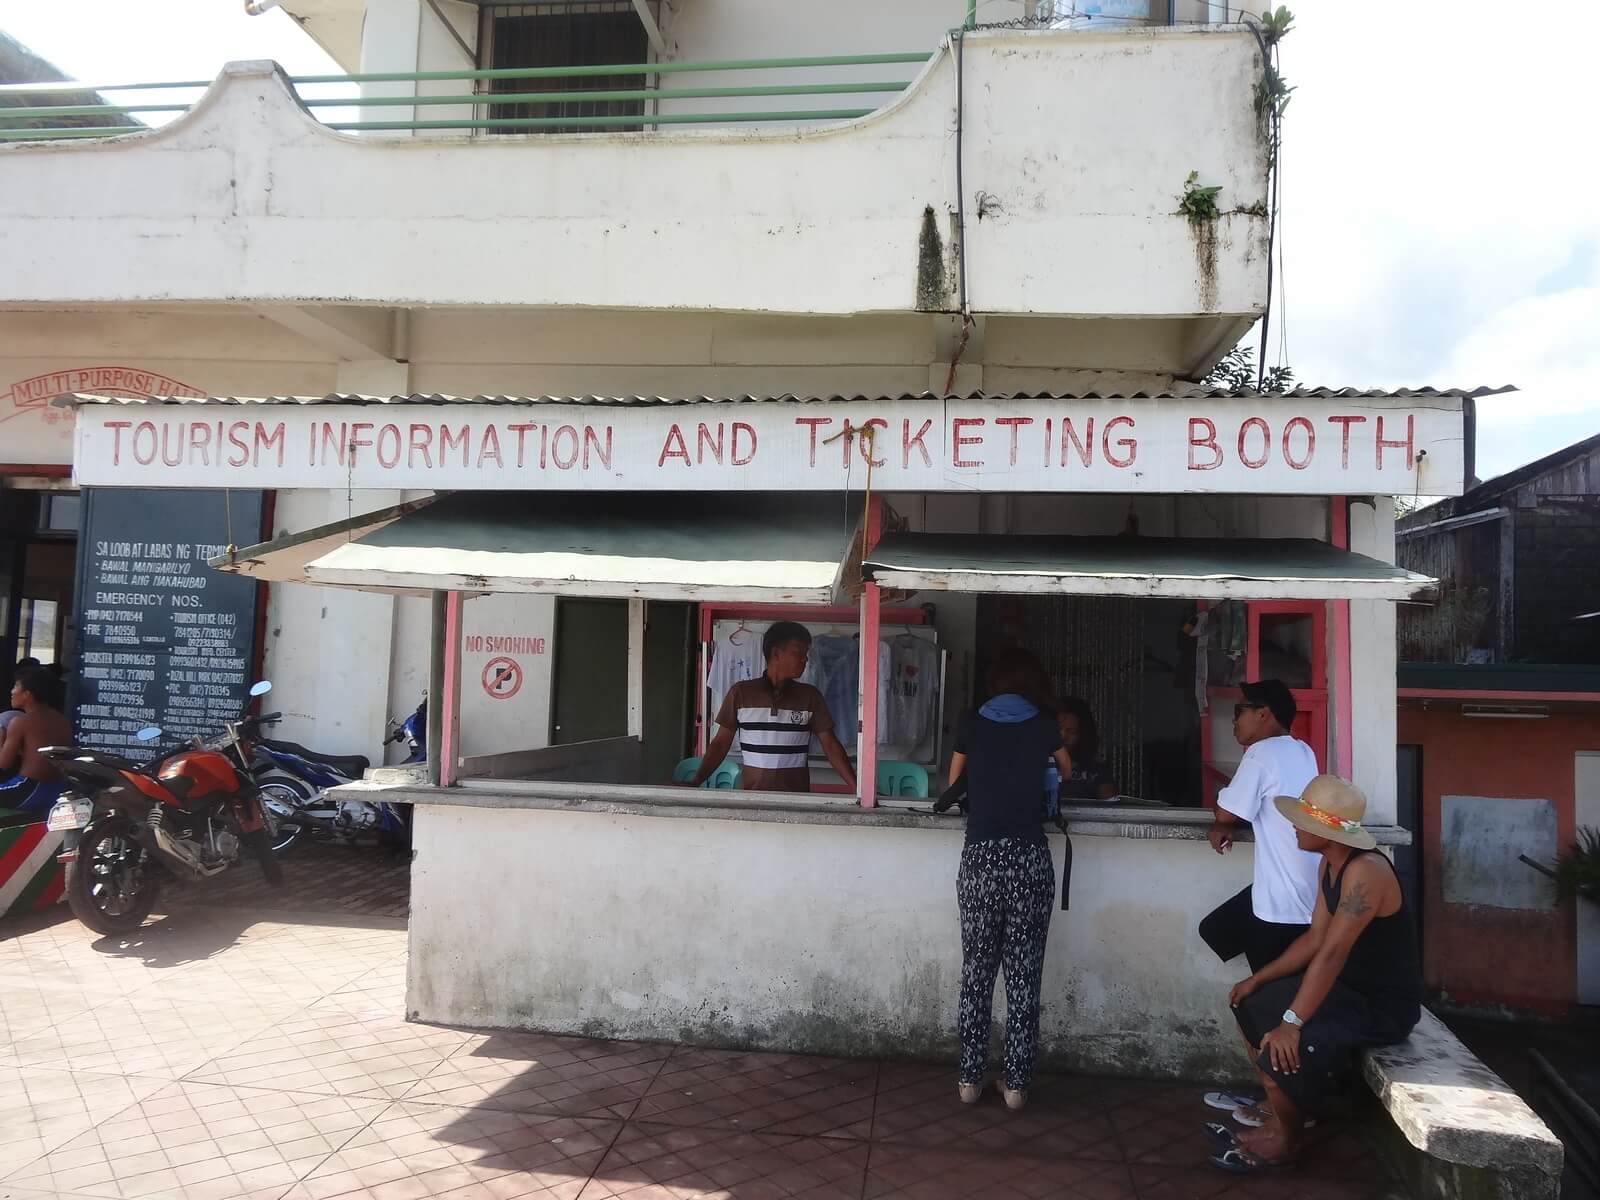
    Tourism desk in the Philippines

    I still struggle to understand how so many attractions in the Philippines continue to fly under the radar.

    How is it that Bali gets 3 million visitors a year and Boracay barely manages to get a million?

    How is it that I literally had the entire resort on Cagbalete Island to myself?

    The Philippines only had 4 million tourists in 2012, compared to 20+ million in Thailand. Anyway, whatever the reason is let’s just hope it stays that way. Part of the magic in exploring the spotless white sand beaches of the Philippines is that you quite often have them all to yourself.


    5. Everyone speaks English!

    I was surprised to find out the language of instruction in schools here is actually English!

    Finding your way around a language barrier can be half the fun in travelling, but it’s also surprising how different your travel experience becomes when you can actually communicate with everyone.

    The level of English here is very high, definitely better than any other country I’ve visited in Asia (except for Singapore). It really makes travelling through the country a lot easier, and it’ll allow you to interact with the locals who will be able to recommend things and places you would have never otherwise heard of.


    6. The fantastic shopping
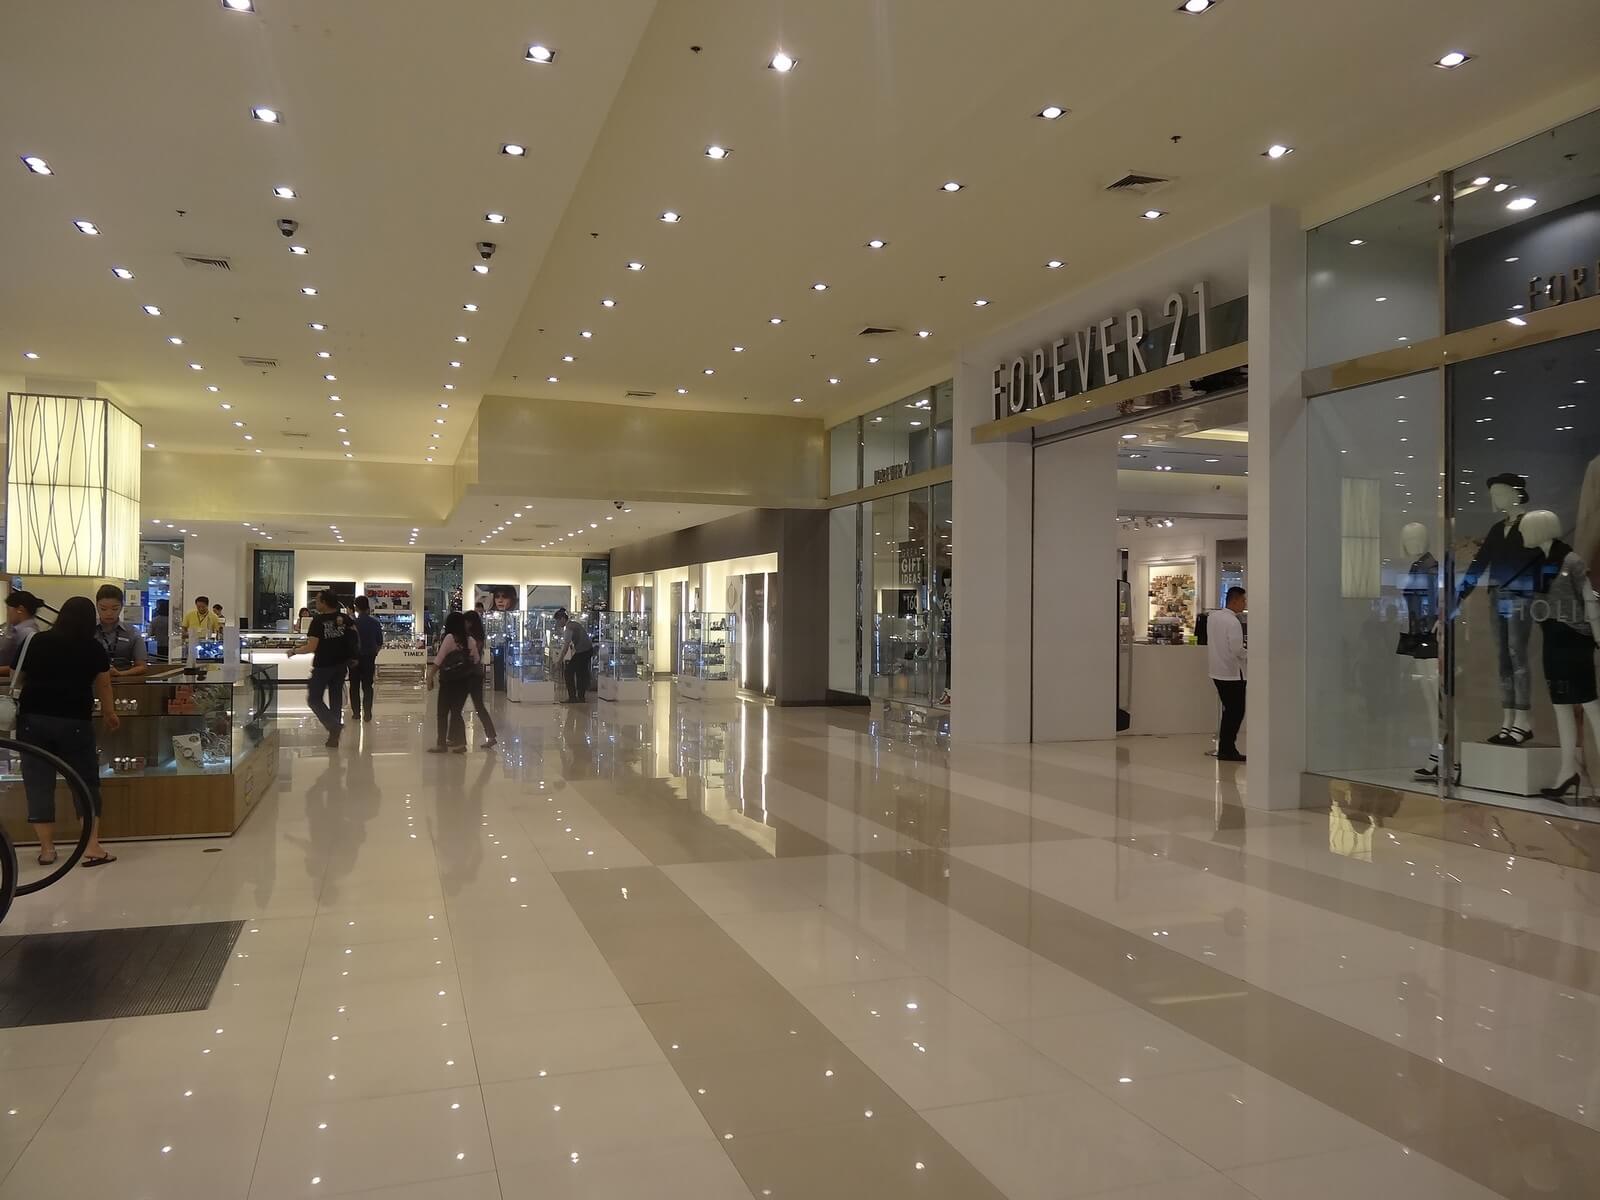
    SM Manila Philippines

    For me, shopping in Manila would be the best I’ve ever seen.

    Bangkok was pretty good, Shanghai was also good, even Hong Kong is not bad.

    Manila beats all of them.

    Out of the 20 biggest shopping malls in the world, 5 of them are in Manila. That’s more than any other city. On top of that all the shop assistants speak great English, stuff is not overpriced (cough, Shanghai), the local brands are surprisingly good quality and the free WIFI actually works! No stupid codes, no getting a password from the information desk; just connect and go.

    Their malls are not just big, boring boxes either. The maze of Greenbelt malls is modern, classy and full of character. Spend a whole day walking through here and you’ll probably only manage to see half of it.


    7. Unbelievable beaches
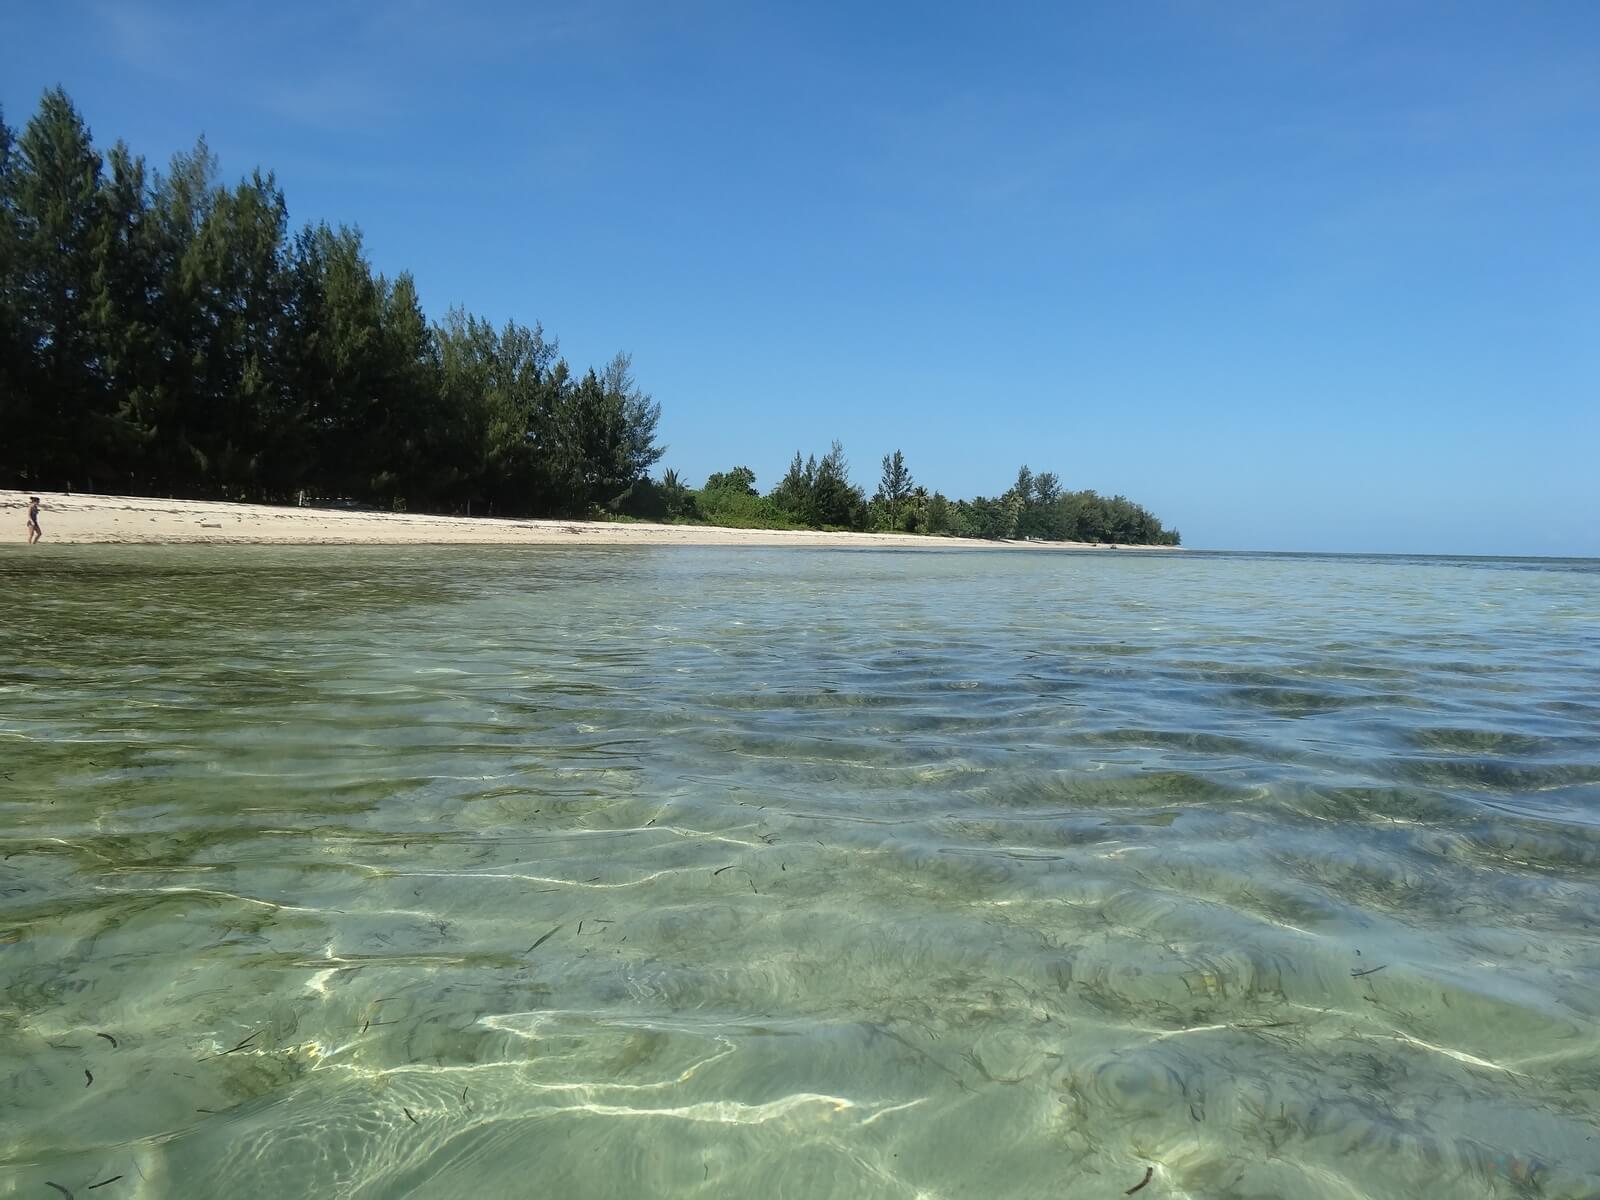
    Cagbalete Island Philippines

    These days its pretty hard to find a picture perfect beach that isn’t overcrowded, overdeveloped or overhyped. Unless of course you’re in the Philippines, where there are just too many to name.

    In a country made up of over 7,000 islands beautiful beaches are bound to be everywhere. And they are! Try Googling Amanpulo, Caramoan, White Beach Boracay, Coron, Camiguin, Anguib Beach, Cagbalete Island, Caramines Sur, Nacpan Beach, Bolobadiangan Island, Subic Beach, Buluan Island; there’s just too many to list.

    Most of these I haven’t even seen yet, but I’ll definitely be back to do it soon. What’s even crazier is that I’m guessing you’ve never even heard of these places, meaning no one else is going to be there except you.


    8. The pretty faces

    Megan Young, Miss World 2013 Philippines
    Miss World 2013. Photo credit: Paul Cortes Photography

    While I was living in Manila, the Traveler’s Digest released an article ranking Quezon City as one of the “Top 10 cities with the world’s best looking men”.

    The article caused a bit of a Facebook sharing frenzy amongst the locals, and the humble celebrations had barely ended when the Philippines won Miss World 2013 a few months later. In fact, it appears the Philippines has been cleaning up at beauty pageants for quite some time now.

    I’m just going to chime in and go on record saying that the Philippines really is a country of very pretty people 🙂


    9. It’s cheap!
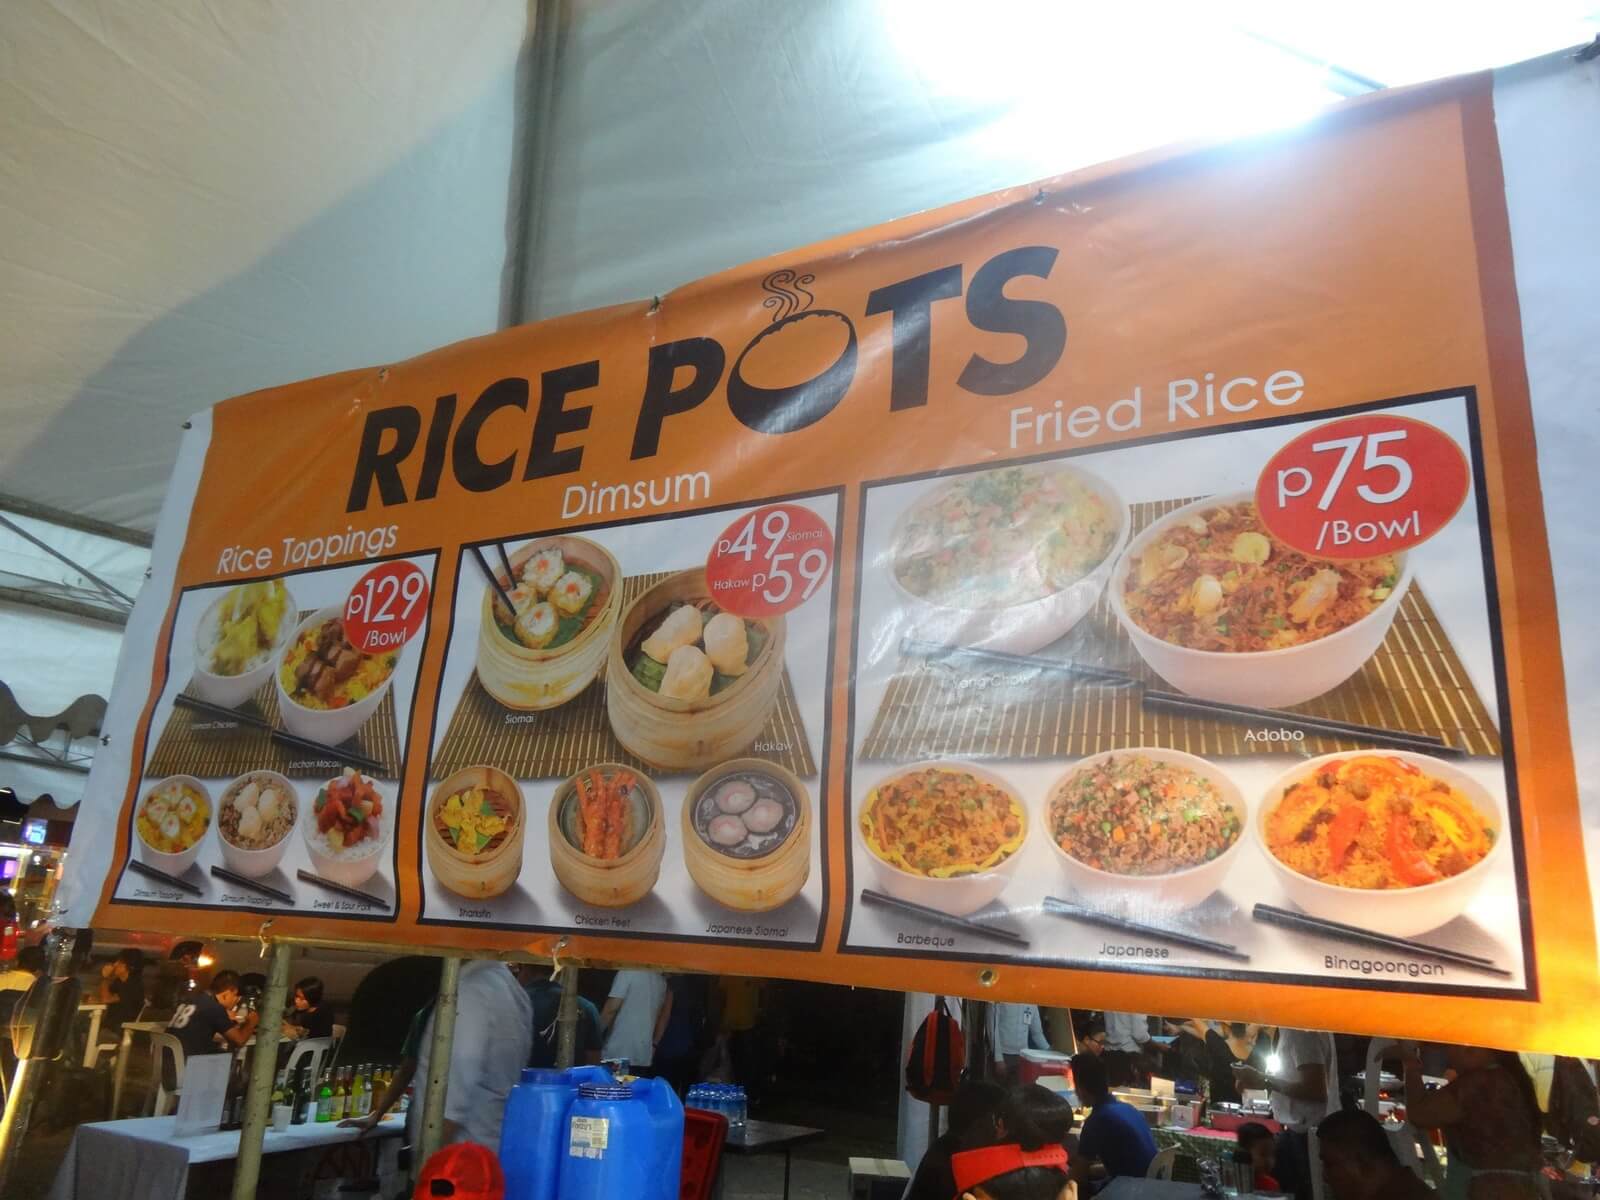
    Glorietta market Philippines

    Budget travellers will definitely have no problem making their way through here. Taxi rides around town cost $3, a decent meal costs $1.50 and a bucket of beers will barely run you $5. Catching the latest movie at the cinema will cost you $6 and you can rent yourself a studio apartment for around $15 a day! Not to mention the country’s budget airlines (Cebu Pacific, PAL Express) offer some of the cheapest fares in Asia.


    10. It’s growing, fast
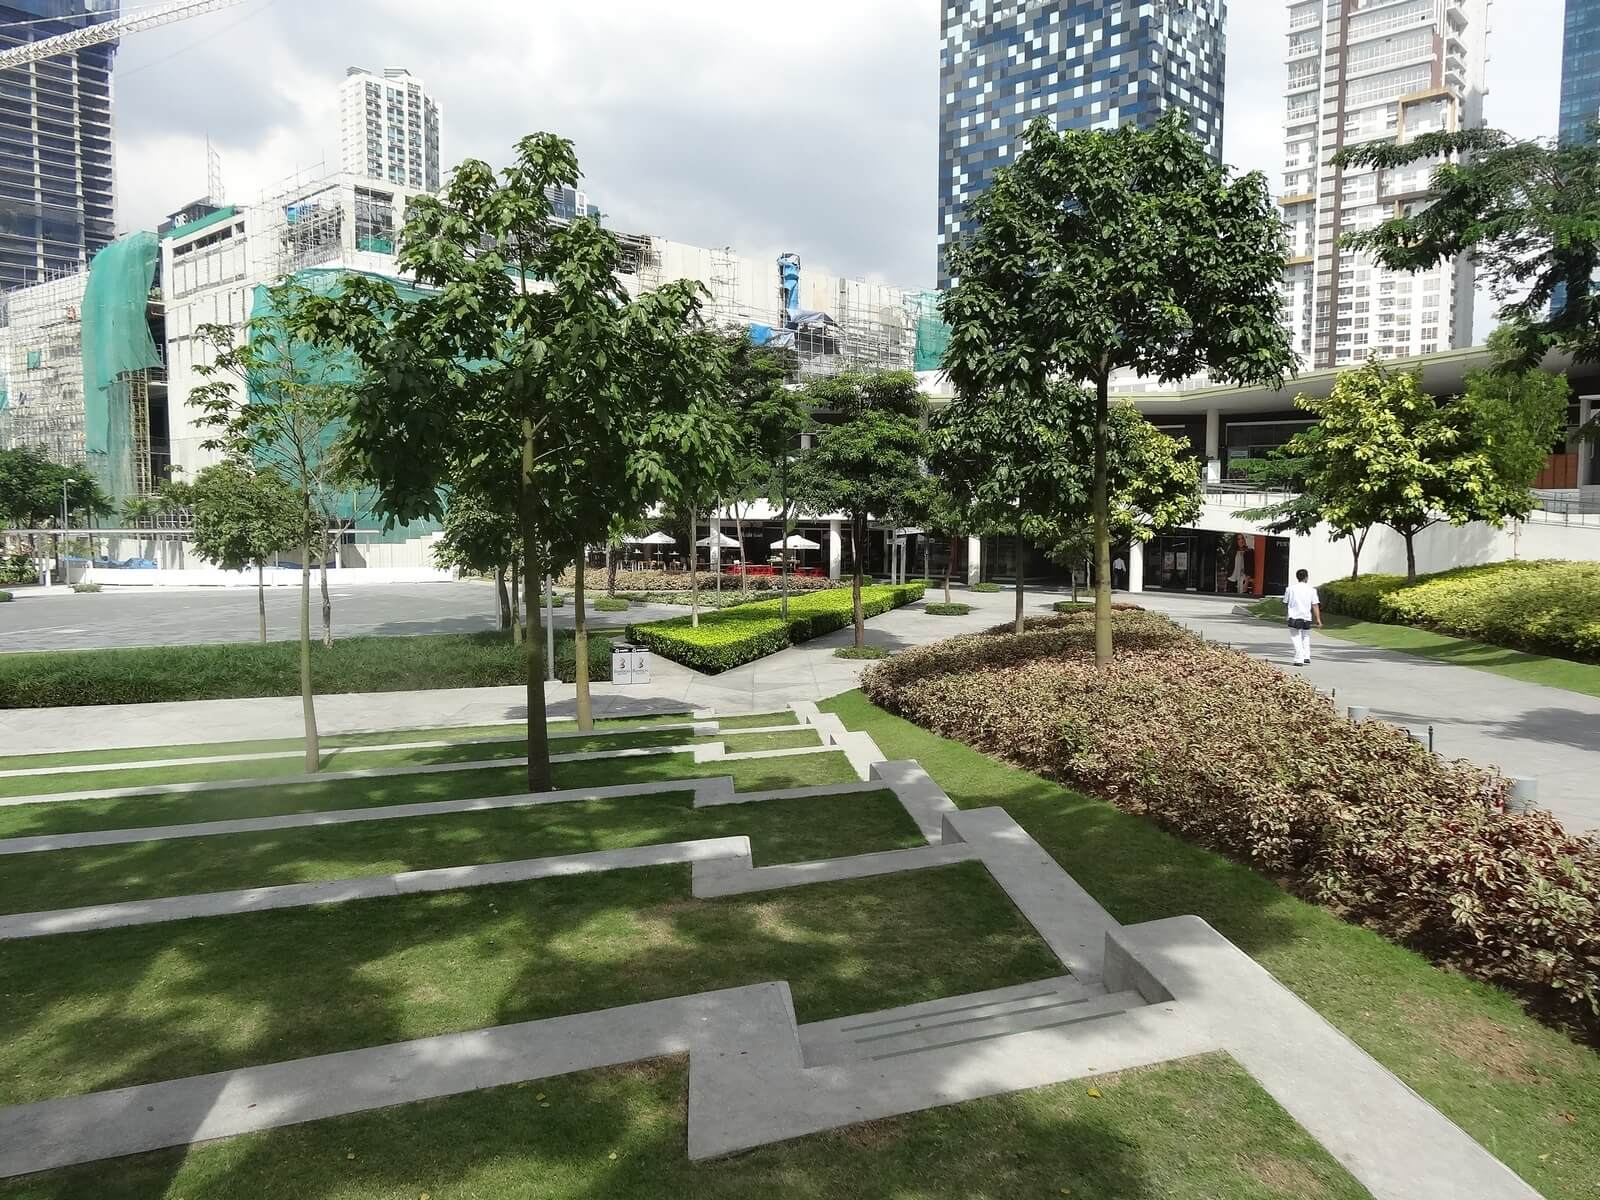
    Fort Bonifacio Philippines
    Fort Bonifacio in Manila

    I remember the first time I visited Fort Bonifacio and felt like I was walking through an upgraded version of Singapore. Skyscrapers were going up in all directions, it was incredibly clean, all the international eateries were around, there were Deutsche Bank and HP and IBM offices towering above me, the roads were wide and uncrowded, there were fancy public parks and boutique shopping streets; there I was thinking “I thought the Philippines was 3rd world?” The place looked like New Zealand 20 years into the future! I cannot wait to see what this place looks like in a few years time.

    I’ll say it one more time. Go to the Philippines NOW. Asia’s best kept secret may not stay a secret for too much longer.

    Looking for more Philippines content? Make sure you check out my trip to El Nido, my month living on Boracay, and my Manila Accommodation guide. It’s more fun in the Philippines!
    Heading to Asia. Be sure to add the Philippines to your "to-do" list. Amazing beaches, delicious food, off the beaten track, the friendliest people. What more could you want?
  • Singapore Airport: A Disneyland For Backpackers

    Singapore Airport: A Disneyland For Backpackers

    Airports! Don’t you love airports?

    I’ve spent my fair share of time sitting in airports, usually in an isolated corner picking my nose and listening to Taylor Swift.

    Earlier this year I spent about 12 hours sitting around in Mumbai airport, and a few years before that I was having the time of my life prancing around Nairobi’s airport for 18 hours or so.

    Needless to say, sitting in the airport sucks. You probably haven’t showered for over 30 hours, all the good seats are taken, the food is stupid expensive and everyone is in a super shitty mood.

    Unless of course you’re in Singapore’s Changi Airport.

    Chances are you’ll have more fun in Singapore airport than you’ll have in actual Singapore. I promise, it’s so cool I’m actually looking forward to the next time I have to transit here. The place is like a gigantic big kid’s playground, with more big screen TV’s, video games and computers than Dick Smith Electronics.

    Let me show you exactly how much fun you can have while in transit in Singapore.

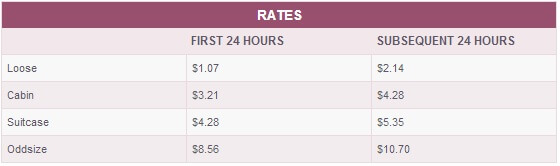
    First of all, there’s a Left Baggage service available. Personally I hate carrying stuff around the airport. Don’t you ever get sick of tying your backpack to your leg while you sleep? Or trying to strategically place your massive suitcase in the cubicle while you poop?

    At Changi Airport you can leave your bags with someone else, and it’s cheap. I left two bags with them for about 12 hours and it cost me $5 USD!

    Untitled

    This is a big deal because wheeling your bags around Singapore Airport isn’t just a mild inconvenience. Singapore Airport is enormous. It has three terminals (update: It has four now), all connected by the Skytrain. It comes every four minutes or so, and takes about a minute to get between terminals.

    singapore airport guide

    While in transit you always need to eat.

    Sometimes it’s good, sometimes it’s not, but in Changi airport your only problem will be trying to choose.

    Every type of food is available – pizza, Burger King, chicken laksa, BBQ pork on rice, McDonald’s, wonton noodle soup, fried chicken and chips, vegetarian Indian…whatever you want – it’s here. The food’s not expensive either, this Hainan chicken rice only set me back $4USD! Or $12, cos I had three of them 😀

    food in singapore airport

    Then, it’s time to charge up your stuff. But what power plug do they use in Singapore?

    Doesn’t matter, because the airport has craploads of universal plugs, including USB’s. 856 of them to be exact.

    No more sitting on the floor against a random pillar, waiting for your phone to charge…

    singapore airport guide

    What I hate about sitting in the airport is the lack of fresh air. It’s like a big air conditioned greenhouse of zombies breathing recycled oxygen.

    Luckily for you, Singapore has a handful of garden areas where you can lay low, breath some real air and chill.

    My favourite is the butterfly garden:

    butterfly garden singapore airport
    butterfly garden singapore airport

    The cactus garden and sunflower garden aren’t too shabby either:

    cactus garden singapore airport
    sunflower garden singapore airport

    Then, just when I start to get bored Singapore brings me back to technology.

    Scattered throughout the airport are free internet terminals, and there’s so many of them that they’re never full.

    The internet is fast, too.

    internet singapore airport
    internet singapore airport

    Then once you’re done stalking your ex on Facebook you’ll probably wanna sit back and relax somewhere.

    Head to the free movie theatre and catch one of the latest blockbusters.

    movie theatre singapore airport

    If the theatre’s full, don’t worry. Just head to the other one.

    movie theatre singapore airport

    And if you don’t like the hush hush of the cinema, you can catch a movie on one of the many flat screens scattered through the terminal:

    tv singapore airport

    Once you start feeling weary, get a massage at one of the many health spas.

    Prices start at around $20USD, but most will be closer to $40.

    wellness spa singapore airport

    Are you getting anxious about what’s happening in the markets?

    Just head to the free Bloomberg corner, where you can run rampant on Bloomberg connected computers and watch the market news.

    I didn’t even have access to this while working as an accountant!

    bloomberg singapore airport

    Bored yet?

    Guess you better head to the game zone, where they have 9 free Playstation 3’s hooked up with the latest games.

    What!!!!

    playstation 3 singapore airport

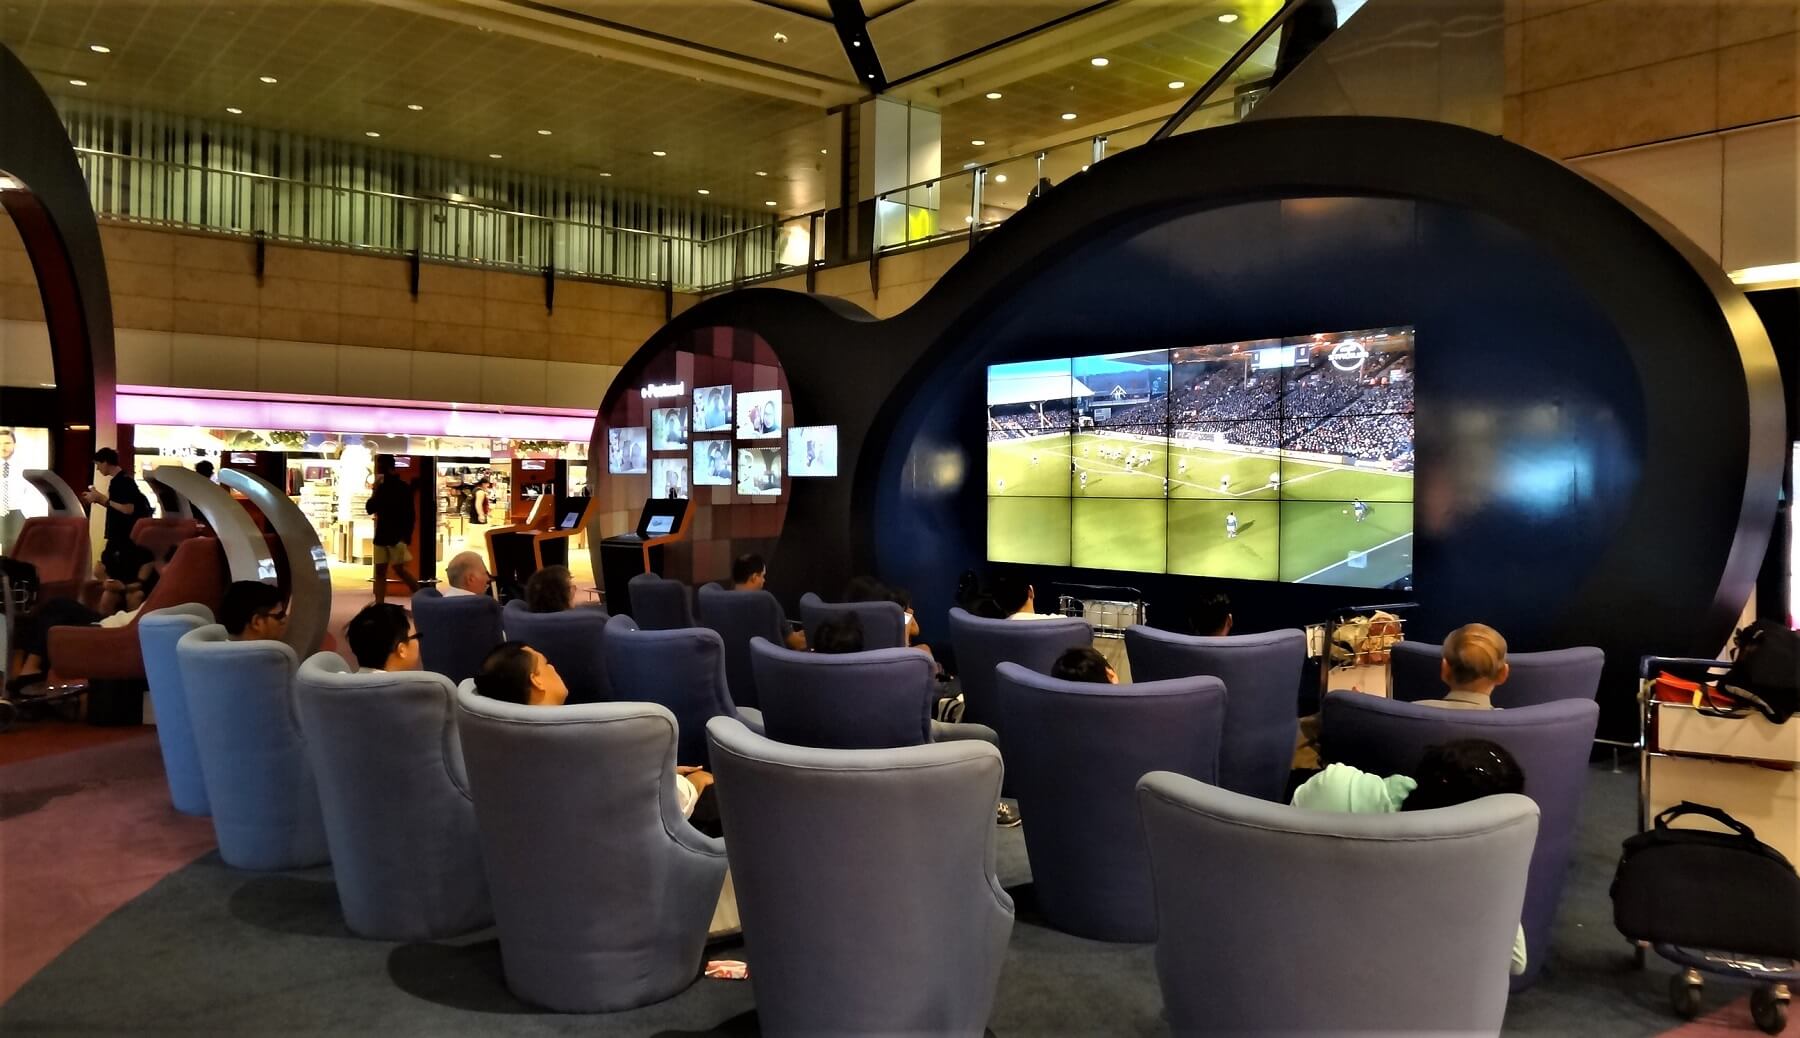
    Once you’re done losing at Fifa, you can head to the sports TV, sit back in your lounge chair and watch the real thing on the big screen.

    sports singapore airport

    You probably want more video games now.

    You’re in luck, because they also have a free LAN cafe set up with six gaming PC’s, ready for you to Battlefield it up!

    OMG!

    battlefield LAN singapore airport

    Getting tired? Take a nap!

    You can access a sleeping zone in a lounge for around $25, and around $9 will get you a drink and a hot shower.

    shower singapore airport

    After that you can head to the TV zone and relax in your own private television cubicle.

    There’s a lot of them, so you should be able to find an empty one 🙂

    tv singapore airport

    Walking through this place is always interesting. It’s scattered with fish ponds and gardens which are such a refreshing change to the dull, sterile boxes that airports so often are.

    fish garden singapore airport

    Now you probably need to use the internet again but you’re bored of using a normal computer.

    Guess you better have a go with these wall mounted touch screen ones…

    computer singapore airport

    Miss your dog? Give him a call using these free internet phones:

    Singapore Airport phones

    Heading to the beach in Thailand or Bali? Be honest, those biceps are still looking kinda small.

    Lucky you. There’s always time for one more gym session:

    gym singapore airport

    If you really need a decent snooze, there’s a couple of transit hotels you can check into without needing to go through immigration:

    transit hotel singapore airport

    And if you ever feel like you’re getting bored of the airport (which is impossible), there’s a free tour of Singapore on offer that will get you out into the real world.

    free tour singapore airport

    Then came the best surprise of all.

    I was so exhausted from running around looking at all this cool stuff when I finally came across a massage chair.

    Ready to spend my few remaining dollars on a much needed foot rub, I sat down and twisted myself in circles trying to find the coin hole. Turns out, it was free!

    AHHHH!

    massage singapore airport

    But what’s even crazier than all this is that this isn’t even half of it! I had about 4 hours in here and I still didn’t get a chance to see the swimming pool, the hair salon, the other gardens, the 4 storey high slide, the Aviation Gallery, the Zone X video arcade (arrgh!), let alone browse through all the amazing duty free shopping on offer.

    All I can say is, if you ever need to transit in Singapore don’t get upset. In fact, I’d try and change your flights up so you can make your transit even longer. I could spend 2 days in here and not get bored. LAN party, anyone?

    Oh, and I nearly forget the most important part. There’s beer, too 🙂

    beer singapore airport

    Truth is, I was actually a little disappointed when it came time to board my flight. I felt like I was Charlie and my time in the chocolate factory was being cut short.

    Next time I’ll make sure I get a little more time here 🙂

    Heading to Singapore?

    • Accommodation is not cheap in Singapore, and even hostels dorm rooms can be pricey, but that doesn’t mean you need to spend a fortune. I’ve scoured the country for the best accommodation options – check them out in my Ultimate Guide To Singapore Accommodation.
    • To keep your food costs down, eat in the hawker centres. You can get safe and delicious meals at all hours of the day for just a few dollars, and they are everywhere. Don’t be intimidated by the crowds! Just go in and find a seat, it works like any other food court. Many things are expensive in Singapore (at least by Asia standards) but food doesn’t need to be one of them.
    • highly recommend purchasing travel insurance. Travel in Singapore is not dangerous but it is can be expensive and you do not want to be left with the bill in the event of an accident. I use World Nomads. They offer coverage in Asia and it’s super simple – you can literally be covered within two minutes. I use them often. For read my beginner’s guide on purchasing travel insurance, click here.

      Have fun!

    World Nomads provides travel insurance for travelers in over 100 countries. As an affiliate, we receive a fee when you get a quote from World Nomads using this link. We do not represent World Nomads. This is information only and not a recommendation to buy travel insurance.

  • Where To Stay In El Nido: Palawan’s Enchanting Secret

    Where To Stay In El Nido: Palawan’s Enchanting Secret

    Ahh, so you’ve heard about El Nido. Yes, it’s a pretty special place. If you’re looking to visit and need some help planning your trip, you’re in the right palce. Below I’ll take you through how to get there, where to stay in El Nido, island hopping in El Nido, plus a few other cool things to do. Hope you’re ready!

    While travelling around the Philippines quite a few locals would tell me about El Nido. Most of them hadn’t been there, but knew enough about it to tell me it was beautiful and that I should go.

    I’d never heard of this place in my life. Couldn’t be that great then, right?

    Wrong.

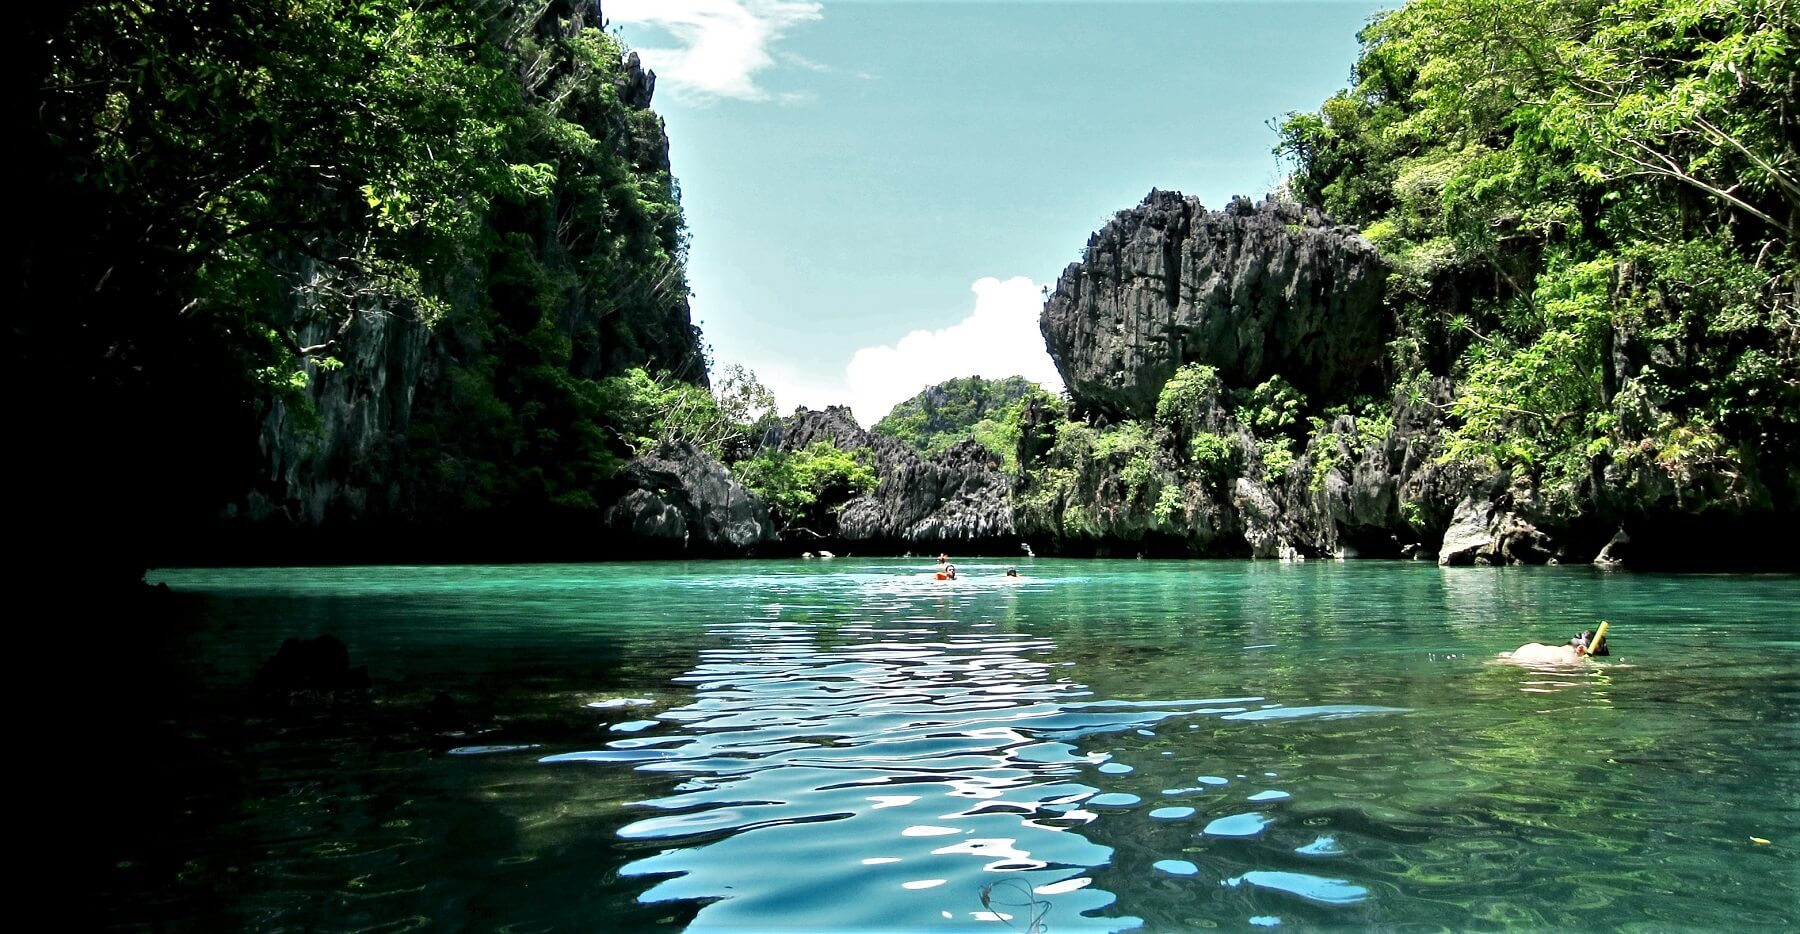
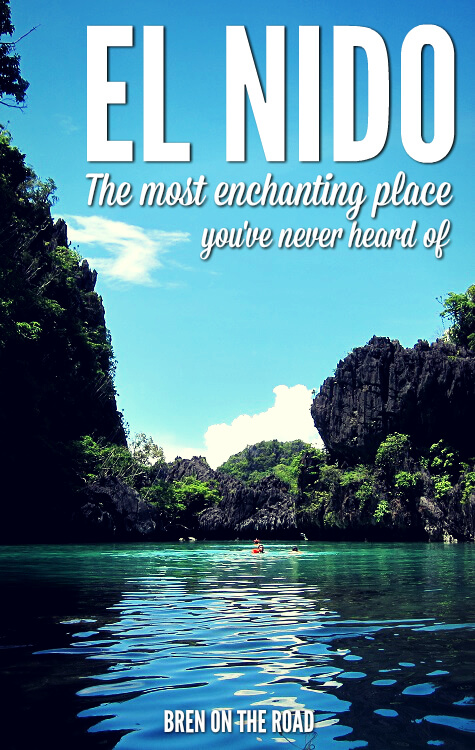
    The archipelago of El Nido was like nothing I had ever seen before. The water was a bright, shimmering turquoise, the sands were white like flour and the towering limestone cliffs left me staring into the sky in wonder. Scattered throughout the islands were unspoiled lagoons and tiny hidden beaches, and under the water lay an endless world of incredible corals and rainbow coloured fish, still untouched after all these years. To put it simply, the place blew me away.

    Read more: 10 Reason Why The Philippines Should Be Your First Stop In Asia

    where to stay in el nido

    When people come back from Thailand I always hear them talk about Koh Samui and how it was the setting for Leo DiCaprio’s movie “The Beach”.

    However, while reading through the El Nido Wikipedia page I learned that the original story was actually inspired by El Nido, as the author was living in El Nido at the time that he wrote it. True story? The locals seem to think so.

    When you island hop across the archipelago you’ll be able to visit the ‘secret beach’ that is believed to have been the author’s inspiration.


    How to get to El Nido

    El Nido is not the easiest place to get to. It’s still relatively unknown which means it’s not particularly well set up to receive tourists; something you’ll find is quite common in the Philippines. I actually prefer it this way, because it means the hoards of tourists that can quickly destroy a place tend to pass on destinations like this.

    First thing you’ll need to do is get to Puerto Princesa. It’s around an hour by plane from Manila and you should be able to get a decent price flight from Cebu Pacific, Air Asia or PAL (maybe around $40USD one way).

    Once in Puerto Princesa you’ll need to get a van to El Nido. The drive is around 6 hours and you should be able to find an air conditioned van for around $15USD.


    Where to stay in El Nido

    Garnet Hotel

    garnet hotel el nido

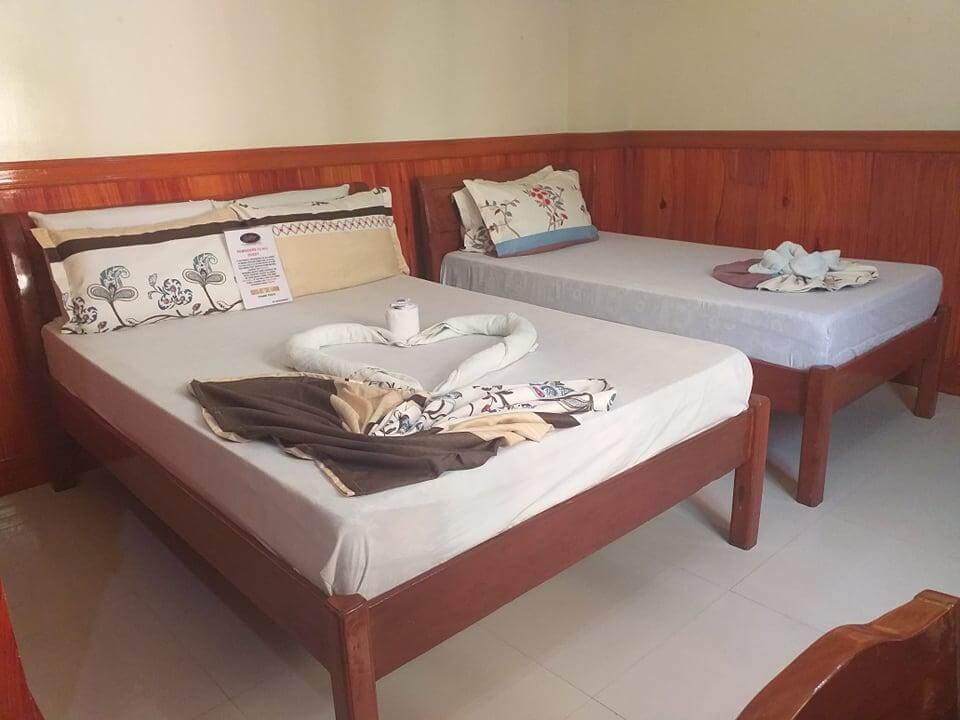
    This is where I stayed and it was perfect for an easy and affordable option. It should only run you $30-$45 per night depending on the season. It’s located right on the main strip and in walking distance of everything (although El Nido is pretty small anyway). Click here to get the best rate.

    Vellago Resort

    vellago resort el nido

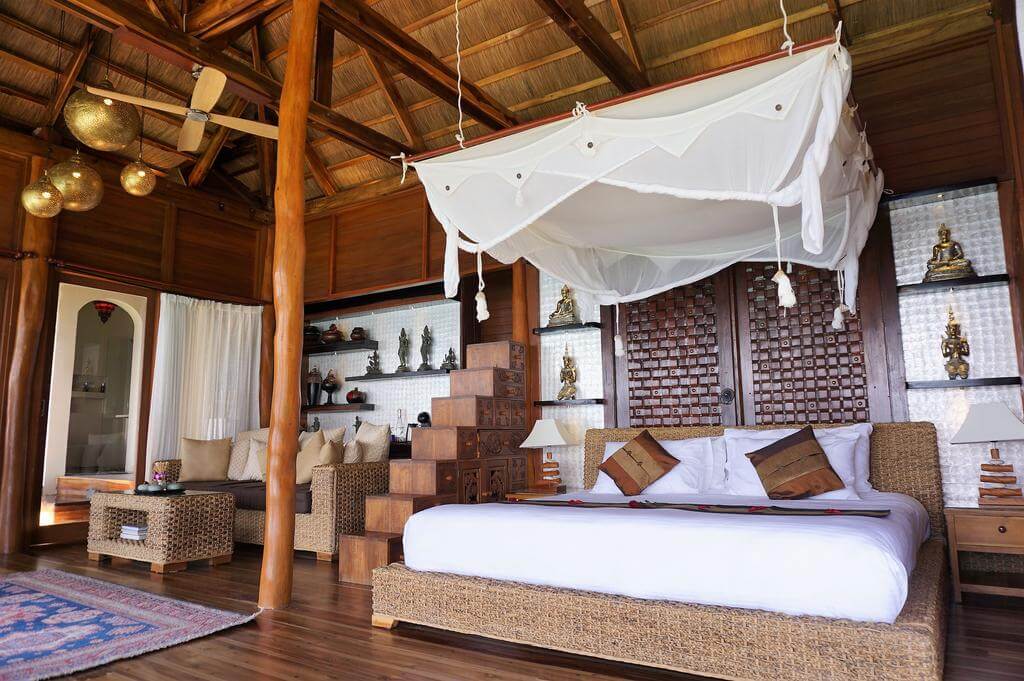
    For those of you wanting some more luxurious, this is the best choice in town. Most luxury resorts are located way out of town, but this is walking distance from the centre. Lavish rooms, not cheap, but if you’re going to splurge, there’s no place more beautiful than El Nido! Click here for the best rate.

    Spin Designer Hostel

    spin designer hostel el nido

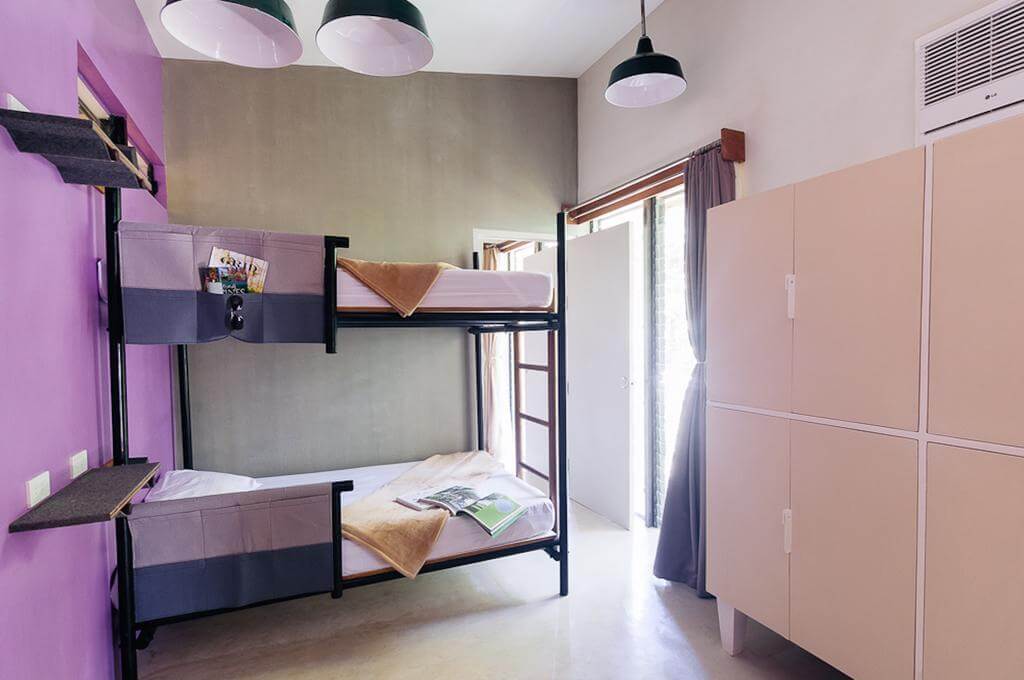
    For the backpackers, this is your place. It’s right in the centre, super affordable and rooms are limited to four beds a dorm. Cozy place with great staff – you can’t go wrong. Click here for the best rate.


    Island hopping

    Island hopping is of course your first priority. This is what El Nido is famous for, and most likely why you’re going there in the first place!

    The island hopping tours are standardised and you can choose from numerous different operators. Each one will offer 4 different tours, aptly named Tour A, B, C and D. I only had time for Tour A and Tour C, both of which I’d highly recommend. Anyway, here’s what you can expect.

    The tours start around 8am and you’ll head out on a boat like this:

    where to stay in el nido

    I’m not the biggest fan of boat rides but the ride out to the islands here is surprisingly pleasant. The ocean is calm, you’re surrounded by natural beauty and the morning sun is just warm enough to keep you happy. Kind of liberating, actually.

    island hopping in el nido

    You’ll then spend the day visiting the various islands, beaches, lagoons, snorkelling and kayaking spots that El Nido has to offer.

    island hopping in el nido

    The lagoons are my favourite. There’s something magical about swimming in these secluded pockets of water. As the guide tells it, they used to be massive limestone caves, and over the years the roofs eventually caved in leaving the lagoons that are here today.

    where to stay in el nido palawan

    The snorkelling around these islands is incredible, so make sure you rent a snorkel before your tour starts. Underwater life tends to freak me out a little bit, and I actually stepped on a sea urchin here which stung like ****. I ran to the beach crying and quickly returned with a long bamboo stick, hunting the culprit down to seek my revenge. Luckily for him I was unsuccessful.

    island hopping in el nido palawan

    I love the hidden beaches and lagoons tucked away in hard to find places. Obviously they’re not so ‘hidden’ anymore, but still breathtaking once you get inside.

    island tours in el nido palawan

    During Tour C you will visit the Matinloc Island shrine. Having a peek inside the buildings that remain also leads you to believe someone was living there not too long ago…

    island tours in el nido palawan

    At one point I actually found myself staring into the ocean for a good 5 minutes.

    “How is it so blue?” I wondered.

    It didn’t even look real, but more like a neverending sea of blue Powerade.

    how to get to el nido

    Every tour also includes lunch. I was just expecting a bottle of water and a sandwich, maybe a mango too if I was lucky.

    Instead, as soon as we dock for lunch the guide and the driver whip out a grill and serve up an insane feast. Grilled pork, crabs, squid, fish, salad, rice, watermelon, banana, pineapple, even a hot drink! Evidently I was so excited with all this that I forgot to take a photo.

    That’s another tip to keep in mind: Make sure you have a good daypack with you because the tours are full day tours and you’ll need to bring quite a few things. An even better idea is to take a dry bag. This is one of the most photogenic places in the world and you want your best gear with you, but you need to keep it safe too. Here’s a great list of the best dry bags for travel.

    Read more: Filipino Food Frenzy: 29 Dishes To Try In Manila


    Other things to do in El Nido

    So, what to do after the island hopping?

    Go exploring!

    There are various shops throughout town where you can rent a motorbike. You can get them for around 500-700 pesos ($14-$18) a day. If that’s not your thing, a trike will be able to take you wherever you want to go.

    renting motorbikes in el nido

    There’s a few beaches and waterfalls around the place you can ride to, but if there’s one place I must recommend it’s Nacpan Beach. It’s around an hour away, but the drive is pleasant for the most part and the roads aren’t too bad.

    how to rent a motorbike in el nido

    Nacpan Beach is a little hard to find, so ask for clear directions before you leave and continue to stop and ask for directions along the way. Once you get there, it’ll all be worth it.

    travelling to el nido

    The beach is enormous, the sand is golden and the ocean is warm and crystal clear. But the best part about it is that it’s so secluded. We had the whole place to ourselves, and maybe saw two other people the whole time we were there. After driving through the long, winding maze of dirt roads to get there, pulling up to the beachfront definitely gave me the wow moment I had been waiting for.

    where to stay in el nido palawan

    More tips for travellers to El Nido

    • There are no ATM’s! This tends to catch a lot of travellers off guard (including myself). Make sure you take out all the cash you need while in Puerto Princesa. You might want to take out a little more than you’d expect to spend, as there’s quite a few nice restaurants and cafes in El Nido town worth trying.
    • Make sure you rent a kayak for Tour A. The lagoons are a great place to kayak around and take photos. Just ask your tour operator and they’ll sort it out for you.
    • Make sure your camera is charging during the night. Electricity in El Nido typically goes off after sunrise and doesn’t come on again until late afternoon. Keeping a powerbank with you is also a good idea.

    From the looks of it El Nido is slowly getting more popular and as a result new hotels and restaurants are popping up around the town. In Manila I also see El Nido tours and even timeshares on sale throughout the malls. However as of now it’s still relatively unspoiled and there were only a handful of other tourists there during my stay.

    My advice? Get there asap! It’s one of those places you’ll never forget.

    Ready to visit El Nido?

    Have you heard of El Nido? These stunning lagoons in the Philippines are once in a lifetime. Getting to El Nido is a little challenging, but worth every second. Check these photos out, I'm sure you'll agree!
  • The Budget Traveller’s Guide to Machu Picchu

    The Budget Traveller’s Guide to Machu Picchu

    Looking to visit Machu Picchu on a budget?

    Luckily for you, finding the cheapest way to visit any place is my specialty! And Machu Picchu is the perfect choice 😉

    These ruins sit high in the Andes of Peru, almost 2,500m above sea level. You might think of it as the Ancient Incan version of Dubai, or perhaps even the Playboy mansion: an exclusive hideaway for the Incan Empire’s rich and famous. Whatever it was it was certainly well hidden; so high up in the clouds that the even the Spaniards, who pretty much wiped the Incan Empire clean, never managed to find it.

    What can deter some low budget travellers from seeing this place is the price; some tour companies will charge up to $500 to get you there from Cusco and back. I’ve seen some 4-5 day tours as high as $2,000.

    However, what I discovered on my journey there is you don’t need the help of a tour company or a guide at all. If you’d like to do Salkantay or the Inka Trail, then you’ll likely need to go with a guide, but if you just want to climb Machu Picchu you can do it solo. The journey is remarkably simple to arrange yourself, and you should be able to get there and back from Cusco for under $200.

    The trip will look something like this:

    Day 1:

    • Bus from Cusco to Ollantaytambo
    • Train from Ollantaytambo to Machu Picchu town
    • Buy Machu Picchu entrance tickets for the following day in Machu Picchu town
    • Spend the night in Machu Picchu town

    Day 2:

    • Early wake up and hike up to Machu Picchu
    • Spend the day in the ruins
    • Come back down and spend a second night in Machu Picchu town

    Day 3:

    • Bus from Machu Picchu town to Ollantaytambo
    • Taxi or bus from Ollantaytambo back to Cusco

    There are other cheap ways of getting there, but in my mind this is the most economical and fuss free way to do Machu Picchu on a budget. Here’s how you’ll do it:

    Step 1: Get your train tickets in Cusco.

    The nearest airport is Cusco, so I’d assume most travellers will be using this city as a base. If you’re looking for a place to stay in Cusco, check out my Cusco Accommodation Guide, which breaks down the best value places in each part of town.

    To get your train tickets in Cusco, head to the Plaza de Armas in Cusco town and look for the Peru Rail office (it’s beside the KFC). This shouldn’t be hard to find. It’s the main plaza in town and your hostel will probably be pretty close to it.

    Ask for a return ticket from Ollantaytambo (also known as Sacred valley) to Machu Picchu town (formerly known as Aguas Calientes).

    I would suggest giving yourself two nights: the first night is so you can get a good night’s sleep before your climb up the mountain, and the second is for a good night’s sleep to rest your weary legs before your return journey to Cusco. It also gives you plenty of time to get there and back, so you can spend a whole day in the ruins and not have to worry about rushing back down to catch a train etc etc.

    It’s a good idea to book your ticket for late to early afternoon. This is because you need to catch a 90 minute bus to the train station, which won’t always run on time. The cheapest ticket might not always be at the most convenient time, so be prepared to shell out an extra $5 for a more welcoming schedule.

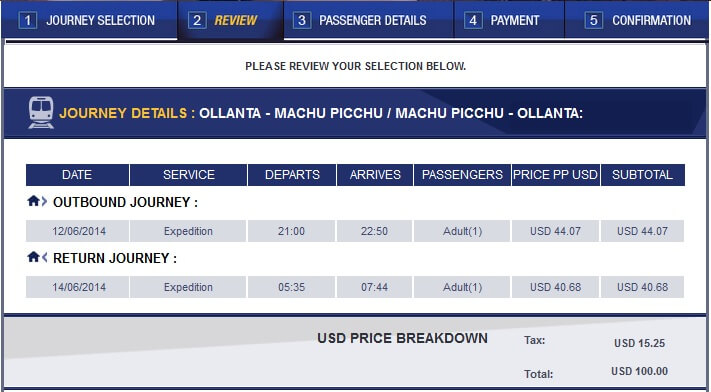
    The train tickets during high season will cost you around $100 USD return.

    You can get a better indication of pricing for your travel dates and even book your tickets at the Peru Rail website.

    machupichu

    Step 2: Bus To Ollantaytambo

    On the day of your journey, get in a taxi and ask him to take you to Calle Pavitos (in Spanish: Quiero ir a la Calle Pavitos, por favor). The taxi ride will cost you no more than 3 soles (around $1) and is just a couple minutes drive within town. Alternatively, you can just use Google Maps and walk.

    The taxi driver will almost certainly know that you’re heading to Machu Picchu and will take you right to the vans. The guys there will be screaming “Ollantaytambo Ollantaytambo!”, and will usher you on board.

    (if you’re wondering, that long name is pronounced Oh-Yarn-Tar-Yee-Tum-Bo).

    The buses don’t run by a strict timetable; they just leave when they’re full. Therefore it’s a good idea to get there early (give yourself plenty of time to get to Ollantaytambo before your train leaves!) The last thing you need is a full bus leaving just before you get there, meaning you’ll be waiting a good hour or so for another one to fill up.

    If your train ticket is booked for 12pm, I’d probably head to Pavitos at around 8am, just to be safe.

    The bus ride is around 1.5 to 2 hours and will cost you around 10-15 soles ($4-$5).

    Step 3: Catch Your Train To Aguas Calientes!

    Once you arrive in Ollantaytambo you’ll probably have a bit of time to wander around. There’s some nice restaurants there for you to catch up on breakfast (or lunch) and it’s a good place to buy stuff you might have forgotten to bring (I bought a goofy looking full brim hat which saved me from some hefty sunburn).

    Then, make sure you get to the station early so you don’t miss the train! It’s not hard to find, the massive crowd of gringos will give it away. If you can’t find it, just ask someone (Dónde está la estación?). From memory it was only a 5 minute walk from the where the van stopped.

    Step 4: Finding Your Accommodation

    Your train will stop at Machu Picchu town, formerly known as Aguas Calientes.

    This is a massive tourist trap (obviously) and everything is madly overpriced. It’s best to have book a hostel beforehand so you don’t have to worry about getting hustled and can go straight to your accommodation.

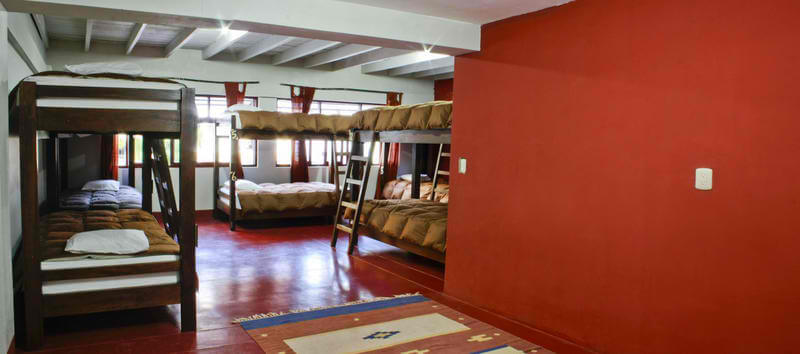
    I can highly recommend a hostel called The Supertramp.

    The beds are comfy and the staff were amazing. But most importantly they had a fantastic hot shower and clean toilets. Perfect essentials, no frills, great price; a budget traveller’s dream.

    Supertramp dorms. Photo: Hostelworld
    Supertramp dorms

    Step 5: Buy Your Machu Picchu Tickets

    This is probably the most important part of it all – remember to buy your tickets beforehand!

    So many people get to the Machu Picchu entrance all the way at the top of the mountain and then realise they can’t buy tickets there. Stupid.

    To get your tickets, you need to go to the Machu Picchu office in the centre of Machu Picchu town. The Spanish name is Direccion Regional de Cultura Aguas Calientes Office. It’s in the main square, not hard to find. Machu Picchu town is pretty tiny, and the staff at your accommodation will surely be able to help. Remember to take your passport and cash (they only accept cash).

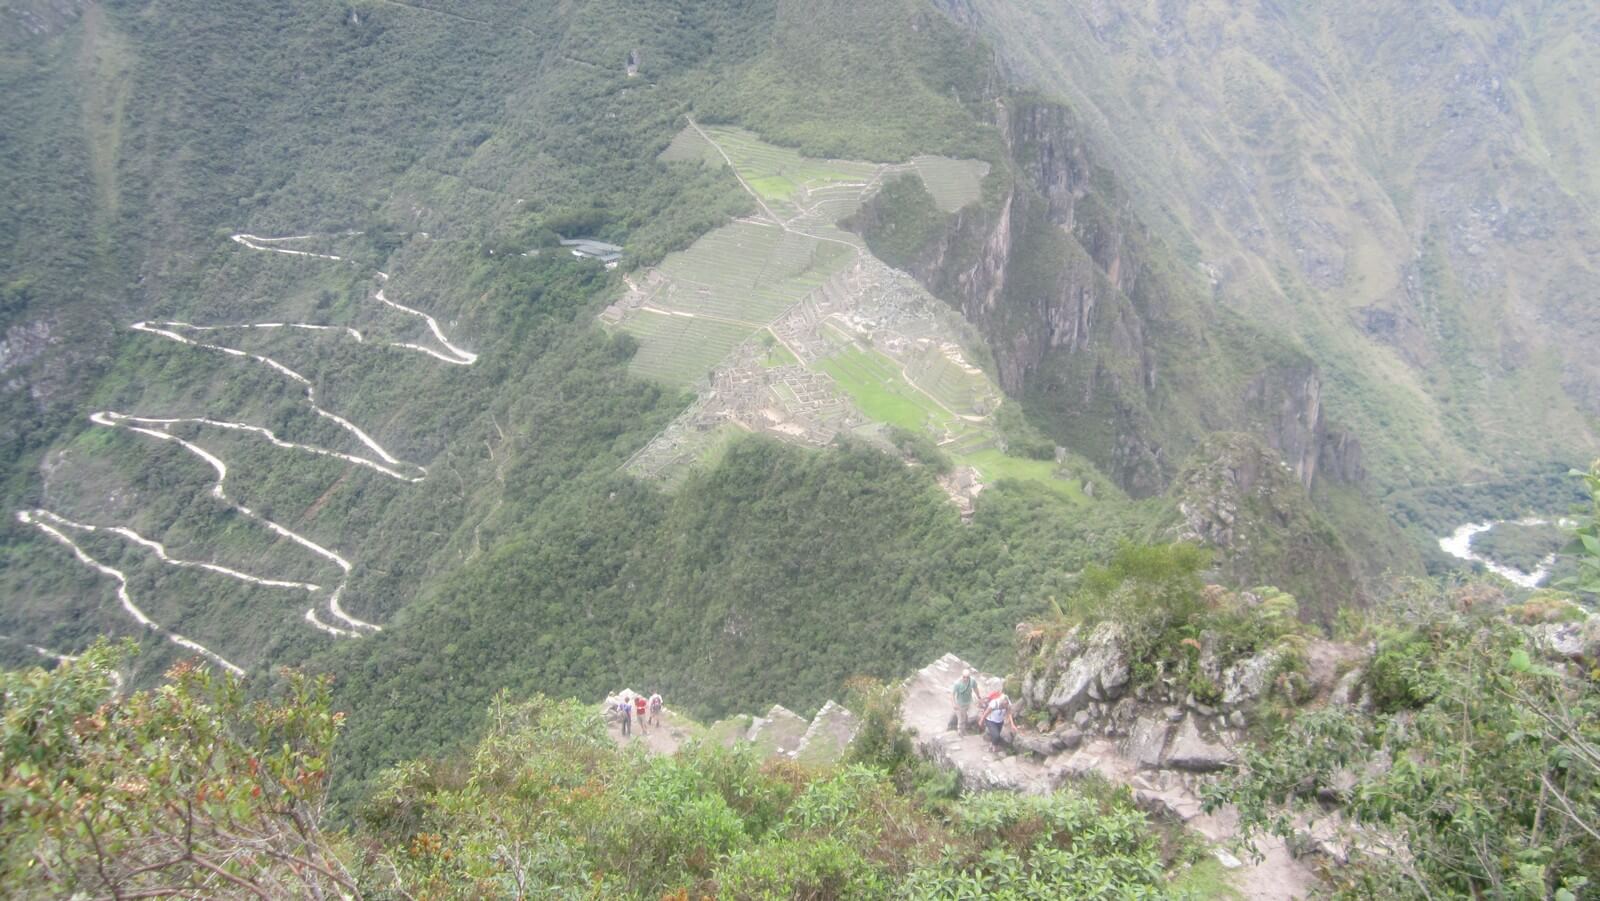
    I highly recommend paying the extra to get a pass up to Huayna Picchu (sometimes spelt Wayna Picchu). This is the peak that stands behind Machu Picchu and the views from the top are breathtaking. Only two groups are allowed in; one at 7am and one at 10am. If you want a decent night’s sleep, book for 10am.

    The ticket price for both Machu Picchu and Huayna Picchu together is 200 soles ($62).

    Remember, the visitors allowed into Machu Picchu are limited to 2,500 per day, and for Huayna Picchu the limit is only 400 per day. For this reason, if you’re going during high season it might be wise to get your tickets online. Alternatively, some agencies in Plaza de Armas, Cusco will be able to help you out (for a fee).

    During low season you shouldn’t have any trouble just buying your tickets in Machu Picchu town the day before. I went in November and managed to get tickets for both Machu Picchu and Huayna Picchu the day before at around 4pm with no trouble at all.

    Step 6: The Walk To Machu Picchu

    The idea on the day of the climb is to start climbing really early so you’ll catch the sun rising over the ruins. However, for this to happen you’ll need a cloudless day which is not always likely. Nonetheless, climbing in the early morning cold is definitely preferable to climbing in the early afternoon heat.

    I woke up at around 4am, along with the rest of the hostel, and we all had breakfast prepared by the lovely hostel staffer (I think she must wake up that early every day, poor girl). There’s actually a bus that will drive you up for around $10USD one way, however I can’t recommend it. Part of the beauty in seeing the place is doing the climb yourself, just the way the Incas did back in the day. As you trod up the stairs you can give a thought to the plebs who had to carry the royalty up there on their shoulders. Must’ve been a fit bunch.

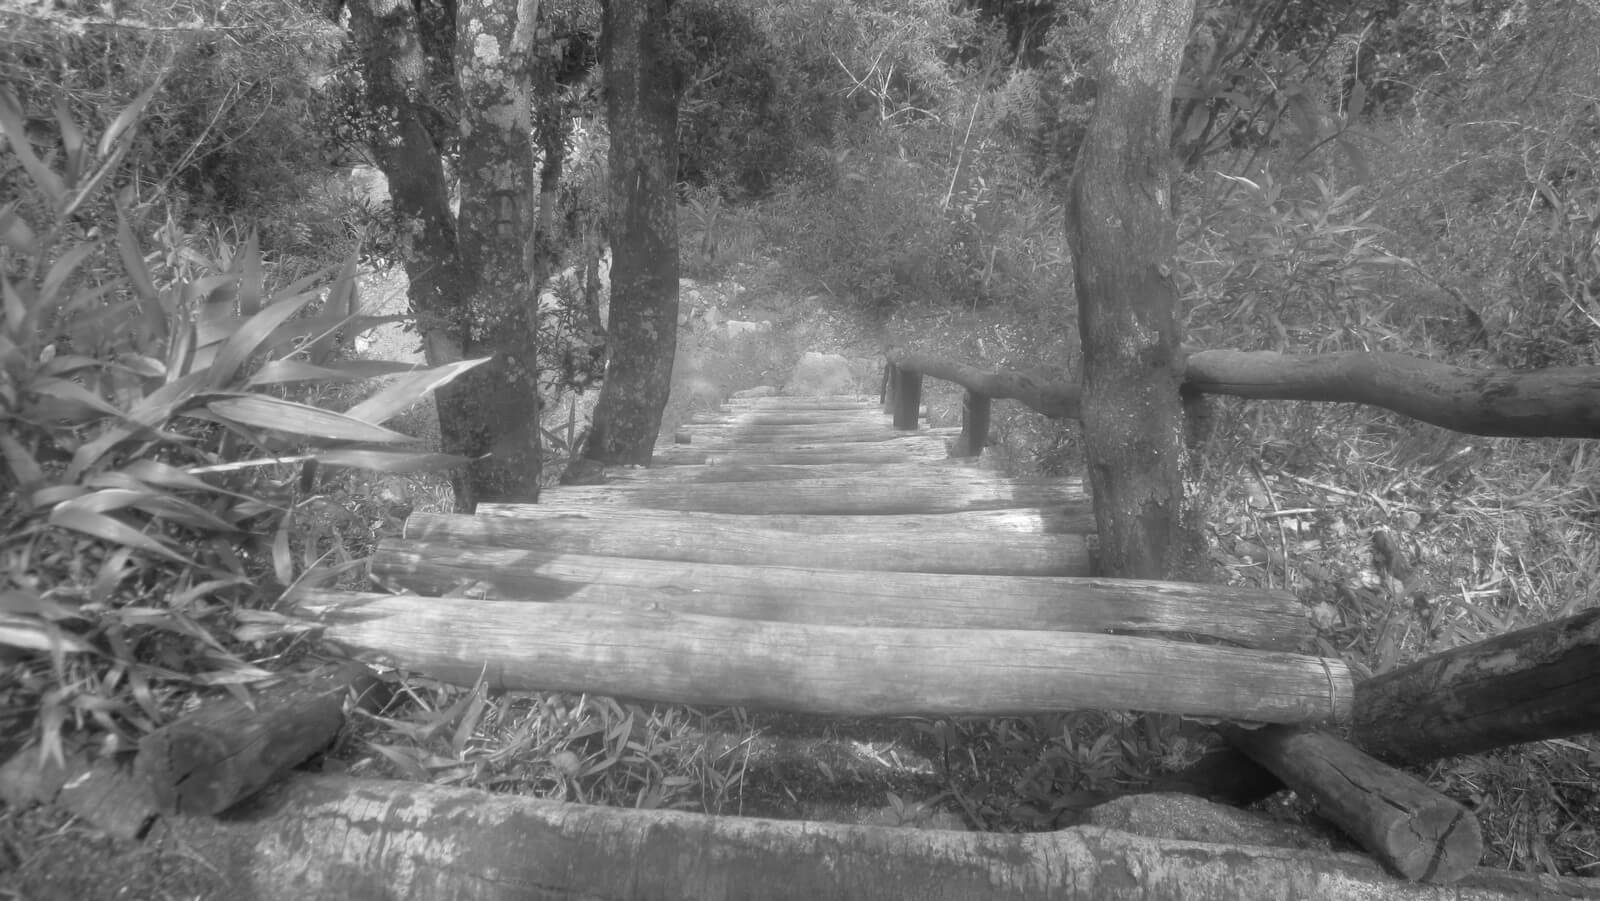
    The climb is pretty tough. At that early hour of the morning it will feel like a million stairs and a hundred hours, but if you move at a decent pace you should reach the top in around 60-90 minutes.

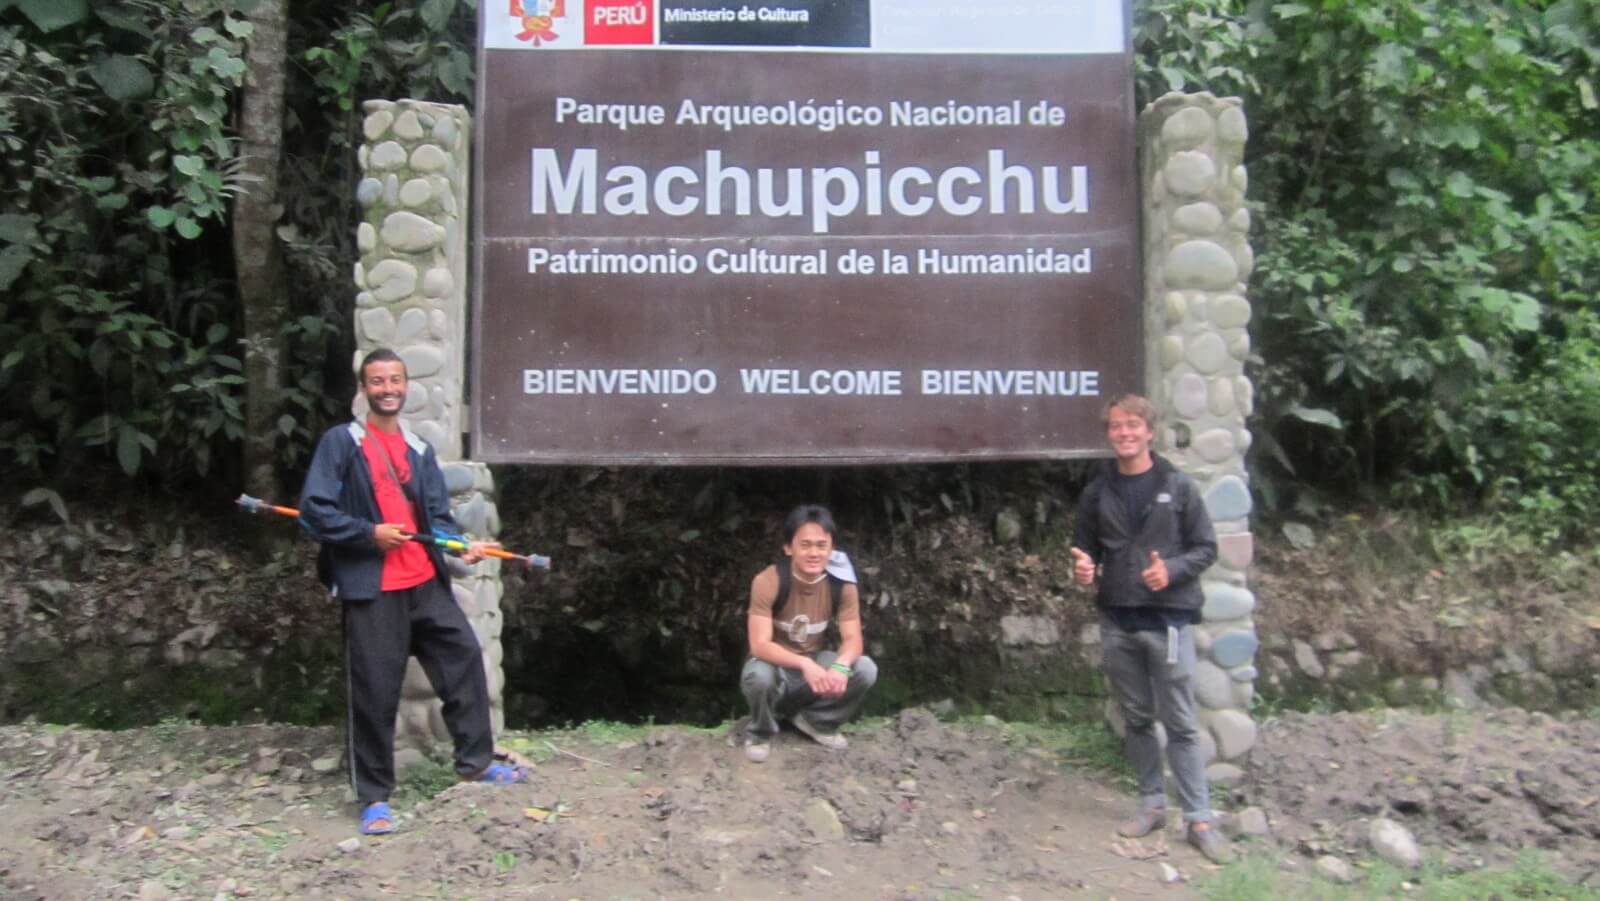
    Finding your way will be easy enough, you’ll simply follow the road until you get to the Machu Picchu sign.

    machu picchu on a budget
    Machu Picchu sign

    From there, signposts with arrows on them will point you in the right direction. If there are buses driving past you every 10 minutes, you know you’re on the right track.

    Step 7: Enjoy Machu Picchu!

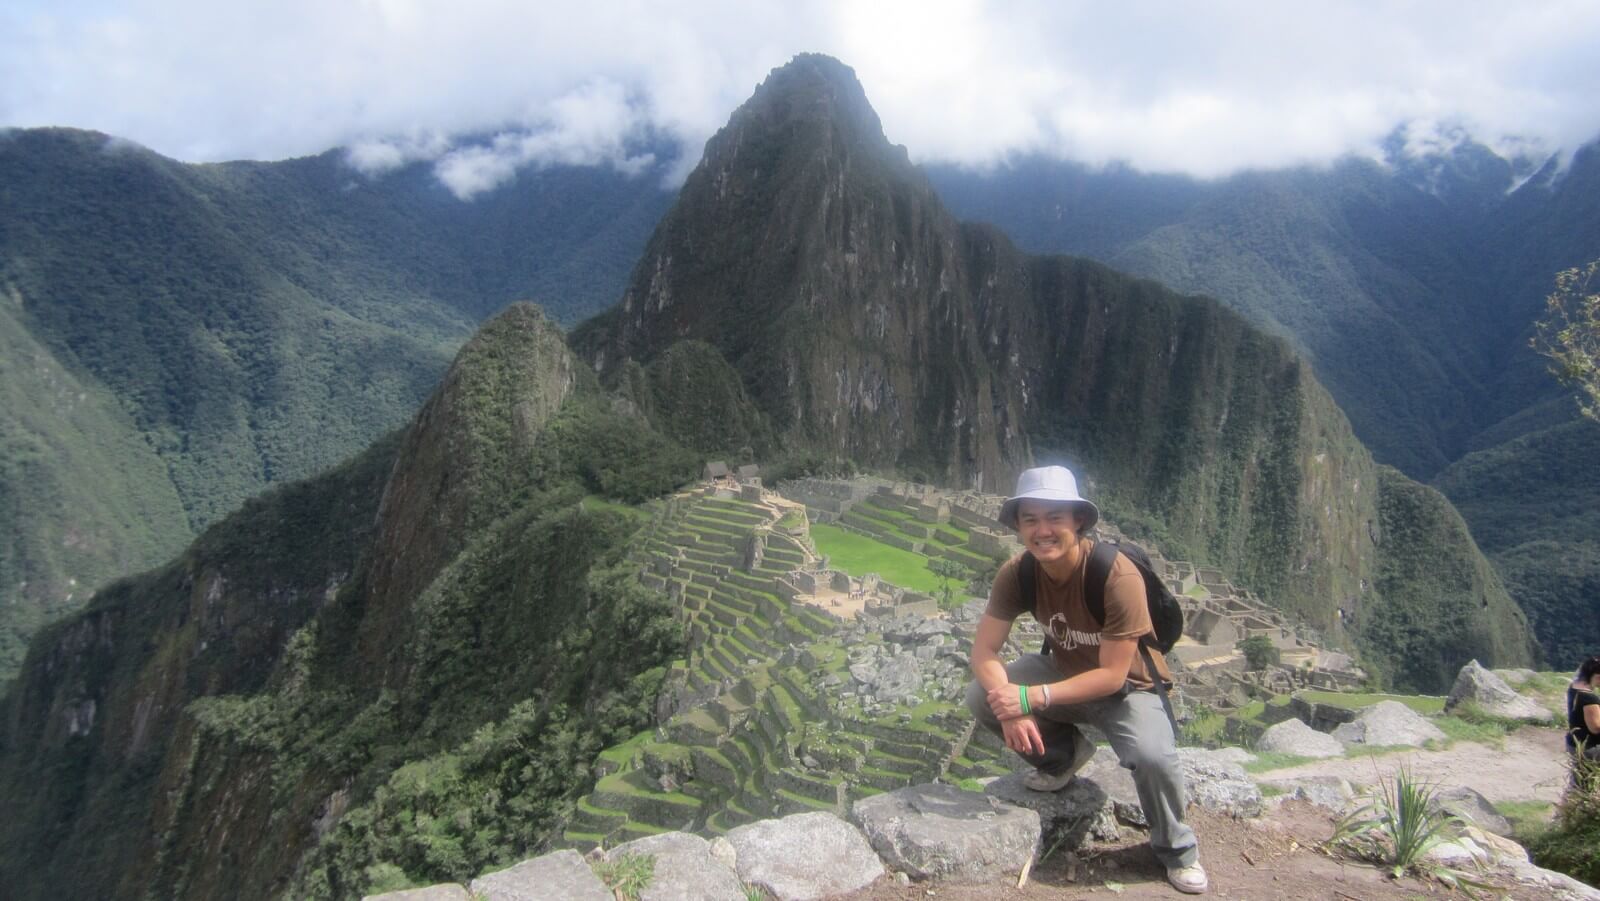
    machu picchu on a budget

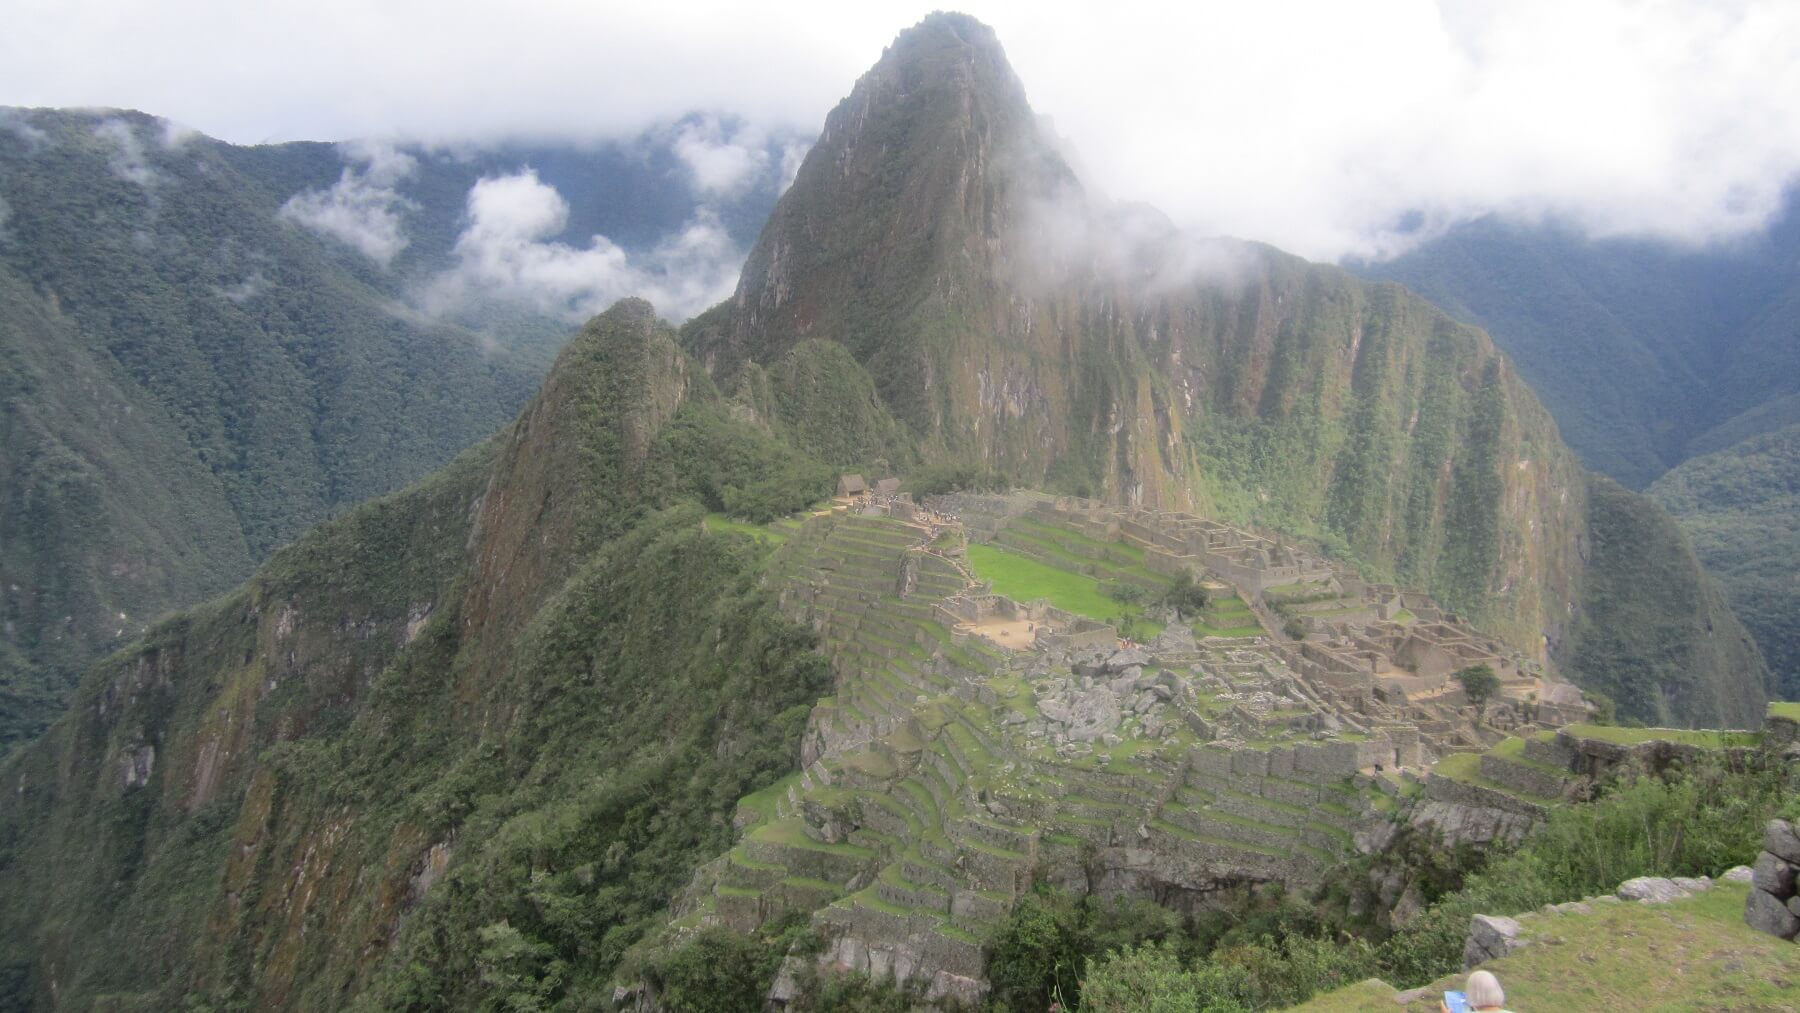
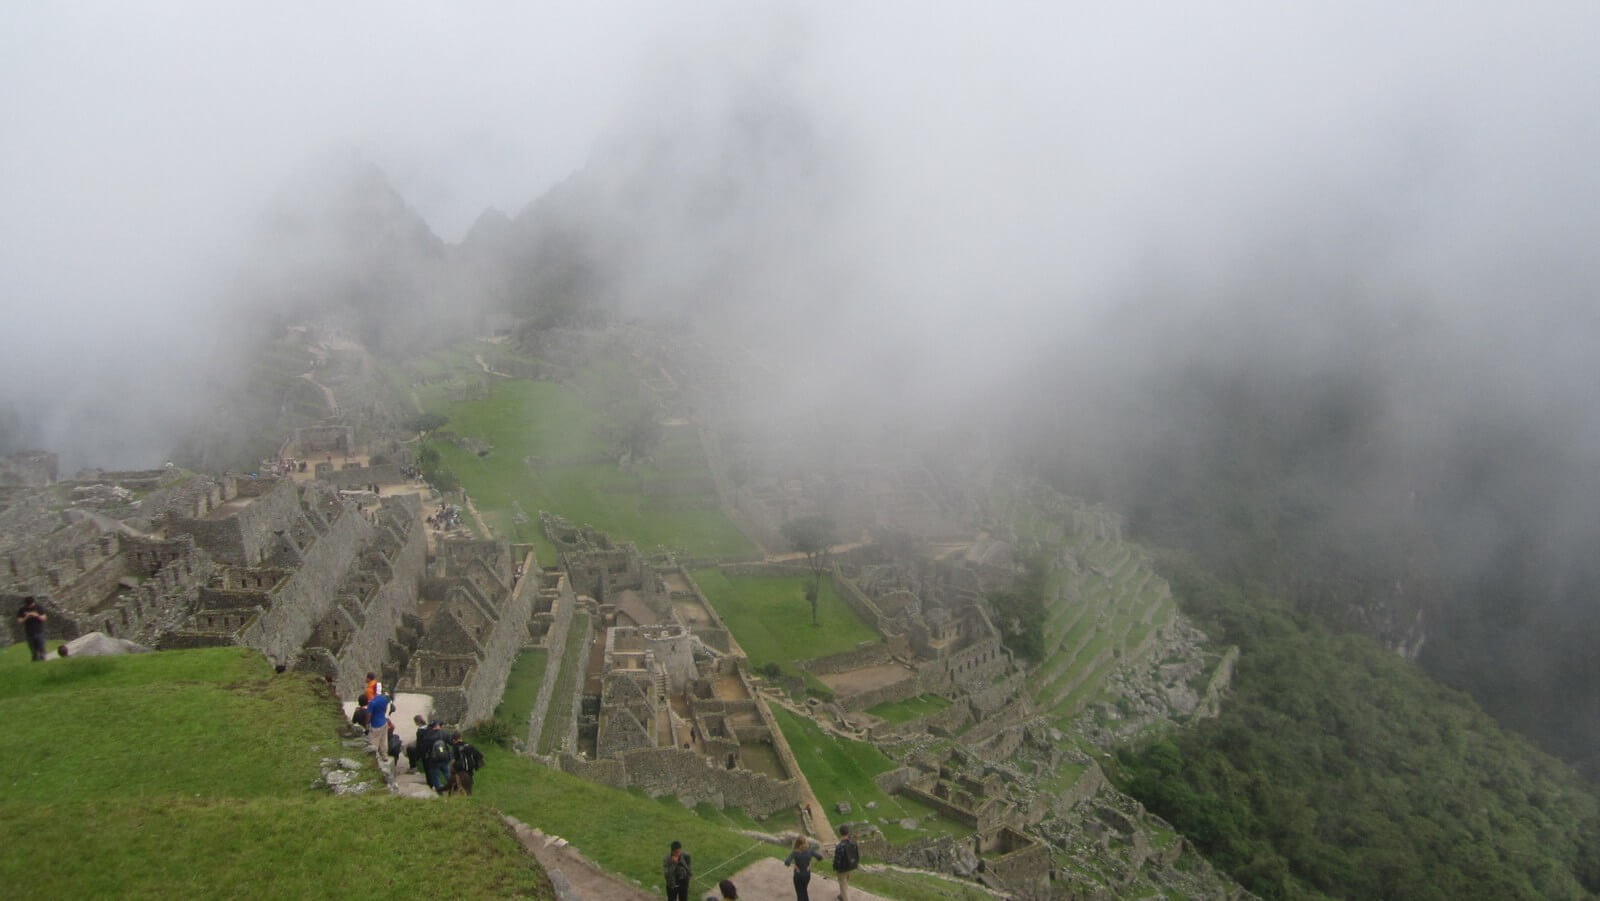
    Once you get to the top you’ll realise why the Spaniards could never find the place. It’s so far up in the clouds that they surely would’ve given up climbing before they even made it halfway.

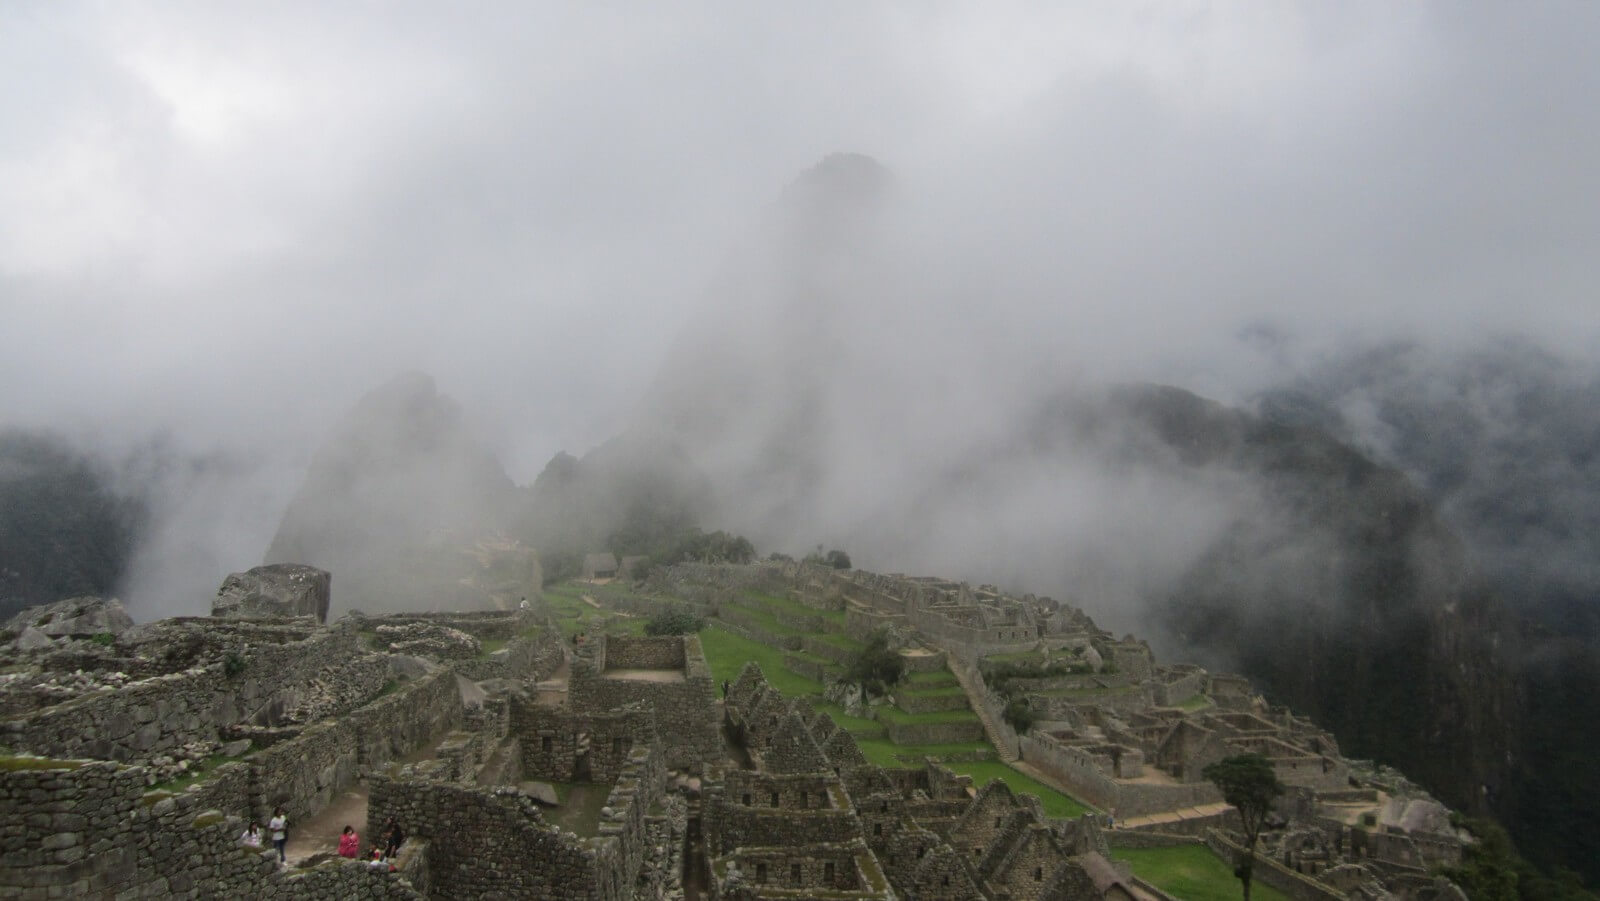
    machu picchu on a budget

    Them resting upon the clouds makes them appear that much more mystical. Before I got there I kept wondering “How cool can a bunch of ruins really be?” The truth is, this bunch of ruins exceeded every expectation. It’s pretty magical.

    machu picchu on a budget

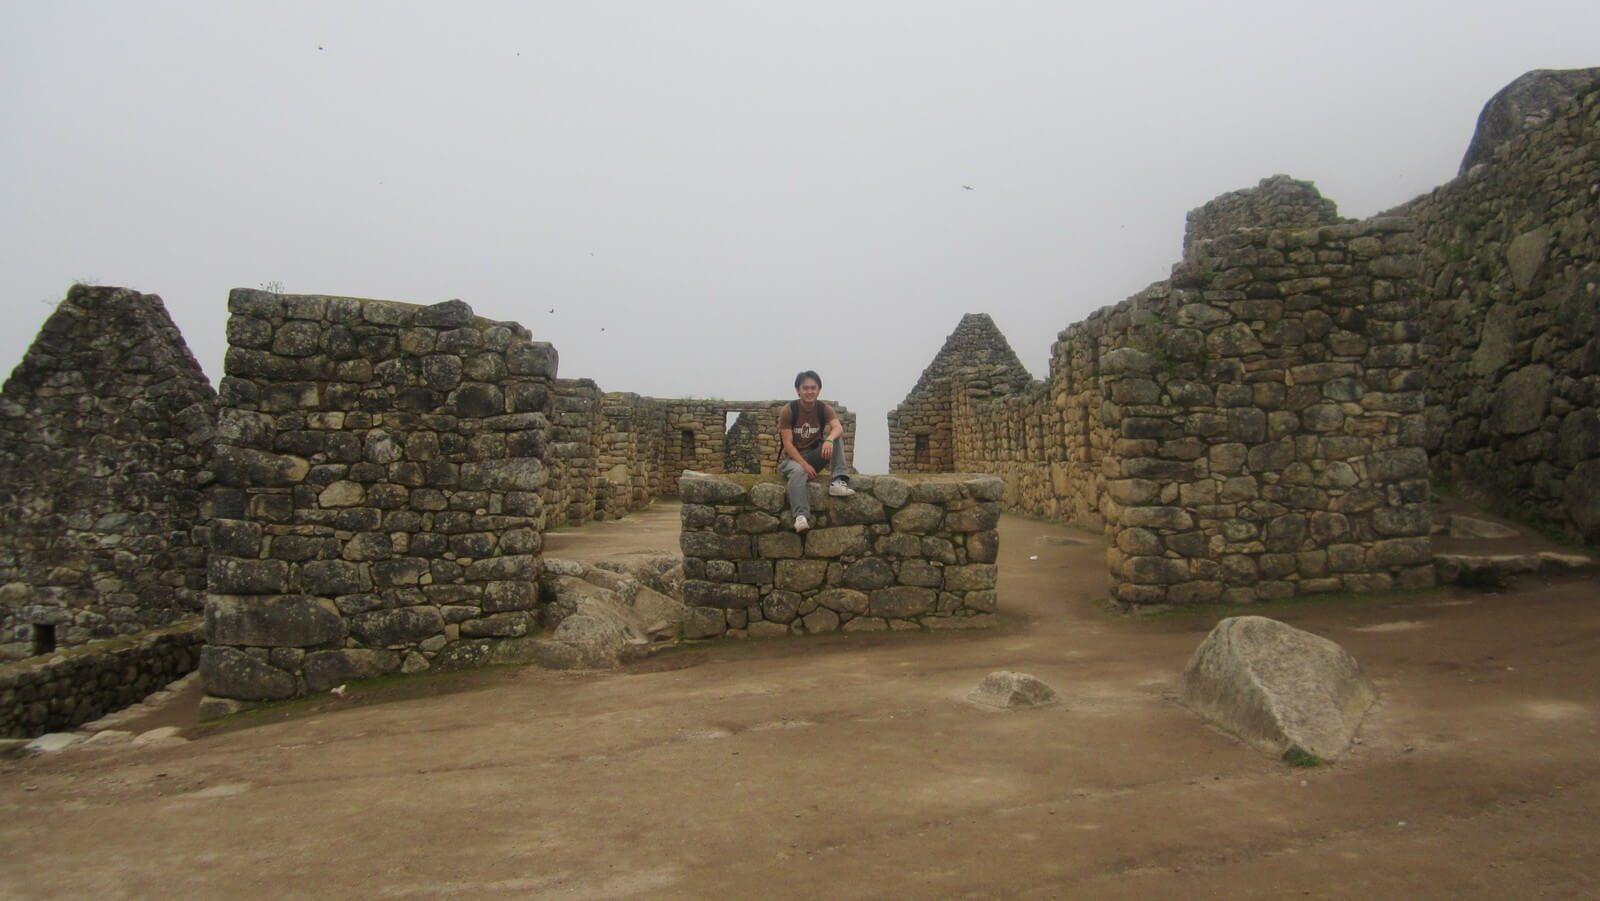
    The postcards make the place look deceptively small. You can easily spend a couple of hours getting lost in the ruins and not even get through all of it.

    machu picchu cheap

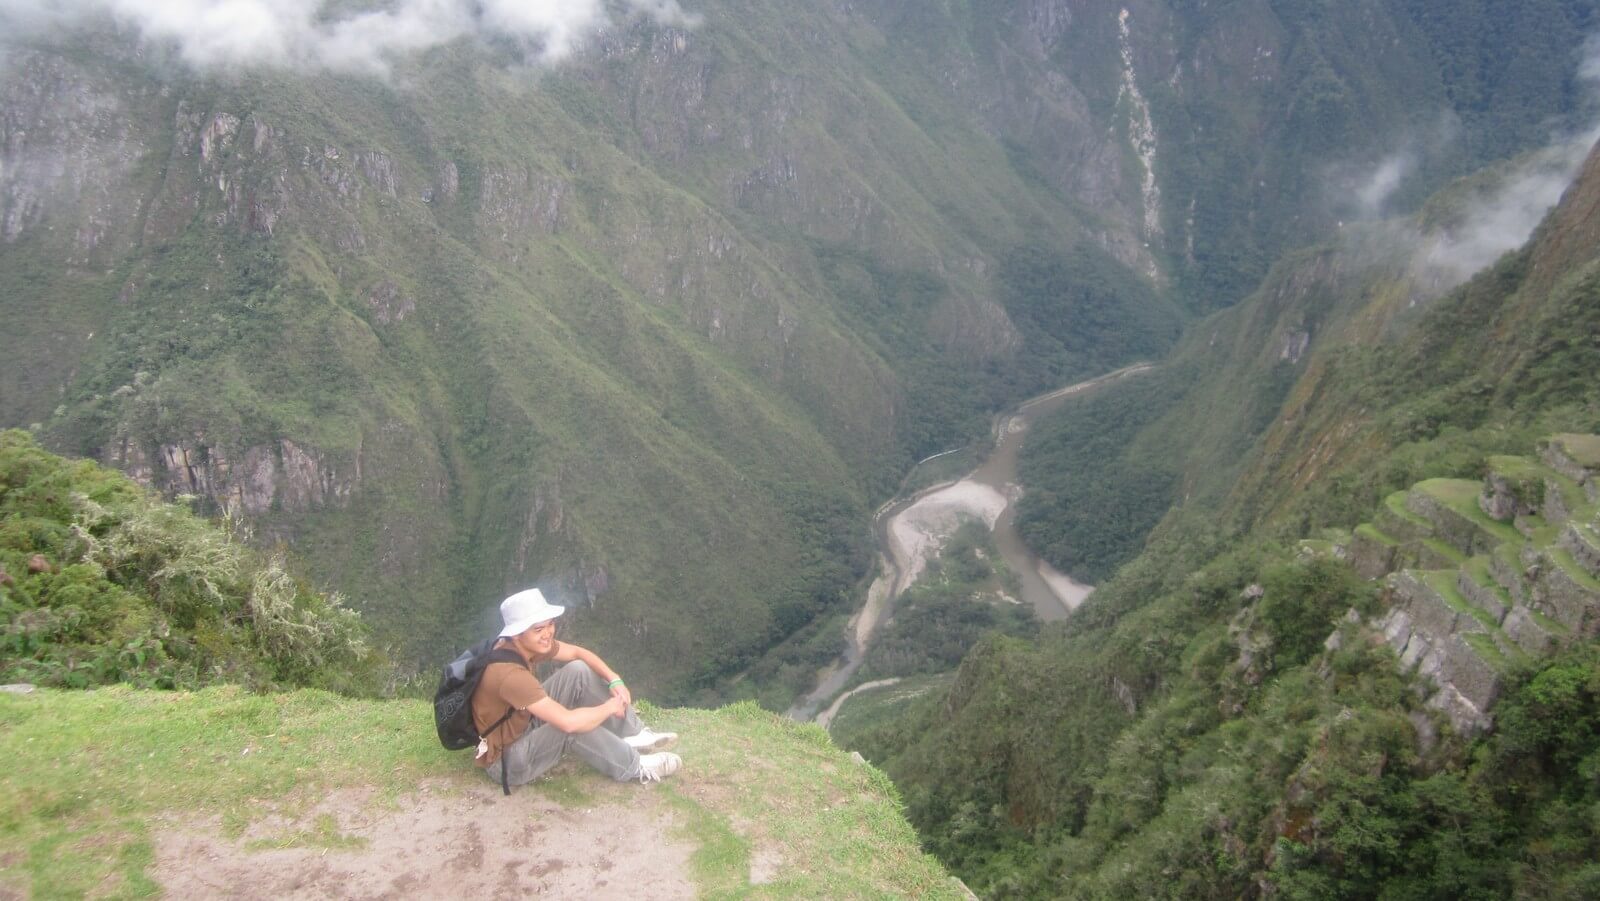
    I was also really amazed at the lack of safety measures. One wrong step and you could easily go tumbling to your demise. Take a peek over the edge and you’ll agree it’s a long way down.

    machu picchu cheap

    If you woke up early enough, you should have at least 2-3 hours free to explore before your group’s timeslot for Huayna Picchu.

    Step 8: Climbing Huayna Picchu

    My best advice is to get to the Huayna Picchu entrance early. The climbing path is narrow and if you’re in the middle of the pack you’re bound to be stuck behind your fair share of oldies waddling up at 0.000004 km an hour.

    I was the third person through the gate and legged it full speed, getting to the top before everyone else. That meant I had the peak to myself for a good 15 minutes! Definitely worth the extra effort. A couple of Aussies arrived next and we sat up there having a yarn, perched on the top of the world.

    Huayna Picchu on a budget

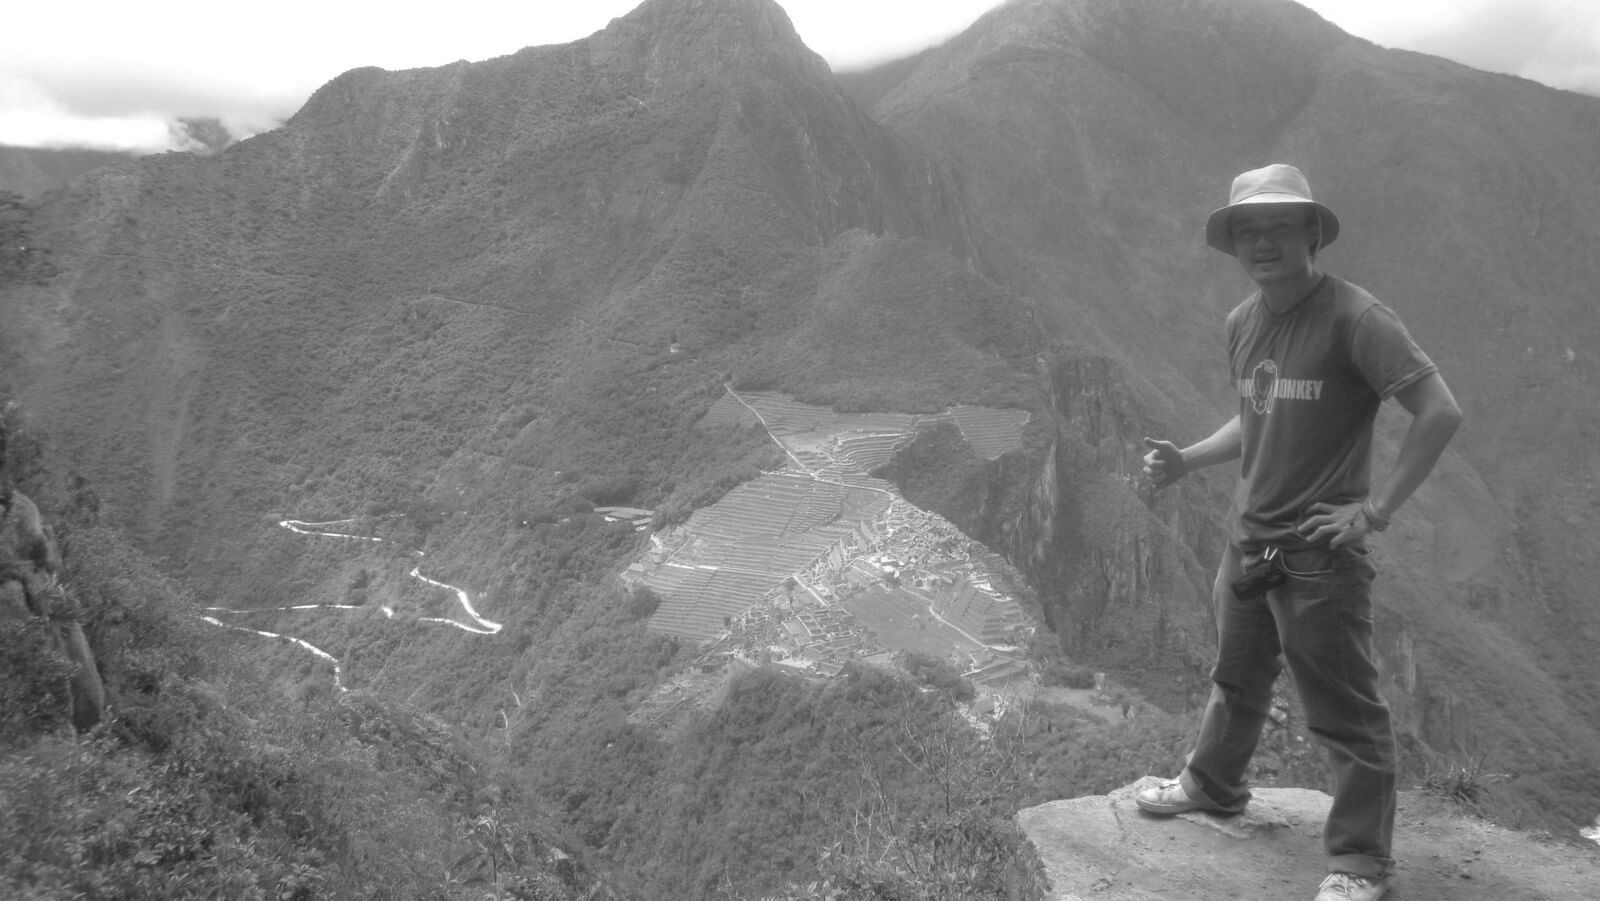
    Note, if you have a fear of heights, you’re probably going to poop your pants up there. It’s so high up that it makes Machu Picchu look like a little Lego castle. There’s no safety railings or anything either. While it’s most likely just another tall tale, a couple of guys in Cusco were telling me that two people went over the edge that year and never came back. While it may not be true, I can easily see it happening. Be careful!

    machu picchu on a budget

    There’s a little side journey on Huayna Picchu which I only know as “the cave”. Everyone kept telling me “Don’t go to the cave, don’t go to the cave.”

    So, I went.

    machu picchu budget guide
    The journey to the cave is full of surprises

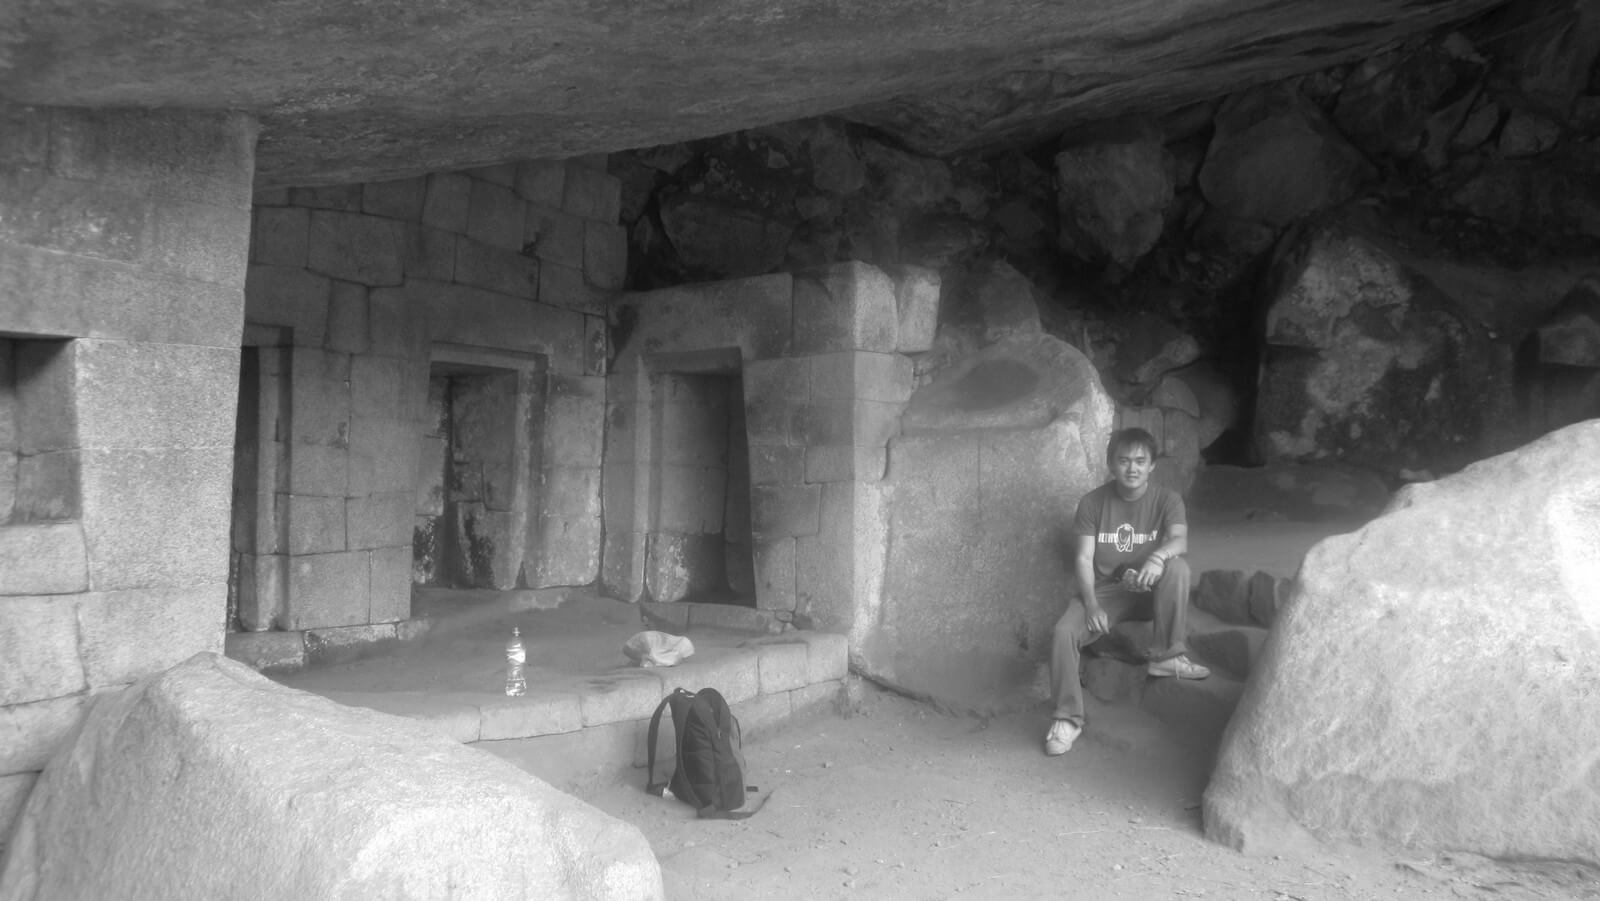
    What a flop. It takes around 2 hours to hike down and around to the other side of the peak to where the ‘cave’ is, and when you get there it really is nothing more than a little cave. Coming to think of it, I’m not sure why I expected anything more than that. Apparently it was some sort of temple or something. Once you see it, there’s nothing to look forward to except the 2 hour hike back.

    machu picchu cave on a budget
    The “cave”

    Your time in Huayna Picchu is limited to 3 or 4 hours, I can’t really remember. Just make sure you get out in time.

    Step 9: Getting back down to Machu Picchu Town

    Once you get back to Machu Picchu and decide to head home, you can either take the bus down for $10 or walk. In my best effort to be the toughest guy ever, I walked. What’s another zillion stairs at the end of the day. A quick tip here is to not buy the $5 waters that they sell at the entrance. Wait 5 minutes until you get out of the park and there will be some local hustlers selling snacks and water for much more reasonable prices.

    It’s a long day; if you hike up, down, walk around Machu Picchu, climb Huayna Picchu, go see the cave, and hike all the way back down, you’ll probably rack up a good 8 hours+ of walking. Reward yourself with a hot shower and then head to an overpriced restaurant to treat yourself to the best crappy $30 pizza you’ll ever have.

    More tips for Machu Picchu on a budget

    • Take sunscreen, a hat, and lots of water. At this altitude you’re pretty close to the sun and he won’t take it easy on you.
    • You don’t need hiking boots. One dude I climbed with was wearing flip flops and survived. I just had a pair of sneakers and didn’t die. The climb is not slippery or hazardous (unless it rains, maybe).
    • Take snacks. It’s a long day and you can’t buy much food up there. If it weren’t for my cookies I might have died on Huayna Picchu.
    • If you haven’t spent too much time in Cusco or at altitude, your body probably won’t be acclimatised. You could get altitude sickness on the climb. You can buy oxygen in Cusco for $10 a can, otherwise, get those anti altitude pills or whatever they are, ask your doc.

    Machu Picchu on a budget in numbers:

    Using the above itinerary your bankroll should look something like this:

    Bus from Cusco to Ollantaytambo: $4

    Train from Ollantaytambo to Machu Picchu town and back: $100

    2 nights at the Supertramp: $20

    Tickets for Machu Picchu and Huayna Picchu: $62

    Bus (or taxi) from Ollantaytambo to Cusco: $4

    Total: ~$200 for a DIY trip to one of the world’s true wonders. Enjoy!

    Heading to Machu Picchu?

    • If you’re looking for affordable accommodation in Machu Picchu Town, I highly recommend the Supertramp.
    • Do not climb Machu Picchu without travel insurance. Accidents are common there, especially with the altitude, and you’re looking at an extremely high bill to get any kind of emergency evac/treatment. I use World Nomads.
    • For more useful resources for your trip, check out my Travel Resources page.
  • City Blueprint: Bangkok, Thailand

    City Blueprint: Bangkok, Thailand

    Bangkok seems like your typical South East Asian city – bad traffic, noisy, dirty, and sunshine so hot that it melts your cheeks. Stalls line the streets of the Sukhumvit area selling anything from frying pans to Viagra and pimped out tuk tuk’s will be offering you rides all over town. Once the sun sets the Thailand you always hear stories about rears its head. Ladyboys and prostitutes tickle your arm as you walk by offering to love you long time and you can hear the madness of the infamous red light districts from a few blocks away. Despite all this, Bangkok has so much more to offer. It’s a world class city with fantastic shopping malls, cheap taxis and probably the best street food you will ever eat in your lifetime.

    Budget

    Bed: Hostel dorms start at $10 USD. A 3-4 star hotel can be found for around $40 USD. Airbnb is also useful.

    Food: You can eat very comfortably at street stalls and local eateries for under $2 a meal.

    Drink: A bottle of water will cost around 50 cents. A beer in a bar will cost you between 80 cents to $4, depending on how classy your joint is.

    Transport: A short ride on the BTS metro will cost you around $1. A 10 minute taxi ride will run you about $5-$7. The local bus will cost around 25 cents.

    I stayed at…

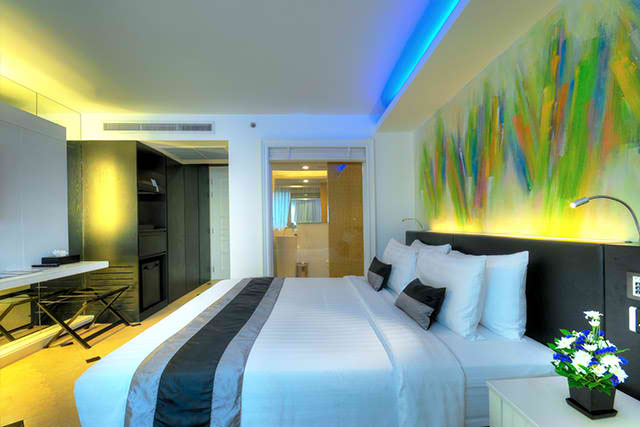
    Skyy Hotel – This is a fairly new hotel in Sukhumvit that is hidden down a side street away from the hustle and bustle of the main road. Once you locate the right road it’s very easy to find and you’ll be pleasantly surprised once you head up to reception. It’s boutique and classy – up to par with some of the 4 star hotels I’ve stayed in. I went in February and after some simple niceties with the guy at reception he upgraded me to an Executive room. Set me back around $50 a night – not cheap but worth it!

    Hotel Entrance
    Executive room
    Executive room

    If Skyy Hotel doesn’t seem like your thing, I’d recommend staying in the Sukhumvit area. It’s well set up to receive tourists, and taxis are cheap enough to take you anywhere in the city.

    For a more thorough guide on where to stay in Bangkok, check out my Bangkok Accommodation Guide.

    One thing you should eat is…

    Sheesh…it’s so hard to choose just one thing…Thailand has some of the best food in the world!

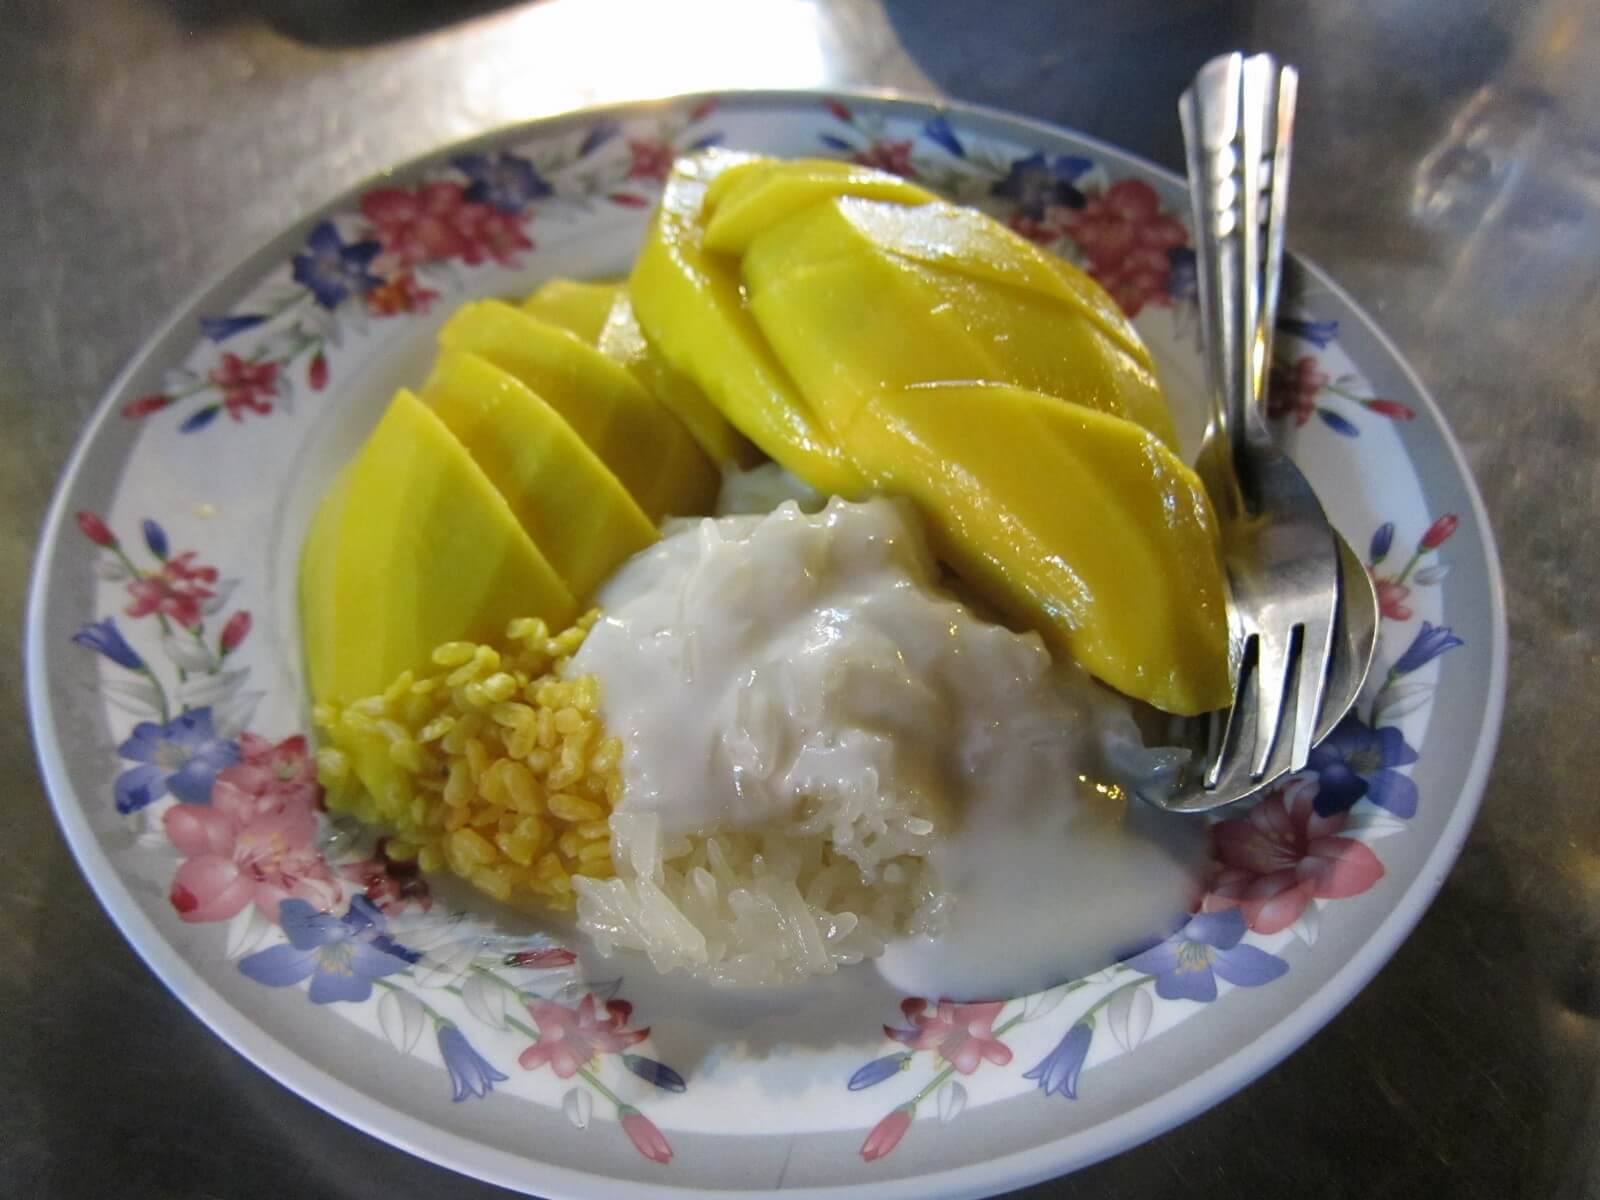
    However, if I were to choose the first thing that comes to mind it’s the mango sticky rice. You’ll be able to find this place in most street food joints in the city, and what makes it so good is the incredible Thai mangos. In this tropical weather they grow them softer and sweeter than ever.

    Soi 38 is a good place to grab this!
    Mango Sticky Rice
    Mango Sticky Rice

    One thing you should drink is…

    Tom Yum Goong – I had the pleasure of trying various Tom Yum soups in Bangkok, although I seem to have forgotten to snap a photo of any of them! Don’t worry, it’s sold all over town and I’m sure you already know what they look like anyway.
    But here’s what I loved about the Tom Yum in Bangkok: I had just eaten a Pad Thai and was kinda half full, with enough breathing room in my guts for maybe something small just to top it all off. My first thought – a bowl of Tom Yum would be perfect! So I call the girl over and order it, and for $2 or so was thinking it’s a pretty good price for the small $12 bowl I’m used to getting at home.

    Sixty seconds later I look over and the darling waitress is struggling to haul this enormous bucket of Tom Yum over from the kitchen. I stare in horror at the overflowing moat of volcanic Tom Yum in front of me, with small flashes of guilt for all the world’s starving children. Once that passes I spend the next hour wading my lips through my personal Tom Yum ocean, the potent mix of Thai chili and Bangkok’s 35 degree heat unleashing a sweat tsunami to pour down my face. The waitress asks if everything’s OK, probably assuming I’m dying, to which I smile and soldier on through the litres of soup that remain. Hands down, the best Tom Yum ever.

    One place you should go to is…

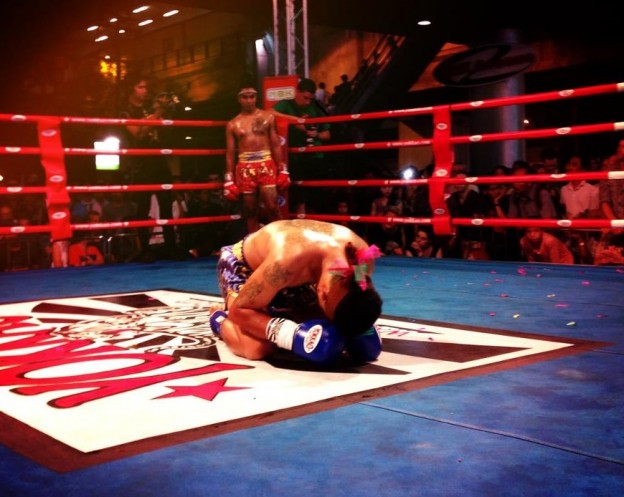
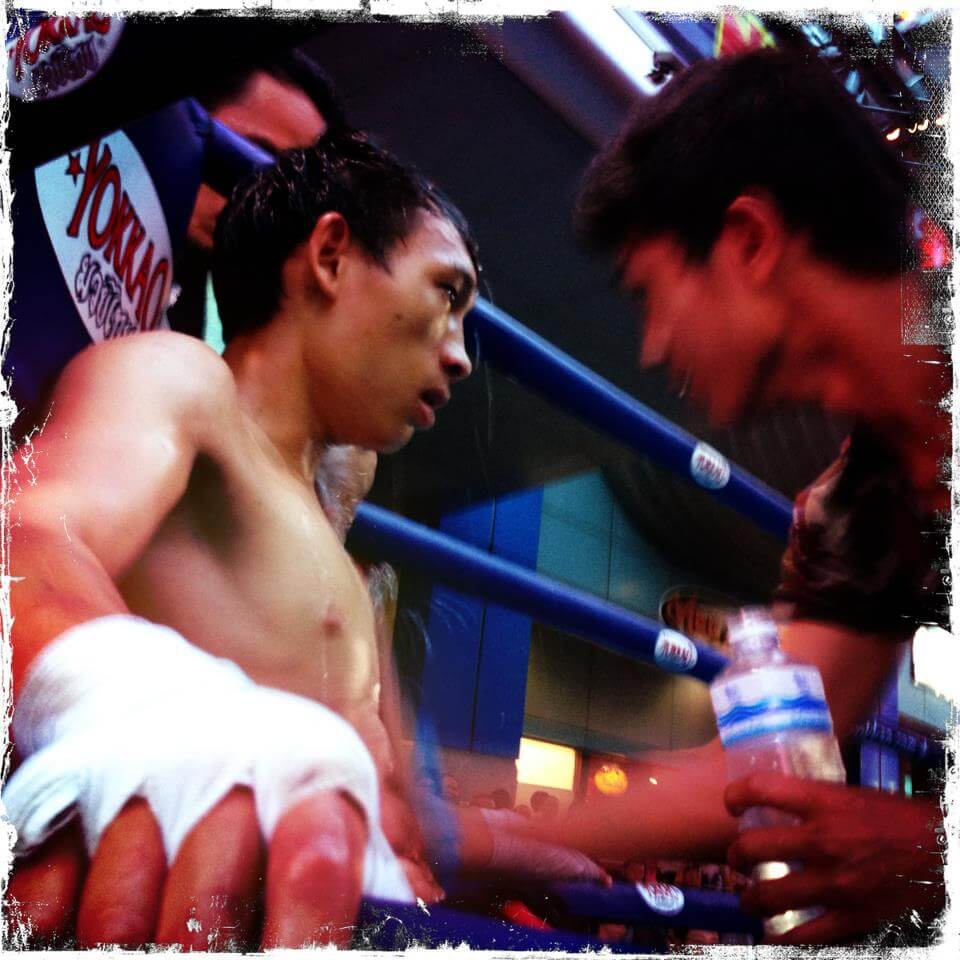
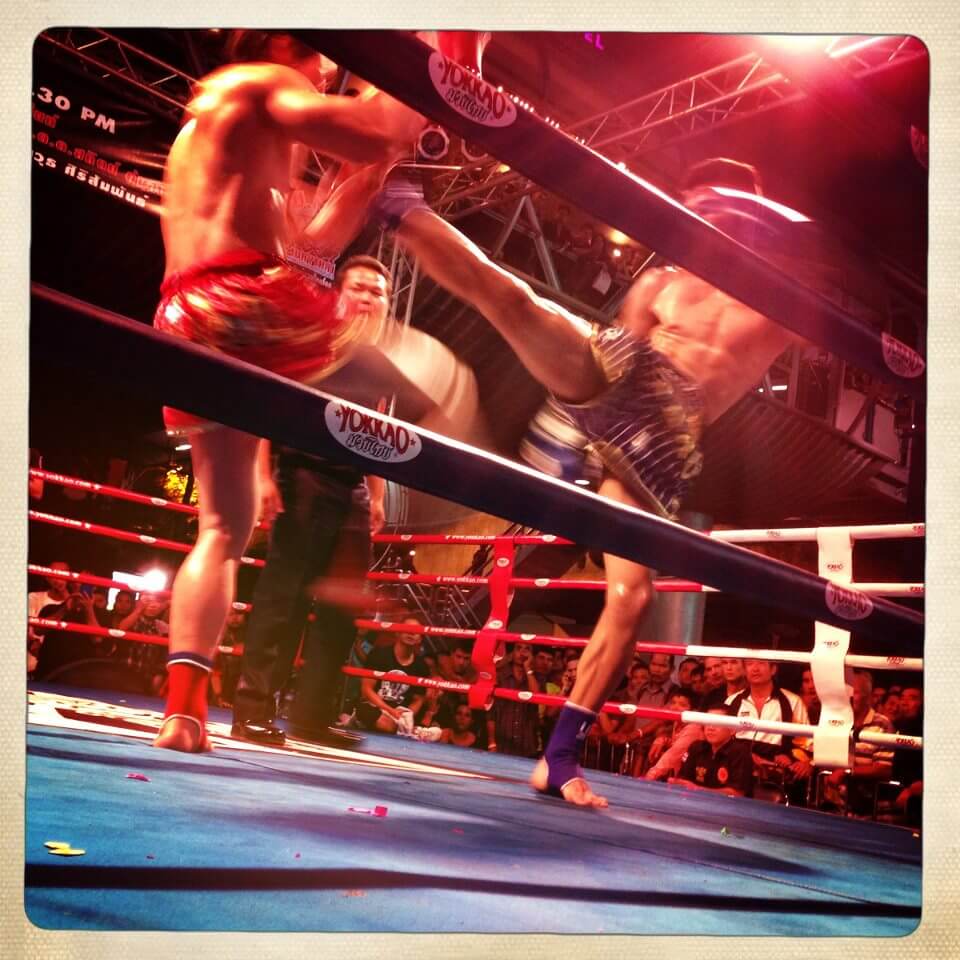
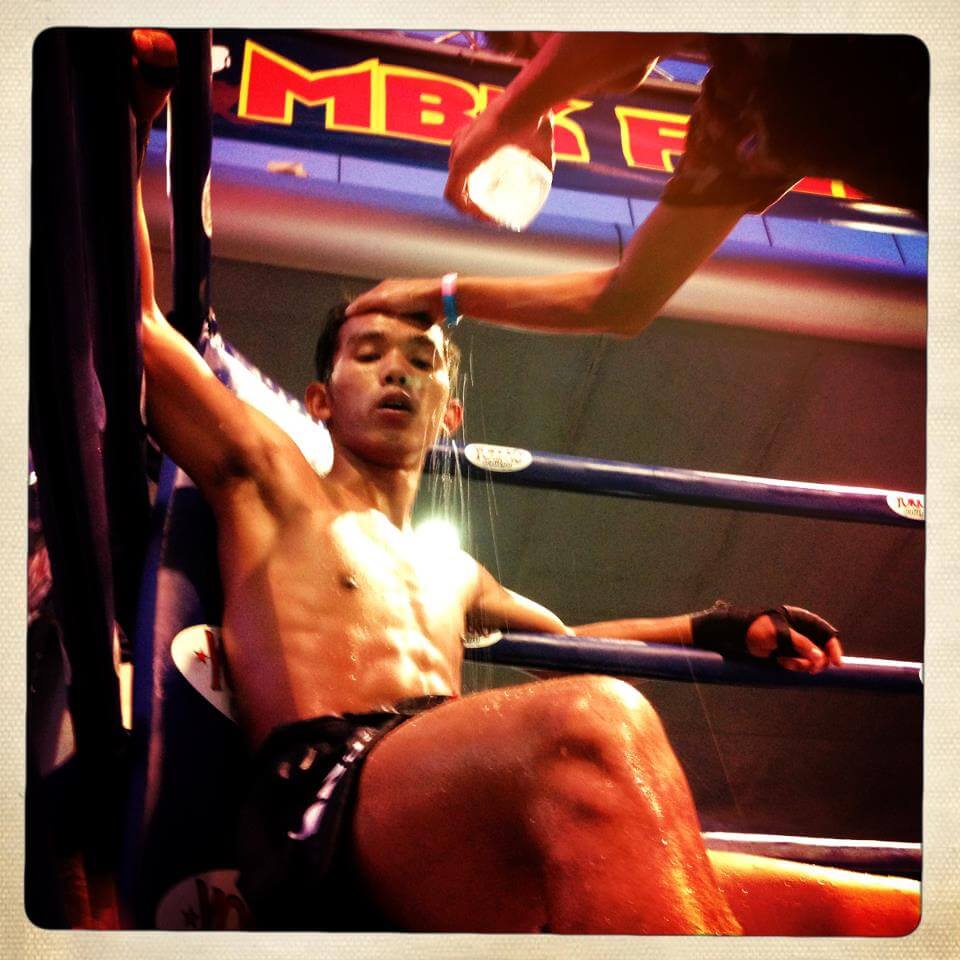
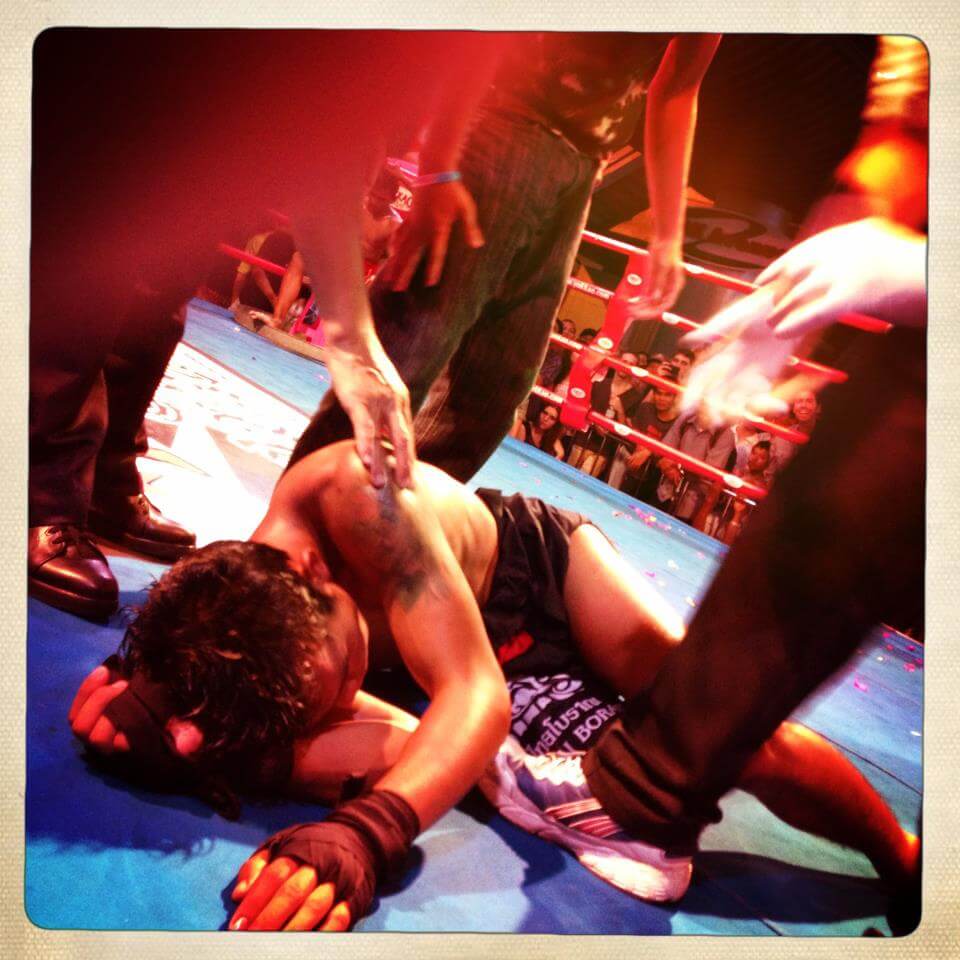
    A Muay Thai fight. I went to MBK Fight Night at MBK Mall. This is a fight night that’s on every Wednesday at 6pm. Get there early if you want a seat!

    If you’re lucky you’ll also get to see a few fights of Muay Kard Check – this is bareknuckle fighting and might have been the gnarliest thing I’ve ever seen. A Cambodian and Thai jumped in the ring with nothing but a few bandages wrapped around their fists. I’ll never forget the echo of the Thai’s knuckles crashing into the poor Cambodian kid’s jaw.

    To get there, get off at National Stadium Station on the BTS metro. From there it’s no more than a 5 minute walk.

    My buddy Vincent managed to charm us into the VIP area, where he jumped up on the canvas and took some incredible snaps.

    Pep talk
    Pep talk
    No mercy
    No mercy
    Survival of the fittest
    Survival of the fittest
    KO
    KO

    Photo credits: Vincent Pastore

    One place you should party at is…

    RCA. This an area with a more local vibe, where you’ll miss a lot of the backpacker crowd. Every taxi driver will know where it is. We went to club Route 66, which was quite impressive.

    The tourist crowd generally congregates at Khao San Road, which can be a bit of a zoo. I suppose you need to go there at least once. Watch out for the guy who does some pretty amazing magic tricks – he’ll tell you how he does it if you pay him a few dollars!

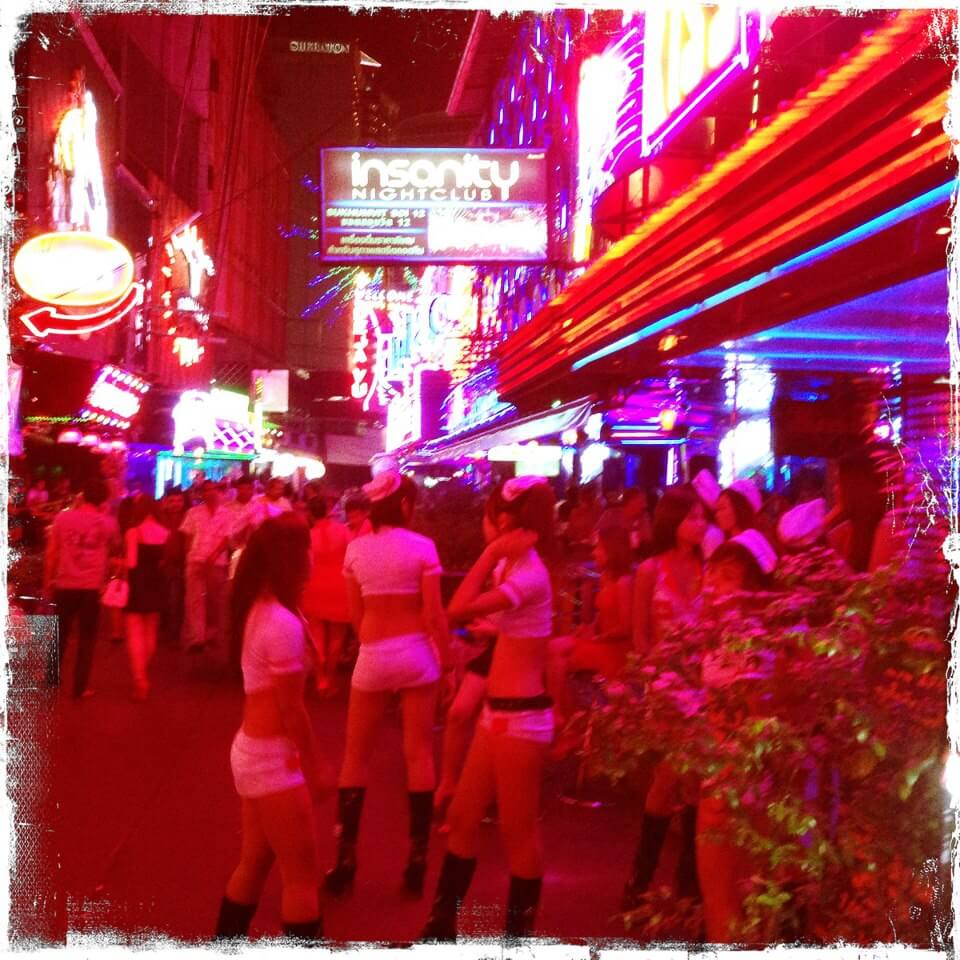
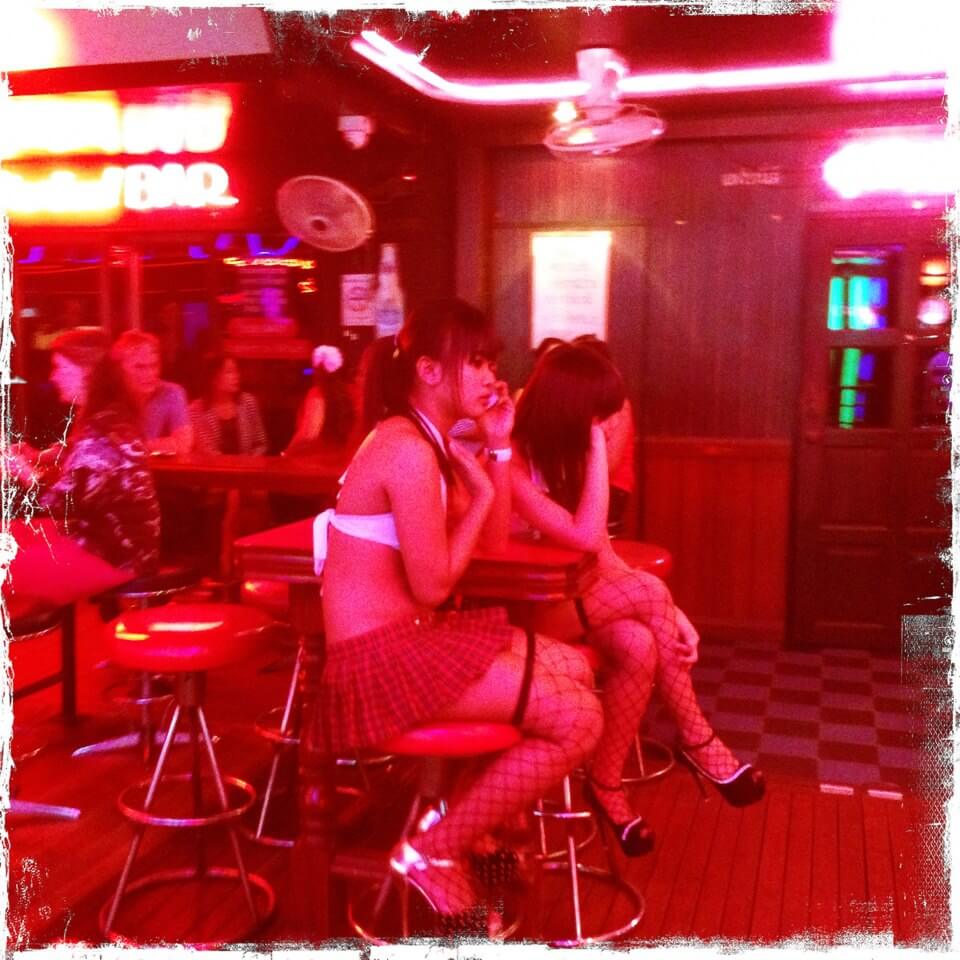
    Also, you also cannot leave Bangkok without visiting Soi Cowboy. This is a red light district, but it’s a tourist attraction all in itself. Legend has it that an American “cowboy” opened the first bars along here back in the 70’s, which is how the place got it’s name. Today the little street has evolved into a hectic, colourful, festival like atmosphere, packed with tourists from all over the world. You’ll see as many old women following their lonely planet guides here as you will old men following their junior self. Thailand is infamous for sex tourism, and along Soi Cowboy sits one of the most famous red light streets in the world. It’s crazy, depressing and interesting all at the same time. Walk through it once and you’ll never be the same again.

    Gogo girls loiter outside to lure in customers
    Gogo girls loiter outside to lure in customers
    Inside the bars girls solicit "lady drinks" and offer a night of company
    Inside the bars girls solicit “lady drinks” and offer a night of company

    Photo credits: Vincent Pastore

    Bren’s Scorecard…

    Ease of entry 9/10
    Bangkok airport is one of the best in the world. Direct flights from everywhere!

    Food 10/10
    Cheap, fresh, delicious, healthy! Not only is the local food amazing, the city has all your western favourites on offer, too.

    Weather 4/10
    Far too hot to walk around comfortably in the day. You’ll be showering and doing laundry a little more than usual…

    Safety 7/10
    Not always the ‘city of smiles’. Scamming is common and I’ve heard my fair share of corrupt police stories. Violent crime appears less likely.

    Transport 8/10
    The BTS (train/metro) is cheap and efficient. Taxis are cheap (although they might drive you around the block a bit).

    Friendliness 7/10
    Most locals are friendly. Of course you’ll meet a few unsavoury characters, particularly during the night.

    Cleanliness 7/10
    Quite a few parts are surprisingly clean, actually.

    Daylife 8/10
    GREAT shopping, lots of places to eat, and a whole ton of cultural stuff too..

    Nightlife 7/10
    A little bit of everything, although prostitution is widespread.

    Affordability 9/10
    For such a great city, it’s incredibly cheap. Will suit a traveler on any budget.

    Bangkok scores: 76/100

    I do my best to give an objective score based on my own experience of the city. If you disagree, I don’t care! Just kidding, I do 🙂 Did your experience differ to mine? Let me know in the comments below!

  • City Blueprint: Cusco, Peru

    City Blueprint: Cusco, Peru

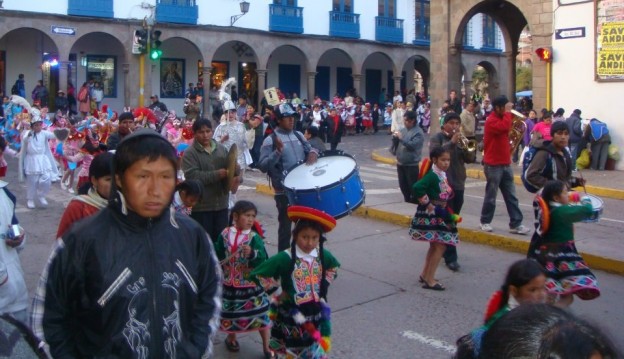
    Cusco is a cozy little city in the south of Peru. At first glance it feels like just another tourist hotspot overwhelmed by westerners but beneath the surface there’s a little more to it. The city has a very homely feel and its narrow alleyways and cobblestone roads give it a unique South American charm that’s not quite as prevalent in the neighbouring countries such as Chile or Ecuador.

    The welcoming spirit makes the culture and people of this city rather endearing and I was somewhat enamored with the place by the time I left. You can definitely feel the western influence that has crept in but getting under the skin of the city reveals a lively latin culture that you will surely find intoxicating.

    Budget

    Bed: Hostel dorms start at around $5 USD. Hotels range from $30 up to the extravagant.

    Food: Eating in the local joints will have you well fed for around $2 a meal.

    Drink: A bottle of water will cost around 75 cents. A beer in a bar will cost you around $2.

    Transport: Taxi rides will be around 3 soles ($1). You shouldn’t pay anymore than 5 soles ($1.75) to get anywhere in the city.

    I stayed at…

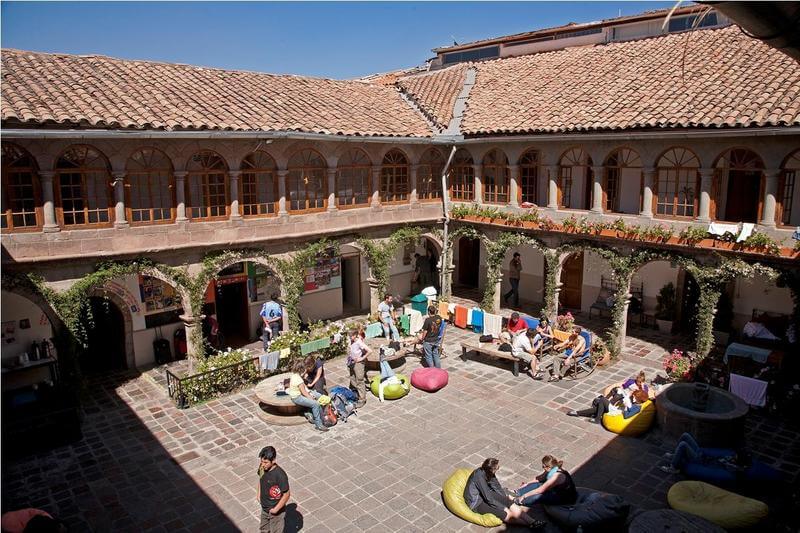
    Pariwana Hostel I spent about 2 weeks staying here, and in terms of value for money it’s easily the best hostel I’ve ever stayed at. Here’s why:

    • The cheapest dorm bed will cost you around $8 a night. That includes bread, jam and juice for breakfast. You get 2 pillows and the bed was more comfortable than my own bed at home.
    • There’s free wifi and around half a dozen computers that are free to use, as well as a TV room.
    • There’s a restaurant and bar in-house that serves great food for around $5 a meal – breakfast, lunch and dinner.
    • Free tea and coffee all day.
    • Dorms have massive lockers with power plugs inside.
    • 5 minute walk from the central plaza and 24 hour security.
    • Awesome hot showers and clean toilets.
    • Tour desk, activities each night and a kitchen.
    • Free bag storage while you go to Machu Picchu.
    • English speaking staff who know exactly what they’re doing.
    • Noise free zones around the dorms at night.

    What more can you ask for?

    For more information on where to stay in Cusco, check out my Cusco Accommodation Guide.

    Pariwana Hostel courtyard. Photo credits: Hostelworld
    Pariwana Hostel courtyard. Photo credits: Hostelworld

    One thing you should eat is…

    Lomo Saltado – This is a Chinese inspired dish, most likely invented by the Chinese immigrants that scrambled the motherland and ended up in Peru looking for work. It’s a kind of like a Latin chop suey – beef, veges and potatoes stir fried in Asian flavours and served with white rice. While I was in Cuzco this was my go-to dish for whenever I needed a hearty meal. Look for it in one of the “chaufa” restaurants around town, which are basically Chinese restaurants with a Peruvian twist.

    Pisco Sour – Chileans and Peruvians argue all the time about who invented this zingy cocktail. It’s made using Pisco – a type of brandy that’s native to Peru (and Chile, apparently). The other ingredients consist of a bit of lime or lemon juice, some bitters, and a drop of egg white, which I suppose gives it the frothy topping. I’m a huge fan of lemon, lime and bitters, so this drink quickly became one of my favourites. Peruvians love this drink too, almost as much as their Inka Cola. There’s even a public holiday dedicated to it!

    One place you should go to is…

    While the obvious tourist hotspots around town are well known, quite a few people miss out on the Molino market. It’s really not too different from street other markets around the world, but it’s a great place to do some cheap shopping. The vendors are far more pleasant to deal with than China’s “This scarf very special material will only cost you five thousand dollar!” types. I bought my fair share of stuff here – locks, dress shoes, jacket, movies, booze, toys. All at great prices too. To get there, simply tell the taxi driver you want to go to Molino. They all know where it is and it’s only a 5 minute drive from the centre. Great place to pick up souvenirs, too.

    One place you should party at is…

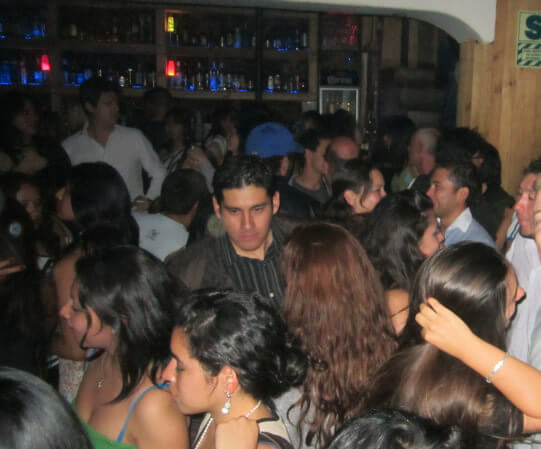
    Plaza de Armas! In all honesty, almost all the clubs around here are the same. If you head to the Plaza at night there will be promoters from each of the different clubs wandering around offering free drink tickets (sometimes they’re around during the day, too). Once you’ve finished your drink, you can head outside and get another one! Backpackers love this town because you can go out every night of the week and not spend a single cent. It’s not hard to see where it gets it’s reputation as the booziest town in all of South America.

    Inka Team

    Bren’s Scorecard…

    Ease of entry 5/10
    It has it’s own airport, but most flights come in via Lima. The bus is horrible by most accounts. Only direct flight I know of is from La Paz, Bolivia.

    Food 6/10
    Local food is very different, and lot’s of good western options around too. However not a whole lot of variety.

    Weather 5/10
    As long as you avoid the rainy season, it’s not too bad. However at this altitude it can get pretty chilly at night, and if your body doesn’t like the altitude you won’t be feeling too great for the first few days.

    Safety 9/10
    It’s a very welcoming city, with good tourist infrastructure and a heavy police presence. I used to walk around alone after midnight and never felt in danger.

    Transport 8/10
    Taxis are very cheap (around $1 anywhere in town).

    Friendliness 8/10
    A couple of taxi drivers tried hustling me here. However most people are very pleasant, and street sellers are generally good at respecting your space.

    Cleanliness 8/10
    In the main tourist spots it’s pretty much spotless.

    Daylife 5/10
    There’s a few adventure spots in the surrounding areas, but the city is small and doesn’t offer much (if you’re into ruins, there’s quite a bit of that).

    Nightlife 7/10
    Always lively, but lacks variety.

    Affordability 9/10
    Outside of the heavy tourist spots, it’s so cheap! A decent 3 course meal gets as cheap as $1.50.

    Cuzco scores: 70/100

    I do my best to give an objective score based on my own experience of the city. If you disagree, I don’t care! Just kidding, I do 🙂 Did your experience differ to mine? Let me know in the comments below!

  • City Blueprint: Shanghai, China

    City Blueprint: Shanghai, China

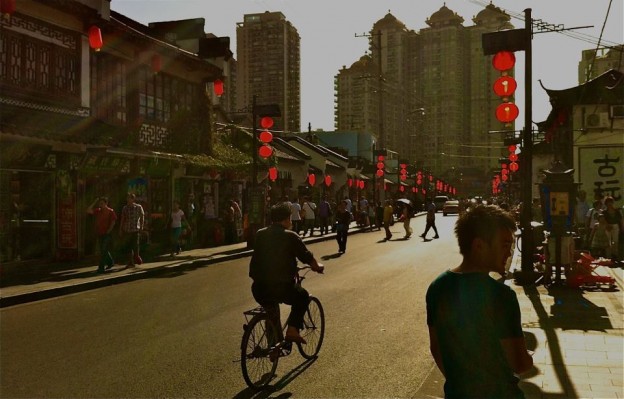
    Shanghai feels like the centre of the universe these days. There are students and professionals from literally every corner of the world, a new skyscraper seems to go up every hour and the city blows up every weekend with too many events, parties and festivals to count. The city has undergone a complete transformation in the last 20 years and now ranks as the world’s most populous city, has the world’s biggest container port, owns the world’s longest shopping street, has more skyscrapers than any other city and is one of the fastest growing financial centres in the world. Add onto that a raging nightlife the diverse population I’ve ever seen and you have a global city in every sense of the word.

    Put simply, everything is happening here.

    Budget

    Bed: Hostel dorms start at around $5 USD. Hotels range from $30 up to the extravagant.

    Food: Eat street food for $1, eat in local tea-houses for $2 or indulge in a few Western meals for $5-10+.

    Drink: A bottle of water will cost around 40 cents. A beer in a bar can cost anywhere from $2-$10.

    Transport: Taxi rides will be around $10 for a 20 minute trip around town. You can get anywhere in the city on the local metro for $1, and buses will cost you around 30 cents.

    I stayed at…

    The dorms in my university! I was actually in Shanghai on a Chinese government scholarship, which brings people from around the world to China to learn the language. These scholarships fund you to live and study in China for an entire year – if you’re interested, I have a thorough post on how to apply for these scholarships here.

    However when my parents visited they stayed at Citadines Apartment Hotel on West Beijing Road. Their facilities seemed pretty good at it was in a great central location, with easy access to most parts of Shanghai. Problem is, it’s around $100 a night.

    The hotel industry in Shanghai is very competitive and you should be able to find 4 star hotels for around $50 a night. At the end of the semester I had to leave my dorms but my flight out of the country wasn’t until a few days later. I found a great hotel to stay at on Agoda, equipped with gym and minibar and all, I just forgot the name. Doh! The point is, Agoda will have many great deals and finding an affordable, private room should not be a challenge. Click here to check it out.

    One thing you should eat is…

    There’s a lot to try in Shanghai, on a good day, it might even rival the street food in Bangkok, Penang and Singapore.

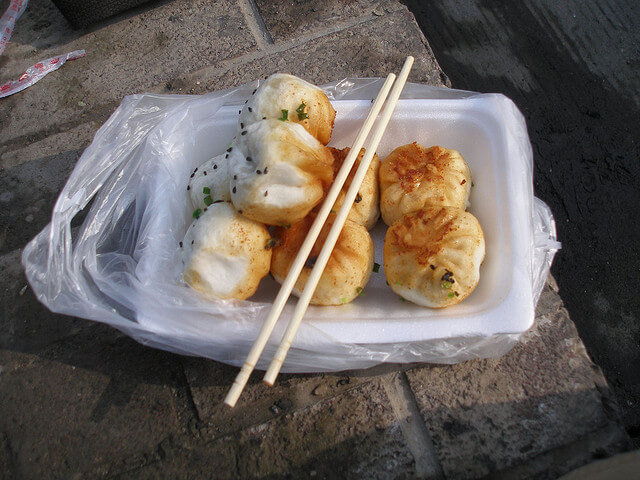
    I’ve spent a long time thinking about this one but I’ll go with the pan fried pork buns, since they’re native to the Shanghai region and I’ve never seen them anywhere else!

    Shengjianbao
    Shengjianbao in Shanghai. Photo credit: Gary Soup @ Flickr

    The Chinese name for these is “sheng jian bao”, a common breakfast item particularly popular in Shanghai. The bun is pan fried so the dough is crispy on the outside, with a soupy pork filling on the inside and a sprinkling of sesame seeds and spring onions to top it off. Splash it with soy sauce and vinegar before you indulge. You’ll love it!

    A serving of 4 will cost you around $1, and you’ll be able to find them in First Food Mall or in popular street food areas.

    One thing you should drink is…

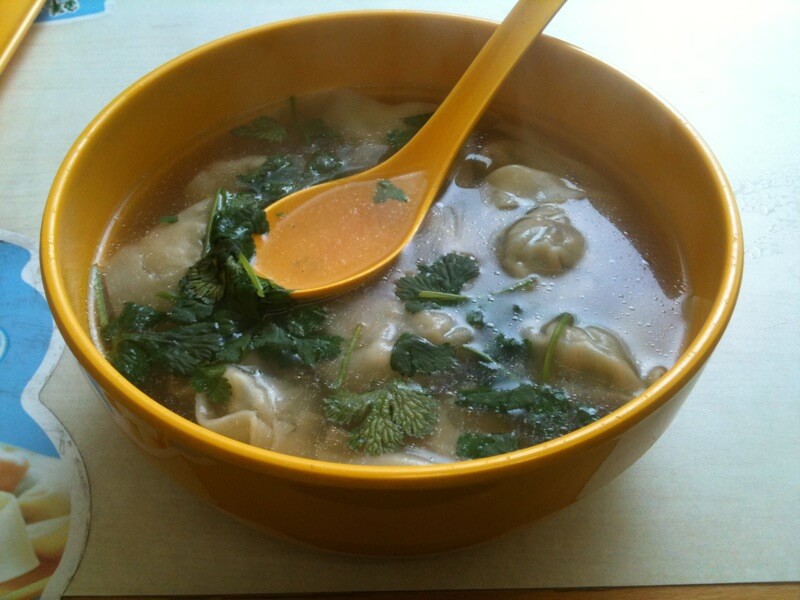
    I can’t think of anything to put here, so I’m going to just put my favourite go-to breakfast, won ton soup! There’s a franchise here called Gil Wonton, that has the fattest, tastiest, MSG overloaded wontons in all of China. Will cost you around $2 a bowl and will definitely leave you smiling. Breakfast of champions (and poor students).

    Gil Wonton, Shanghai
    Gil Wonton

    One place you should go to is…

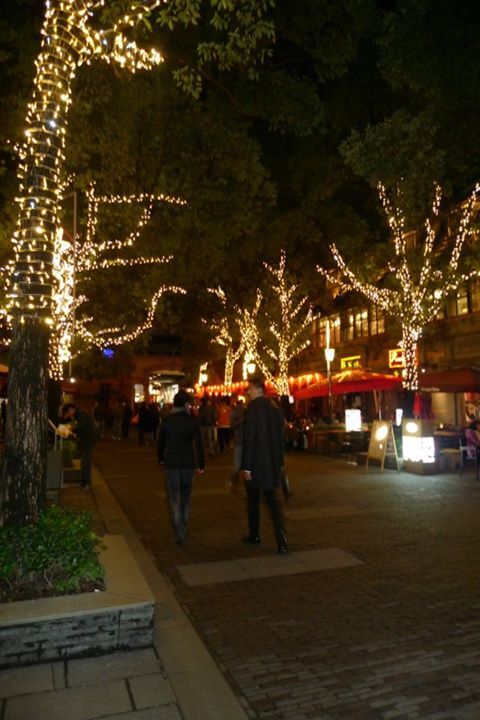
    Xintiandi – This is a very chic and modern dining and entertainment area in central Shanghai, often heavily populated by the expat community. I like it because it’s never overcrowded (as it can be quite expensive), and it’s littered with boutique restaurants and bars serving all kinds of international cuisine. I find its narrow alleyways and paved walking streets give it a lot more character than some of the other expat hangouts around the city. You can spend a day here shopping in the extravagant Xintiandi mall, indulge in a cafe dinner, then lay back in a coffee shop and people watch until sundown. After that head over to Brown Sugar for a cocktail and end the night at one of the area’s disgustingly crowded nightclubs.

    Xintiandi, Shanghai
    Xintiandi at night

    Another quick tip – Before you get into town, check out Smart Shanghai for any upcoming events. There’s always something happening in this city.

    One place you should party at is…

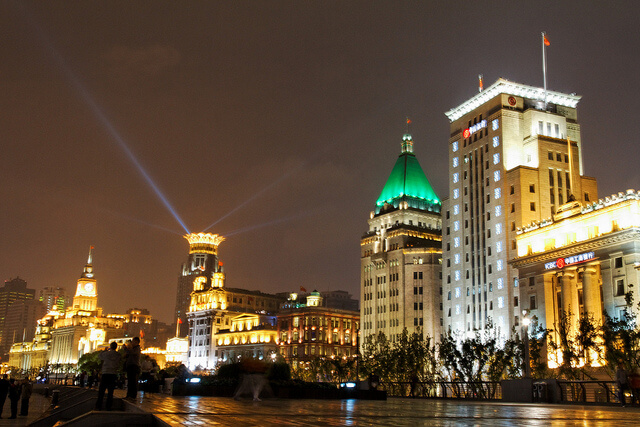
    The Bund – Shanghai’s famous Bund has a collection of popular nightclubs all within walking distance. Many of them draw a pretentious crowd, most notably Bar Rouge and the flamboyant M1NT, however you can enjoy a slightly toned down atmosphere at the neighbouring Muse on the Bund or Cuvvae. Add to that a dozen or so other clubs along this strip and you can have quite a fun (and expensive) night out here.

    M1NT, supposedly Shanghai’s greatest club, has a guest list that you’ll need to be on if you want to avoid waiting in line (even when the club is empty). Luckily it’s not a real guest list, it’s just for show. To get your name on it all you need to do is call them (you can even do it while you’re standing outside the club) and let them know you and your posse are coming. Then enjoy feeling important as they tick your name off and welcome you onto their red carpet. Pretty good marketing I must say.

    I generally try to stay away from this kind of snobbery, but in Shanghai it’s all part of the fun! And admittedly M1NT is actually quite impressive once you get inside.

    Shanghai Nightlife the bund
    The Bund at night. Photo credit: KimonBerlin @ Flickr

    Bren’s Scorecard…

    Ease of entry 3/10
    Airport is great, but the process for getting a visa is long and stupid.

    Food 8/10
    You can literally find anything you want here. However, fake alcohol is a problem and some local joints serve up questionable food (hmm, is this really chicken?).

    Weather 5/10
    To be blunt, Shanghai’s weather sucks. Painfully hot and humid in summer, sub zero nights throughout the winter, BUT there’s a few months in between these extremes that can be pleasant.

    Safety 9/10
    Amazingly safe for such an enormous city. Scams can be a problem though.

    Transport 10/10
    Taxis are very affordable, and the metro might be the best in the world. Rush hour not as bad as you would think.

    Friendliness 5/10
    It’s a mixed bag. Blatantly ripping people off is a problem.

    Cleanliness 6/10
    Air pollution is a huge problem, and at times schools are closed to keep the kids indoors. Other than that the streets are kept pretty clean.

    Daylife 8/10
    Great place to shop, eat and explore.

    Nightlife 10/10
    Out of control every single night of the week.

    Affordability 9/10
    Many cities of this calibre would bleed your pockets dry. Surprisingly you can get by here on $20-$30 a day pretty comfortably. Obviously if you want to splurge there’s plenty of opportunities for that, too.

    Shanghai scores: 73/100

    I do my best to give an objective score based on my own experience of the city. If you disagree, I don’t care! Just kidding, I do 🙂 Did your experience differ to mine? Let me know in the comments below!

  • 17 Tips For First Timers In Africa

    17 Tips For First Timers In Africa

    Travelling to Africa for the first time can freak people out. All we seem to know about the place is that it’s a land full of war, disease, poverty and starving children.

    But that’s not really true.

    Africa is a beautiful continent, full of fast developing nations and incredibly rich in culture and diversity. If it’s soon going to be your first time in Africa, it doesn’t matter whether you’re going on safari in Kenya, doing a road trip through Namibia, exploring Tanzania, visiting the winding alleys of Morocco, or photo bombing the great pyramids of Egypt; it’s surely going to be like no other place you’ve been on earth.

    With that in mind, here’s a few things you’ll need to know before you take that first trip into the motherland.

    1. Get travel insurance!

    After almost a decade of full time travel I can tell you my #1 travel tip is this: Never (ever ever ever ever ever) travel without travel insurance!

    And that advice is x100 when travelling through Africa, especially if it’s your first time!

    Travel insurance usually will cost you between $2 and $5 a day but will literally save you tens of thousands or even hundreds of thousands of dollars in the event of an accident, and possibly even save your life.

    If you can’t afford travel insurance, you can’t afford to travel. Put your plans on hold and save for a few more months until you can.

    What happens when you buy travel insurance?

    If your bus crashes and you break a leg, break some ribs, go into a coma, or are going to die, your travel insurance will get you the highest quality care or evacuate you to somewhere that can provide it. If you die, they’ll get the body home for your family. If you’re riding a bike and you smash into someone’s expensive car, they’ll pay for it. If your bag gets lost, you’ll get a few thousand dollars to buy clothes and shoes and toiletries. If you get malaria or dengue and need to spend a week in hospital, it won’t cost you $50,000 like it costs other uninsured (and stupid) travellers. It will cost you nothing.

    Travel insurance is the first thing you should buy before you even book your air ticket or hotel. That way, your trip is covered if you need to cancel! (It’s not covered if you need to cancel and then decide to buy insurance after).

    If you’re looking for a travel insurance provider, I have been using SafetyWing for many years and still use them today. SafetyWing is a travel medical insurance designed specifically for nomads, and for a modest monthly payment you can stay insured while you travel, no matter how long you’re on the road. As a travel blogger who is constantly on the road for up to a year at a time, it’s perfect for me.

    However, you can also buy travel insurance for specific travel periods, so they’re also great for short-term travels and your standard vacations too.

    Their Nomad Insurance Essential Plan gives you full medical cover (up to $250k), you can upgrade to the Complete Plan for $1.5m medical cover and full travel cover to include things like lost luggage and trip cancellations (well worth it in Africa!). They cover 180 countries, so you’re well covered on the continent and you can even buy your policy in the middle of the your trip. You can get a free quote on a policy here!

    I also have a guide explaining everything you need to know about travel insurance, which I highly recommend you read. Click here to open the guide in a new tab.

    Sunrise in Namibia

    2. Take new US Dollar Bills

    USD is widely accepted in Africa, and for many visas you are required to pay in USD. Therefore it’s a good idea to carry a good stack of fifties on you for whenever the need arises. Some countries like Liberia and Zimbabwe actually use the USD for daily business.

    Make sure you take large bills no older than Series 2009 and even newer if possible. On my first trip to Africa I took several bills older than this, and also some $5 and $1 bills, only to find out most money changers and tour operators won’t accept them. The only chance you’ll have to get rid of these bills is souvenir sellers on the streets.

    Also, to avoid carrying large amounts of cash try and use the ATM’s where possible – they’re widespread and accept credit cards and Plus cards. This will save you the anxiety of carrying large bundles of cash in your pockets.

    ATM withdrawals are safe and easy if you have a card designed for travel. For all my travels, I use an N26 card.

    3. Take an unlocked smartphone

    The first time I went to Africa I just took a very old brick phone, but times have changed a lot since then!

    Cellphone carriers are now surprisingly good. 4G is now available in most places and cheap – you might only pay $10 or so for unlimited data for a month.

    Some people think Africa is so backward that people are still sending letters by pidgeon, but those people have been fooled. The “Nokia revolution” has totally transformed Africa, and in many ways they’re ahead of the western world in this regard. Even farmers living in small huts way out in the villages have cellphones and even do business over Whatsapp and receive payments in mobile money.

    Make sure you take an unlocked Android or iPhone, and buy a sim when you arrive. Basically every country on the continent has a decent cell and data network and it’s affordable. Your phone must be unlocked to use it. Alternatively, you could always just buy a cheap Huawei cellphone when you arrive.

    Village life, Tanzania

    4. Malaria Awareness

    Malaria is no joke – it’s a big problem in Africa and millions die from it every year. However, don’t let the fear of this ruin your trip. Malaria is easy to prevent and with the proper precautions you’ll be fine.

    Malarone and Doxycycline are the two most common anti malarials. Malarone is the more expensive option (around $7 a pill), but has the least side effects.

    Also, since a malaria treatment was developed in 2015, it’s a less serious issue than it used to be. However, that doesn’t mean you want to catch it!

    Thankfully, malaria is not easy to catch, it’s a specific species of mosquito that carries it and it struggles to live at altitudes above 1,500m. That means in places like Addis Ababa and Nairobi you can relax a little, however seaside towns like Zanzibar and Mombasa require extra vigilance. The obvious prevention method here is to use insect repellent whenever outdoors at night, in the bush, or wherever mosquitoes might be found. If you don’t get bitten, you’re safe!

    5. Take Sunscreen

    This can be hard to find in some African countries, simply because the local population have no need for it.

    When you do find it, it’ll be expensive and you’ll be lucky to find your favourite brand. Take your own from home.

    Sahara desert, Morocco

    6. Protect yourself from Traveler’s Diarrhea!

    This is one of my best Africa travel tips. While food hygiene is actually quite good in Africa, and there is a very strong culture around washing hands and washing dishes and washing vegetables very thoroughly, traveler’s diarrhea still happens.

    The thing that lets them down is the potability of their water supplies.

    Most tap water in Africa is not safely drinkable for westerners. However, luckily there is a way for you to protect yourself against unsafe water and stomach problems in general. I’ve travelled to some of the most undeveloped countries in the world and haven’t had traveler’s diarrhea for years.

    What’s the secret?

    Probiotics.

    Probiotics are the gut flora in your digestive system that help build your immune system and break down any nasties in your stomach. Studies have shown that superloading with probiotics and taking them regularly during a trip greatly decreases the risk of traveller’s diarrhea, and is also excellent for your health in general. My favourite probiotic to take is this one, which has 50 billion cultures per tablet and works amazingly.

    I have a full blog post on preventing traveller’s diarrhea which is mandatory reading for anyone visiting Africa for the first (and second and third) time. You can click here to go there now.

    Street food, Mombasa

    7. Always dress down!

    Remember that poverty is still a big problem in Africa, and you’ll come across many people who struggle day to day, including an abundance of homeless people and street kids.

    While they don’t present any danger in most cases, it helps to not flaunt your expensive things and draw attention to yourself. Assuming your face is not African, you’re already going to draw attention in rural places and often in cities too, so try and stay as low key as possible. This means not wearing shiny watches, rings, bracelets, earrings, necklaces. Use cheap sunglasses, shoes and backpacks. This advice also applies to a lot of Southeast Asia and Latin America too.

    Another thing you should be mindful of is the culture. While short shorts and low cut blouses and tank tops might be normal to wear back home, they’re not in most of Africa. That means easy on the bling and no flashy clothes. For the ladies, try and stay covered up as best as possible.

    Rural life, Ethiopia

    8. Take a torch, powerbank, and headlamp

    Powercuts are widespread and frequent in Africa, especially smaller African cities, and many areas don’t have electricity. While the torch on your phone is usually sufficient, I’d highly recommend taking a headlamp, especially if you’re going hiking, camping, on safari, or visiting rural areas. Trust me, you’ll thank me later!

    I use this headlamp and highly recommend it.

    Also, take a good powerbank. I use this one and it has saved my butt on many occassions!

    9. Don’t take white clothing!

    One thing you’ll notice about many African cities is not all the roads and footpaths are paved. The sidewalks are often dirt or gravel and this leads to a lot of dust and dirt in the air.

    For this reason, I always avoid taking white clothes, especially socks! They get brown very quickly, and in some places you will end up hand-washing them as washing machines are rare outside the big cities. On my first trip to Africa I took a lot of white t-shirts and socks, and they were all brown and beige by the time I got home.

    Also, take a pair of sunglasses for when you’re wandering around. Your eyes will thank you.

    Rural Uganda

    10. Don’t take photos of locals without permission

    You’re going to come across some amazing photo opportunities of local people doing things you’ve never seen before. While your first inclination may be to pull out the camera and snap, try to refrain from doing so as local people will often take offense at you taking photos of them.

    In fact, many people will approach you and ask you for money if they catch you.

    You can use your zoom and take your snaps from afar or just be discreet, but there is a proper way for taking photos in Africa. You ask permission first, and they say yes, go ahead and take it, and if they say no, you say thank you and move on. Many people will in fact be fine with you taking their photo and will ask to see it afterwards. Don’t be alarmed if they ask for a tip, it is quite normal and will keep the peace for you to give them a coin or a small bill (a few cents to a dollar and no more).

    It will keep the peace and they will appreciate your respect.

    Street seller, Zanzibar

    11. Take hand sanitizer!

    If you’re planning a few trips off the beaten track you’re bound to be touching all sorts of dirty things and have local children jumping all over you. Keeping a bottle of this handy is a lifesaver.

    Hard to find in some places, so take your own from home.

    12. Carry A Packet Of Baby Wipes

    Especially if going on safari, camping, hiking, or any outdoors activity. Trust me, they’ll come in handy!

    Kenyan food!

    13. Don’t connect to Wifi without protection!

    Most places in Africa have wifi now but security isn’t up to the level that we’re used to.

    I’d highly recommend (no, I insist) that you get a VPN before you start connecting to wifi networks in hotels/cafes/restaurants etc. This will encrypt all your connections and ensure your activity is secure, which is particularly important if you’ll be accessing bank details online, Paypal, credit cards, or any other sensitive information.

    The amount of celebrities and just regular people that continue to get their passwords scraped and online accounts broken into is proof enough. You need to secure your connection and the best way to do that is with a VPN.

    I use Private Internet Access and have been for many years, and recommend them highly.

    If you’re new to this stuff I’ve got an article about internet security while travelling here!

    Bayimba Festival, Kampala

    14. Be smart with hustlers

    While walking around the streets you’ll get some unwanted attention. Guys will try to sell you arts and crafts or lure you to souvenir stores in an effort to earn a commission. If you’re in bars and clubs late at night, you’ll get propositioned by working ladies.

    That’s fine if you’re interested, but chances are you’re not. If any case these people are harmless and are just an annoyance more than anything else, so the trick is to just be cool and relaxed rather than hostile.

    When they ask if it’s your first time visiting just say “No, I come every year, my brother lives here” or something like that. Once they realise you’re not a clueless tourist they’ll most likely chit chat with you for 10 more seconds before moving on to a more promising target.

    I remember getting off the bus in Tanzania one year and before my feet have even touched the ground some dude had his hand on my shoulder screaming “Taxi my friend? My friend? Taxi!?”

    I ignored him and he goes on, “Your first time in Africa, my friend?”

    I shook my head. “My family lives here.”

    “Oh! You have African wife?”

    I started laughing and turned to him and noded seriously. “Ndiyo, kaka” (yes, my brother).

    He smiled with that knowing look in his eyes, and then disappeared so fast that even I was surprised. I turned my head to nod him off and he’s already back at the bus door, hassling someone else. This is a really common occurrence and it’s a drag at first but don’t let it ruin your trip. It’s harmless and just requires a little travel savvy. Always be polite, never say it’s your first time in the country, and if in doubt, just don’t say anything! Just smile and be on your way.

    15. If you find a good taxi driver, hold onto him!

    Once you land in the country, get the phone number of a reliable taxi driver. If your hotel sends a driver to the airport and you get to your hotel alive, get his number. Otherwise ask the hotel staff for a reliable taxi. Keep his number in your cellphone or even better, memorise it. You can call him whenever you’re in a fix, especially if you’re stuck somewhere after dark, making sure you’ll never be stuck without a ride home in the night.

    Also, in many of the major cities they now have Uber, so make sure you download it! It’s cheap and has been extremely useful for me, especially as you can avoid the whole haggling part of getting a taxi. But especially in Africa, a taxi driver you know personally is always the first choice.

    Fish market, Zanzibar

    16. Pack a first aid kit

    A standard first aid kit can come in handy in a place where ambulances are scarce and hospital helicopters don’t exist.

    That means bandages, antiseptics, prescription antibiotics, a pocketknife, sterile needles (some hospitals don’t have these), DEET, anti diarrheals and painkillers.

    Most of these things you can find in major African cities, but it’s for peace of mind more than anything. Also they’re hard to find in some rural areas.

    17. Use your common sense and stay safe!

    Despite what people think Africa is not a wild, lawless place. Of course there’s crime, but common sense will be sufficient to keep you safe. Don’t go out alone at night – take a local male with you. When you arrive in the country, ask someone you can trust such as a tour guide or hotel staff about the danger spots in the city. If you always have an escort at night and don’t go wandering, you’ll be in no more danger than you would be in your home country.

    I’ve been to every continent and Africa is by far my favourite! Go, explore, discover, enjoy.

    Happy travels!


    Looking for tours and activities at an affordable price? I use GetYourGuide! Always great deals and local perks.

    For travel insurance, I always use World Nomads – get protected for just a few dollars a day!

    Somewhere to stay? Booking.com gives you the biggest selection and the best rates.

    Looking for more Africa Travel Tips? Check out my posts on places like Nairobi, Abidjan, Cape Town and Tanzania! Also I have many city guides on major African cities here!

  • City Blueprint: Kota Kinabalu, Malaysia

    City Blueprint: Kota Kinabalu, Malaysia

    Kota Kinabalu is a peaceful city located on the Malaysian island of Borneo. Although not a particularly small city, it’s night and day compared to some of the bustling metropolises of Asia, like Bangkok or Singapore.

    The streets are rarely crowded, even during meal times, and even the shopping malls can be ghost towns during the week. Spend more than a week here and you’ll probably have run out of things to do.

    However, Kota Kinabalu is a fantastic place for one thing….eating!

    Budget

    Bed: Hostel dorms start at around $8 USD. A 3-4 star hotel can be found for around $40 USD.

    Food: Eat comfortably for around $3 a meal.

    Drink: A bottle of water will cost around 50 cents. A beer in a bar will be costing you around $3.

    Transport: Taxi rides will be around 15-20 ringit ($5) for rides around town.

    I stayed at…

    Horizon Hotel – Luckily I went during low season and managed to get a great rate here. It’s usually around $100 a night. There’s a pool, an excellent gym, and it’s located around 5 minutes walk from the waterfront. Not to mention the room was like a penthouse! Jacuzzi, rain shower, enormous bed, remote control curtains…didn’t know what to do with myself. Excellent value.

    I also spent a couple of nights at Oceania Hotel – the hotel is brand new and is great value; the only problem is it’s a little far from the action, and getting around KK isn’t the easiest thing. Luckily the hotel has a shuttle that goes into the centre each morning, which can make your life a whole lot easier. Rooms start around $45 a night.

    In any case, try and stay somewhere near the waterfront. That’ll put you near the Centrepoint shopping complex as well as some nice bars and restaurants. Right beside the boardwalk is the seafood market – probably my favourite place in the city.

    Try to avoid staying in any of the hotels in the Borneo 1 shopping centre. It’s a nice complex, but there ain’t nothing to do around there! If you think you’ll want to head there to shop, there’s a free bus from the waterfront several times a day.

    One thing you should eat is…

    Seafood from the market – Alongside the waterfront opposite Le Meridien hotel is the seafood market. You’ll be able to find all sorts of seafood, and once you make your choice they’ll kill in front of you – can’t get any fresher than that! It’s cheap, too.

    Here’s dinner from the first night:

    Lobster
    Lobster fresh from the ocean
    Lobster fresh from the grill
    Sambal prawns
    Sambal prawns

    I would’ve had no trouble eating here for every meal. Very cheap and so much good stuff to try! Maybe not quite as delicious as foodie capital Penang, but it’s close!

    One thing you should drink is…

    I picked up this snazzy drink somewhere in the city. I have no idea where, I’m pretty sure it was in Centrepoint mall somewhere (helpful, I know). I guess you’ll have to go on a treasure hunt if you wana try it. It’s a 3 citrus soda. Super refreshing in the KK heat.

    3 citrus soda

    One place you should go to is…

    Tanjung Aru Beach – This place puzzled me a little bit. It’s a long stretch of beach backed by a whole lot of food stalls and few bars. I went around 2pm on a weekday. The beach isn’t mindblowing but it’s definitely nice. The weird thing was, there was not a single person on it. I couldn’t figure out why. I was too scared to walk onto the sand for the first 20 minutes or so because I thought it might be sacred or something; turns out it was just that nobody was there. I had the whole place to myself!

    Not a single person on it...
    Not a single person on it…
    My own private beach!
    My own private beach!

    Also consider heading out to the islands for the day (last ferry leaves at 2!) or making the trip out to see Mt Kinabalu – two things I didn’t get around to doing.

    One place you should party at is…

    Well, in honesty, I can’t tell you where because I never made it out. I did head to the Couchsurfing meet on Friday night where I met some cool people. However the consensus amongst the guys there was that nightlife in KK is rather lacklustre.

    Anyway, that doesn’t matter, because the best place to enjoy a beer would be along the boardwalk at the KK waterfront. Get there early, order a few cold ones and sit back and enjoy what might be the most amazing sunset you have ever seen.

    kk sunset

    The truth is the photo doesn’t even do it justice. What’s more, the sunset looks like this every single day of the week. A little slice of heaven to end your day.

    Bren’s Scorecard…

    Ease of entry 7/10
    You can fly direct to here from quite a few places in Asia for extremely cheap. Malaysia airports are awesome too, you don’t need to fill out those stupid entry forms.

    Food 8/10
    So much to try and so cheap!

    Weather 4/10
    Some days are excruciatingly hot, but there’s some pleasant days too.

    Safety 9/10
    Can’t imagine too much riff raff going on around here. If I stayed here longer I’m sure I’d be confident to give it a 10.

    Transport 5/10
    Taxis aren’t too expensive, around 15 ringit for a drive within the town. The problem is they don’t have meters (or at least don’t use them). Hard to know if you’re paying a fair price.

    Friendliness 8/10
    All smiles around here. Taxi driver was so taken aback when I offered him a tip, I like that.

    Cleanliness 8/10
    Probably a little cleaner than your typical city in the region.

    Daylife 4/10
    There’s a few things to do, but I think after you’ve spent a week there you’ll have nothing to do except eat.

    Nightlife 3/10
    There are some places, but the expat crowd couldn’t really recommend anywhere in particular. Waterfront is good for a relaxing beer.

    Affordability 7/10
    It’s cheap, but not super cheap (at least not by Asian standards).

    Kota Kinabalu scores: 63/100

    I do my best to give an objective score based on my own experience of the city. If you disagree, I don’t care! Just kidding, I do 🙂 Did your experience differ to mine? Let me know in the comments below!

  • Gorilla Trekking In Uganda: A Bushwalk You’ll Never Forget

    Gorilla Trekking In Uganda: A Bushwalk You’ll Never Forget

    Someone’s just told you all about gorilla trekking, right? That’s why you’re here? I’m glad, because I recently did it, and I’m about to tell you all about it (yes, it was amazing).

    There are few places in the world where you can truly walk amongst animals in their natural habitat. Most of the time you’re staring through a cage or out a safari truck window.

    However, in the heart of East Africa you’ll find the last natural habitats of the majestic mountain gorilla, and for a price, you can walk amongst them.

    Gorilla trekking is possible in 3 places – Rwanda, Democratic Republic of Congo or Uganda.

    Congo’s reputation is that it’s a little unstable and visa issues are common. However, the Congo is slowly emerging as a tourism destination with more adventurous travellers – my friend Lauren at Never Ending Footsteps went recently and loved it.

    Of course Rwanda and Uganda are still far more tourist friendly, and naturally these two countries are the most popular.

    In the end, we chose Uganda. I also had the pleasure of sharing this adventure with my parents, who were setting foot on Africa’s sacred sands for the first time. We hadn’t travelled together in more than ten years.

    Below is a recap of the whole experience. If you’re planning on taking on this adventure, this is a full breakdown of everything you can expect.

    Gorilla Trekking Uganda, Day 1:

    Day 1 of the tour and we’re up before the sun. The guesthouse staff are also awake and invite us to indulge in a well-rounded breakfast of fruit, yoghurt, cereal and eggs. A welcome surprise. Our guide arrives a little late, maybe 7 am, but without too much fuss we’re on our way. I strategically dress in the closest thing to pyjamas that I have, ready for 8 hour drive ahead.

    Where are we going? Uganda’s mountain gorillas are located in the Bwindi Impenetrable National Park, a deep, dense forest out in Bwindi province, a long drive from the capital city of Kampala.

    With lack of anything better thing to do, I take a nap and 2-3 hours later we arrive at our first mandatory stop – the equator. A straight line runs across the road, and while standing upon it you supposedly have one foot in the northern hemisphere and my other in the south.

    We oblige and snap our pics, which feels like more of a gimmicky photo opportunity than anything else. Still, something to show the grandchildren someday.

    Gorilla trekking uganda
    The equator

    Another hour in and Mum and Dad start to question why the car panels were shaking so hard. In Africa I just grind my teeth through such things, and assumed all the shaking was just a bumpy road and few loose screws.

    As it turns out, our wheels are unbalanced and needed to be un-unbalanced, which apparently is really important (who knew). As a result, we charge the next couple of hours to finding a chop shop and getting this thing sorted.

    Dad is bit of a metalhead and starts poking around, fascinated by the old school equipment they’re pumping. Mum’s throwing a tantrum at our shitty “custom built top of the line 4 wheel drive”. For me, this car stuff flies over my head so I go wandering around this tiny Ugandan town. It’s called Masaka. People stare at me like I’m Jackie Chan, with all the young guys fist bumping me and doing karate chops. In a few minutes I manage to find a Vodacom store and purchase a simcard, while the girl at the counter looks at me like I’m an alien. I introduce myself and she relaxes, finally realising I’m human.

    Gorilla trekking uganda
    A couple of workies figure out how to pull the wheels off
    Gorilla trekking uganda
    Changing tyres

    Two hours later we’re back on the road. To me the car is still shaking just as much as before, but Mum and Dad seem satisfied. Must be the extra years of experience.

    The drive is smooth sailing until we reach the mountain roads. They wind around in circles and the thick, brown dust is intense. Nonetheless, some of the views from these heights are spectacular.

    Finally we arrive at a gate. A security guard opens up and we drive slowly through a village road, lined with rundown wooden houses and local villagers sitting out in the moonlight. We all look through the windscreen anxiously, wondering where we’ll be sleeping after a long day on the road.

    When we finally show up, I’m actually blown away by the place. My room is half tent half house, complete with towels, linen, flush toilet and hot water shower. Being out here in mother nature’s territory I thought I’d be working a sleeping bag in a mud hut.

    High five, Uganda.

    Gorilla trekking uganda
    The view from our ‘tents’
    Gorilla trekking uganda

    Gorilla Trekking Uganda, Day 2:

    The next day is gorilla trekking day.

    It’s a 6am wakeup call and a short 10 minute drive to the check in spot. When we arrive, we’re briefed warmly and efficiently by a couple of gun toting rangers. The lowdown: prepare for lots of walking, don’t let gorillas get closer than 7 metres, cover your mouth when you cough and sneeze and take lots of water. That’s it for the motivational speech and within moments we’re back in the van and off to the Bwindi Impenetrable Forest.

    Once we hit the bush I repeatedly thank fate that I paid the extra $10 for a walking stick and got me some decent Timberlands. It is no regular bushwalk like we have back in New Zealand; it is virgin forest with no signs, no paths, lots of thorns, rocks, bugs and slippery stuff; not what I was expecting at all.

    Up the front, our guide wields his machete with a vengeance, relentlessly slashing away every stick and branch as if the trees are trying to kill him. Maybe they were.

    Gorilla trekking uganda
    The bush is thick and uninviting

    Two hours pass and we’re well into the thick of the forest. Then, I hear a bunch of radio chatter and the guide stops us in our tracks.

    “We’re here.”

    I can feel the group’s adrenaline spike as if we had entered Jurassic Park. I look around and see nothing. The bushes a few foosteps away from me rustle softly, and the guide parts the branches with his machete and peeks through. I assume it’s just another ranger chilling with a cigarette, but as the guide waves us over I glance around the bushes and realise how wrong I am. It’s a freakin’ gorilla, sitting no more than a car’s length away. Naturally you would take a photo, but I don’t. I’m frozen and mesmerised. I watch him sitting there, fiddling with the branches like a knitting Grandma on a Sunday afternoon. For some reason I feel the need to whisper, as if he’s going to turn around and wrangle me if he figures out I’m here. I stand there staring at him, and unlike most animals, he doesn’t even flinch. It’s incredible.

    Gorilla trekking uganda

    Then, they start to move. The guide takes us in a different direction to flank them, trying to keep up. They appear slow and lethargic but they can move surprisingly quick. Then suddenly, he raises his hand and stops us as we come to a clearing.

    “They’re coming.”

    A few seconds later a couple of kid gorillas tumble through the bushes in front of me, literally centimetres from my feet. I nearly pee my pants.

    We spend the next hour following them through the forest. It’s a little hard to keep up, as their enormous bodies just tumble through the brush while us inferior humans need to poke our way through with our little machete. Luckily they stop every now and then, chilling in the sunshine and eating trees. It’s the perfect chance to snap a couple photos.

    Gorilla trekking uganda

    A few moments later we finally see the Silverback. The guy is a monster, it’s like seeing Kong Kong in real life. A good 4 or 5 of them are together now and we try to follow them while they move as a family.

    While I try to concentrate on not falling into all the thorns surrounding us, I hear a massive roar and look around in a panic, startled. I catch a glimpse of King Kong facing us, around 20 metres away, arms in the air and bellowing into the sky. He towers above the other gorillas and slams his fists violently against his chest, roaring ferociously. I freak and without a second thought I drop my camera and flee, ready to run for my life until I notice the guard still standing beside me lax as ever. He laughs.

    “They’re just playing.”

    I knew that!

    Gorilla trekking uganda
    The enormous silverback meditates

    It’s not long before our scheduled hour is up. We follow them up a small slope for a couple more minutes, desperately trying to snap a few more photos. I try to get the perfect shot that has eluded me, but sadly it doesn’t happen.

    Gorilla trekking uganda

    It’s a good 45 minutes back up to the main road. The Bwindi Forest is like a massive crater, so the hike back is uphill and infinitely harder. It doesn’t matter – we’re all still buzzing from the magic experience. I could’ve stayed down there all day with them, but it makes sense to get out and leave them be. After all, it’s their home, not ours.

    A few more near vertical climbs and we’re finally out on the main road. We stand around and catch our breath, maybe still in awe of how damn cool it all was.

    Gorilla trekking uganda

    Even today, I’m still amazed at how crazy it was to be so close to them. What the photos don’t really show is how beastly they really are. They have biceps the size of soccer balls and a D cup breast of pure muscle. Say the wrong thing to one of them and he can pick you apart like a chicken wing.

    It’s also incredible how they’re at complete ease with a bunch of strangers with rifles poking around their habitat. Fearless creatures, but peaceful too. To walk alongside them is an out of body experience so surreal that you may not even believe is happening while you’re doing it. I can’t recommend it enough. It’s one long drive and a few thousand dollars you’ll never forget.

    How to book a Uganda Gorilla Trek?

    The easiest way to do it is via an arranged tour. If you are inexperienced traveller, and especially if it is your first time in Africa, I would recommend using an established provider. My suggestion is G Adventures. They are reasonably priced and have a great reputation.

    If you are more experienced on the road and are happy to get to Kampala yourself, you can travel there first and shop around the local tour market. It will probably cost you ~$1,200 including accommodation and transport. I wouldn’t say Kampala is a dangerous or difficult city to visit independently, but it will definitely be overwhelming if it’s your first time in Africa or first time travelling alone.

    There is also the option to do it without a tour company – you will need to get to Bwindi yourself, buy the gorilla permit from the Tourism office and find a local guide once you get there (you can’t go into the forest unaccompanied). I would only recommend this for very experienced travellers.

    The gorilla trekking permit in Uganda is $700 as of July 2020.

    Permits are strictly limited, so I suggest arranging your trip at least 3-6 months in advance.

    What about Rwanda?

    The Rwanda permit costs all travellers $1,500 per person as of July 2020. Here are other things to consider:

    • In Rwanda the gorilla zone is only a couple hours from the Kigali airport. In Uganda it’s around 10 hours. So in Uganda, you’ll have an extra 6 hours on the road each way.
    • Half the world’s mountain gorilla population lives in the Bwindi Impenetrable National Park in Uganda, significantly higher numbers than Rwanda. Our guide told us there are instances of people trekking for 10-12 hours and not managing to find or catch up to the gorillas. They are roaming creatures and can be anywhere in the forest at any time. However, he conceded that the trackers are experienced and this occurring is rare.
    • The bush is also different in both places. Rwanda has a bamboo heavy forest, which makes it less bushy and easier to see the gorillas and snap your photos. Uganda on the other hand is very thick, dense green forest in parts, and some parts are not very photo friendly.

    Whichever you choose, I can guarantee you it will be unforgettable!

    You can get more information about buying the gorilla trekking permits in both Uganda and Rwanda here.

    Some clips from the trek:


    What do you need to pack when Gorilla Trekking?

    Travel Insurance!

    The number one thing you should have! Medical care and emergency services are not of a high standard in rural Uganda, and quality care is limited in the capital. Do not travel without travel insurance. For a travel insurance provider that covers Africa at an affordable cost, I use World Nomads. You can read more about finding good travel insurance in my Traveller’s Guide To Buying Travel Insurance.

    A Good Camera

    There are so many good photo opportunities. If your smartphone has a solid camera that’s great, but if not make sure you have something to take quality snaps with.

    Hiking Boots

    Comfort is key, and also know you’ll be walking through a lot of unfriendly terrain down in the Bwindi Impenetrable Forest (it wasn’t named that for nothing). Make sure they’re well worn in by the time your Gorilla Trek happens (or buy a second hand pair).

    A Good Daypack

    Make sure you have a smaller daypack that you’ll be comfortable hiking with for several hours. Many backpackers only travel with their main backpack, which leaves them in a fix during activities like this.

    Water bottle!

    Tap water is not potable in Uganda. I would recommend travelling with a filter bottle, and also drinking bottled water wherever possible. For Africa, the bottle I would recommend is a GRAYL filter bottle. This both filters and kills contaminants with UV treatment – very cool and very effective. I would also recommend reading my Guide To Never Getting Traveller’s Diarrhea – mandatory reading for anyone visiting Africa!